
Converting Card Fronts to Super Functional & Adorable Notebooks
It’s clever, practical, and a little bit genius.
Let’s open a bit of a creative Pandora’s box today, shall we?
You know those gorgeous handmade cards we pour our hearts, glitter, and possibly a small forest’s worth of paper into? Well, what if we gave them a second life—one that lasts beyond the mantel display? That’s right, we’re turning card fronts into mini notebooks! It’s a crafty twist that feels like a small rebellion against the “send it, admire it, recycle it” cycle. (And let’s be honest, the postal issues aren’t exactly helping our cause.)

This keychain dangle still requires a snowflake charm!
No, I haven’t been drinking (in case that is your first thought right now) … I’ve simply decided that my handmade card fronts deserve a longer, more practical life! Think about it: we pour so much love, paper, and detail into each card, only for it to sit proudly on display for a few days—before inevitably finding its way to the recycling bin. Turning those same beautiful designs into notebooks feels like a tiny crafting revolution! It’s still handmade, still heart-filled, but now functional enough to stick around far longer than the mail service delays.
Why the Change Makes Sense
Cards will always hold a special place in our hearts, but the world’s gotten a little trickier for card makers. Between postal strikes, rising postage costs, and fewer people actually mailing cards, it’s easy to feel the pinch—both creatively and financially. But transforming those lovely card fronts into notebooks gives them a life that’s both useful and sentimental. A notebook isn’t just admired—it’s used, carried, and filled with thoughts, doodles, or even shopping lists. And once full, it’s often kept, because it holds memories that last far beyond its pages.
From Idea to Adorable Reality
Now that we’ve justified this bit of crafty madness (and proven it’s completely sober genius), let’s get to the fun part—turning that beautiful card front into a fully functional notebook. You’ll be surprised at just how easy and satisfying this little transformation is. A few supplies, a touch of creativity, and before you know it, you’ll be looking at your card fronts in an entirely new light—each one a potential notepad, journal, or gift-worthy jotter just waiting to happen.
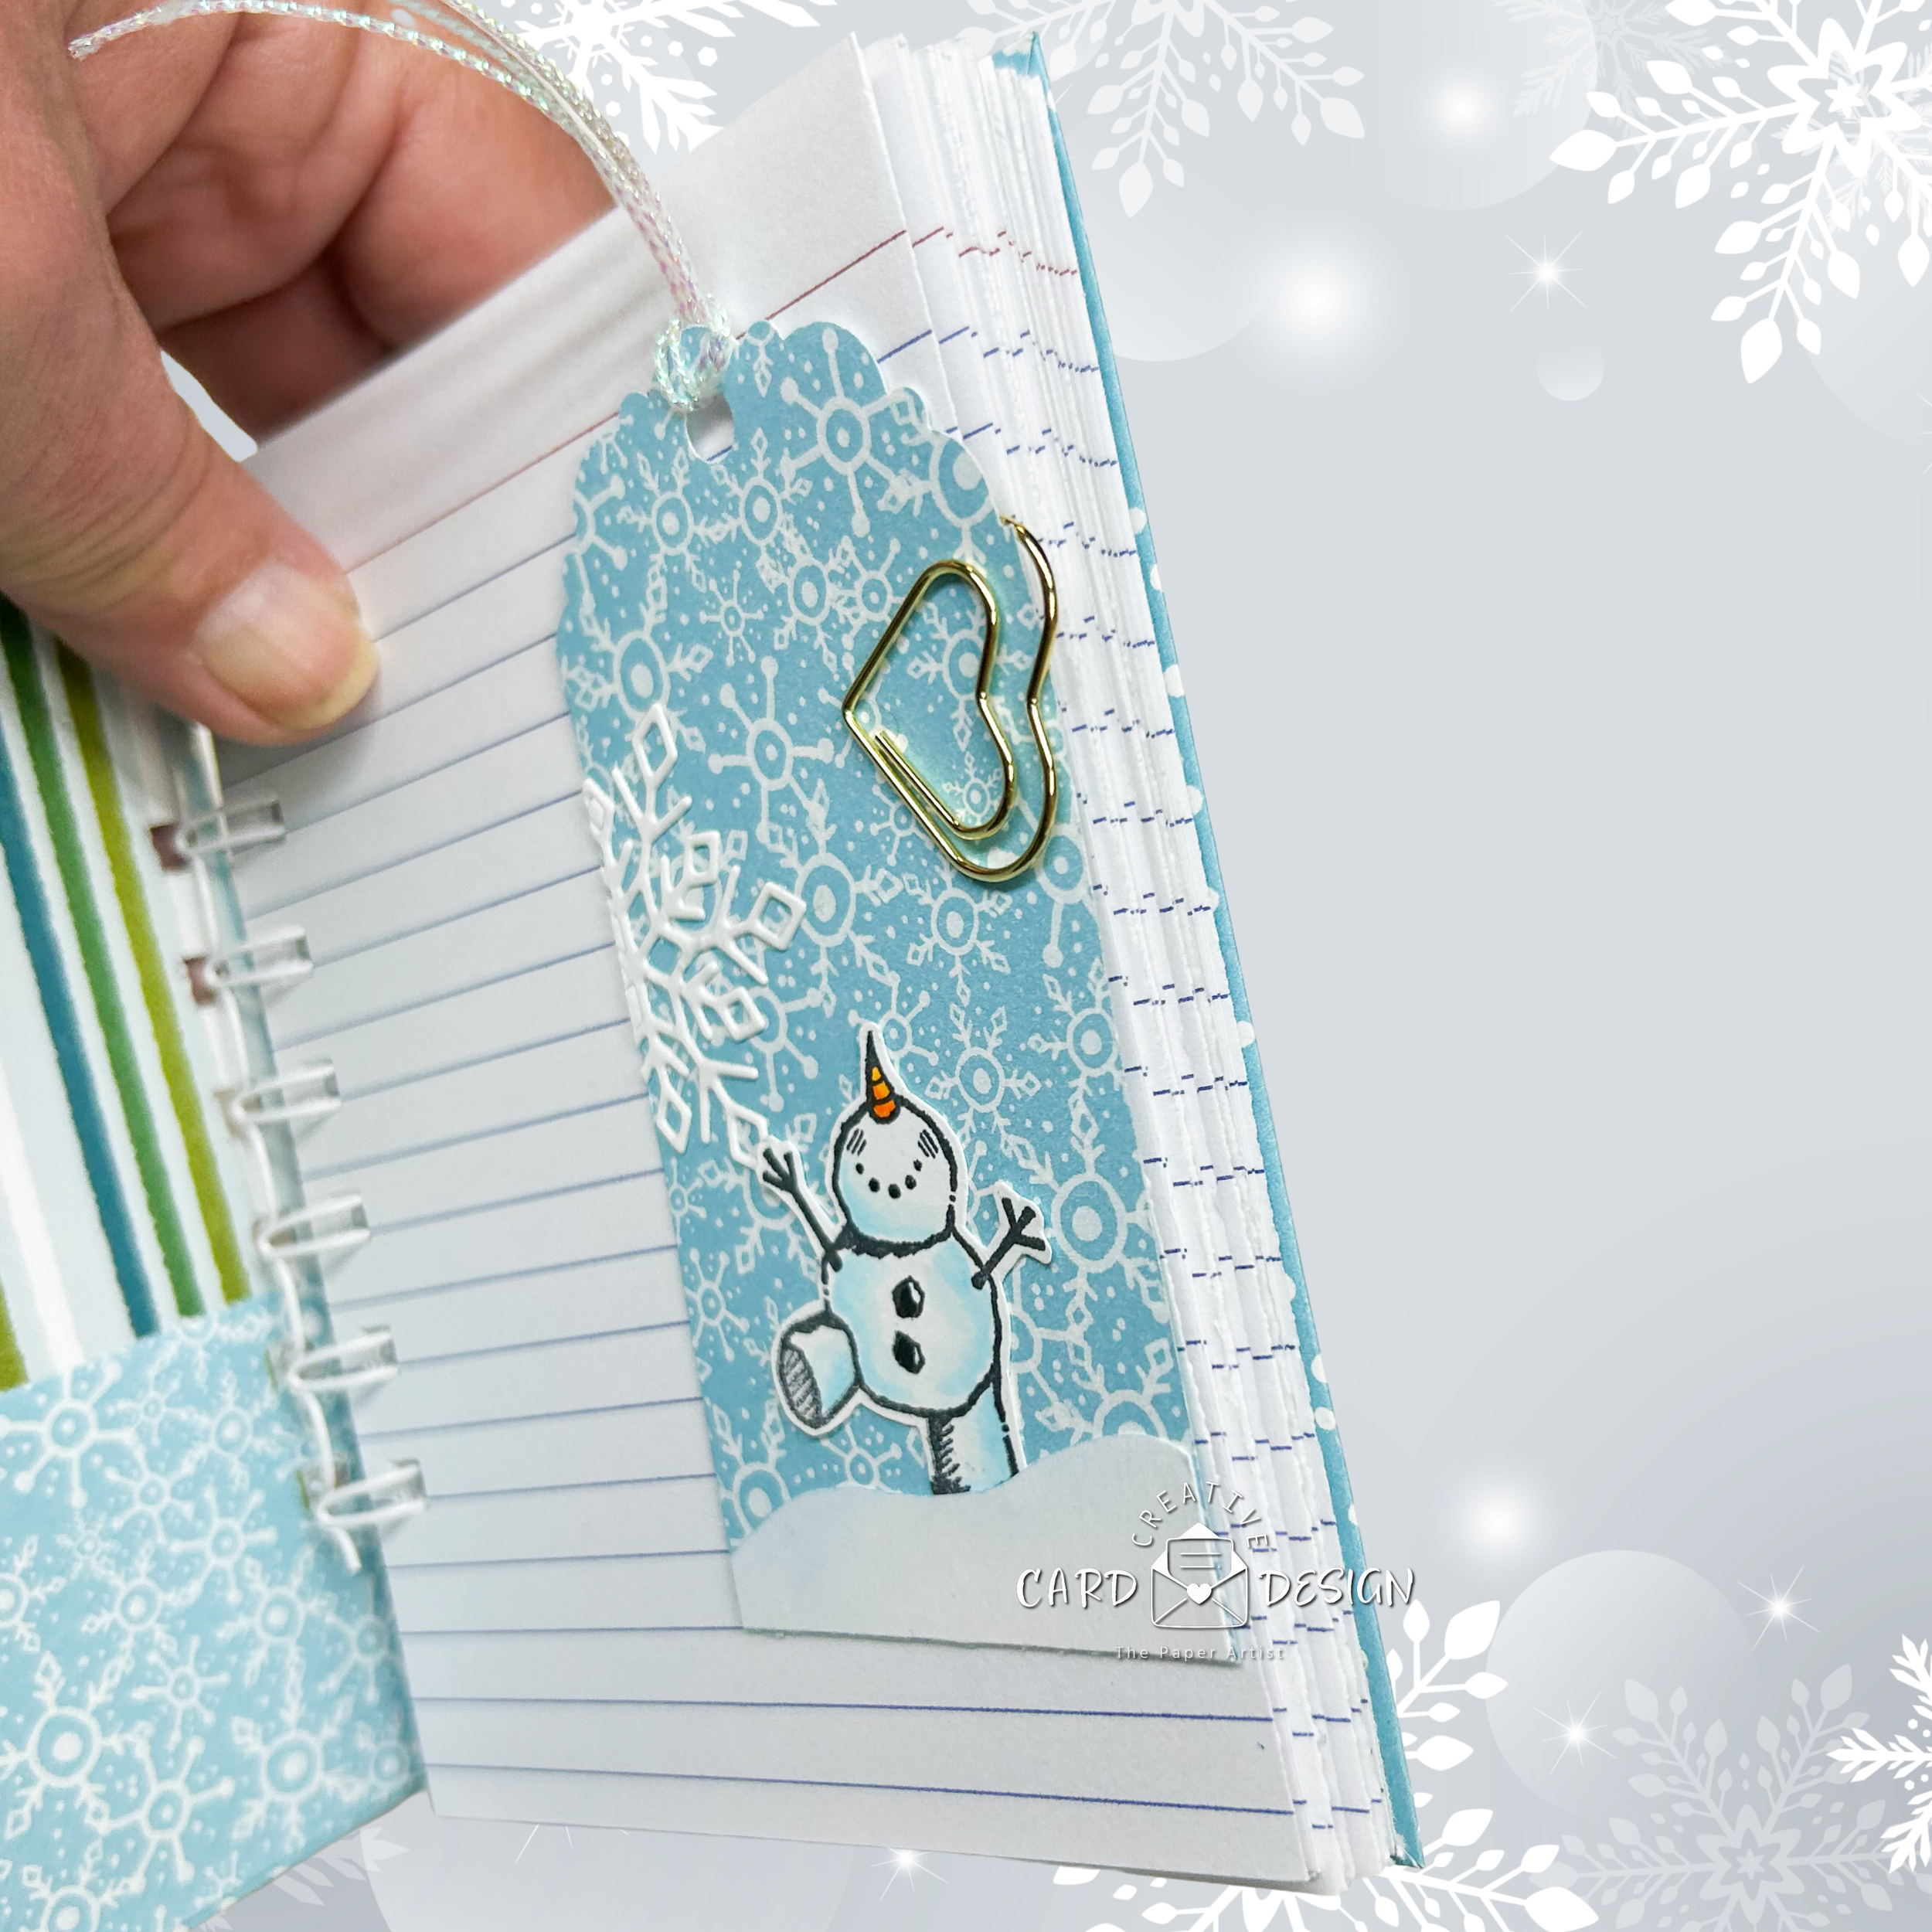
Notebook Measures 4 1/8 inch x 5 1/8 inch (not including the coil binding).
This notebook only uses a small section of a binding coil — 1 coil makes 3 notebooks and a mini! Ask me about the minis?
Crafting with Purpose
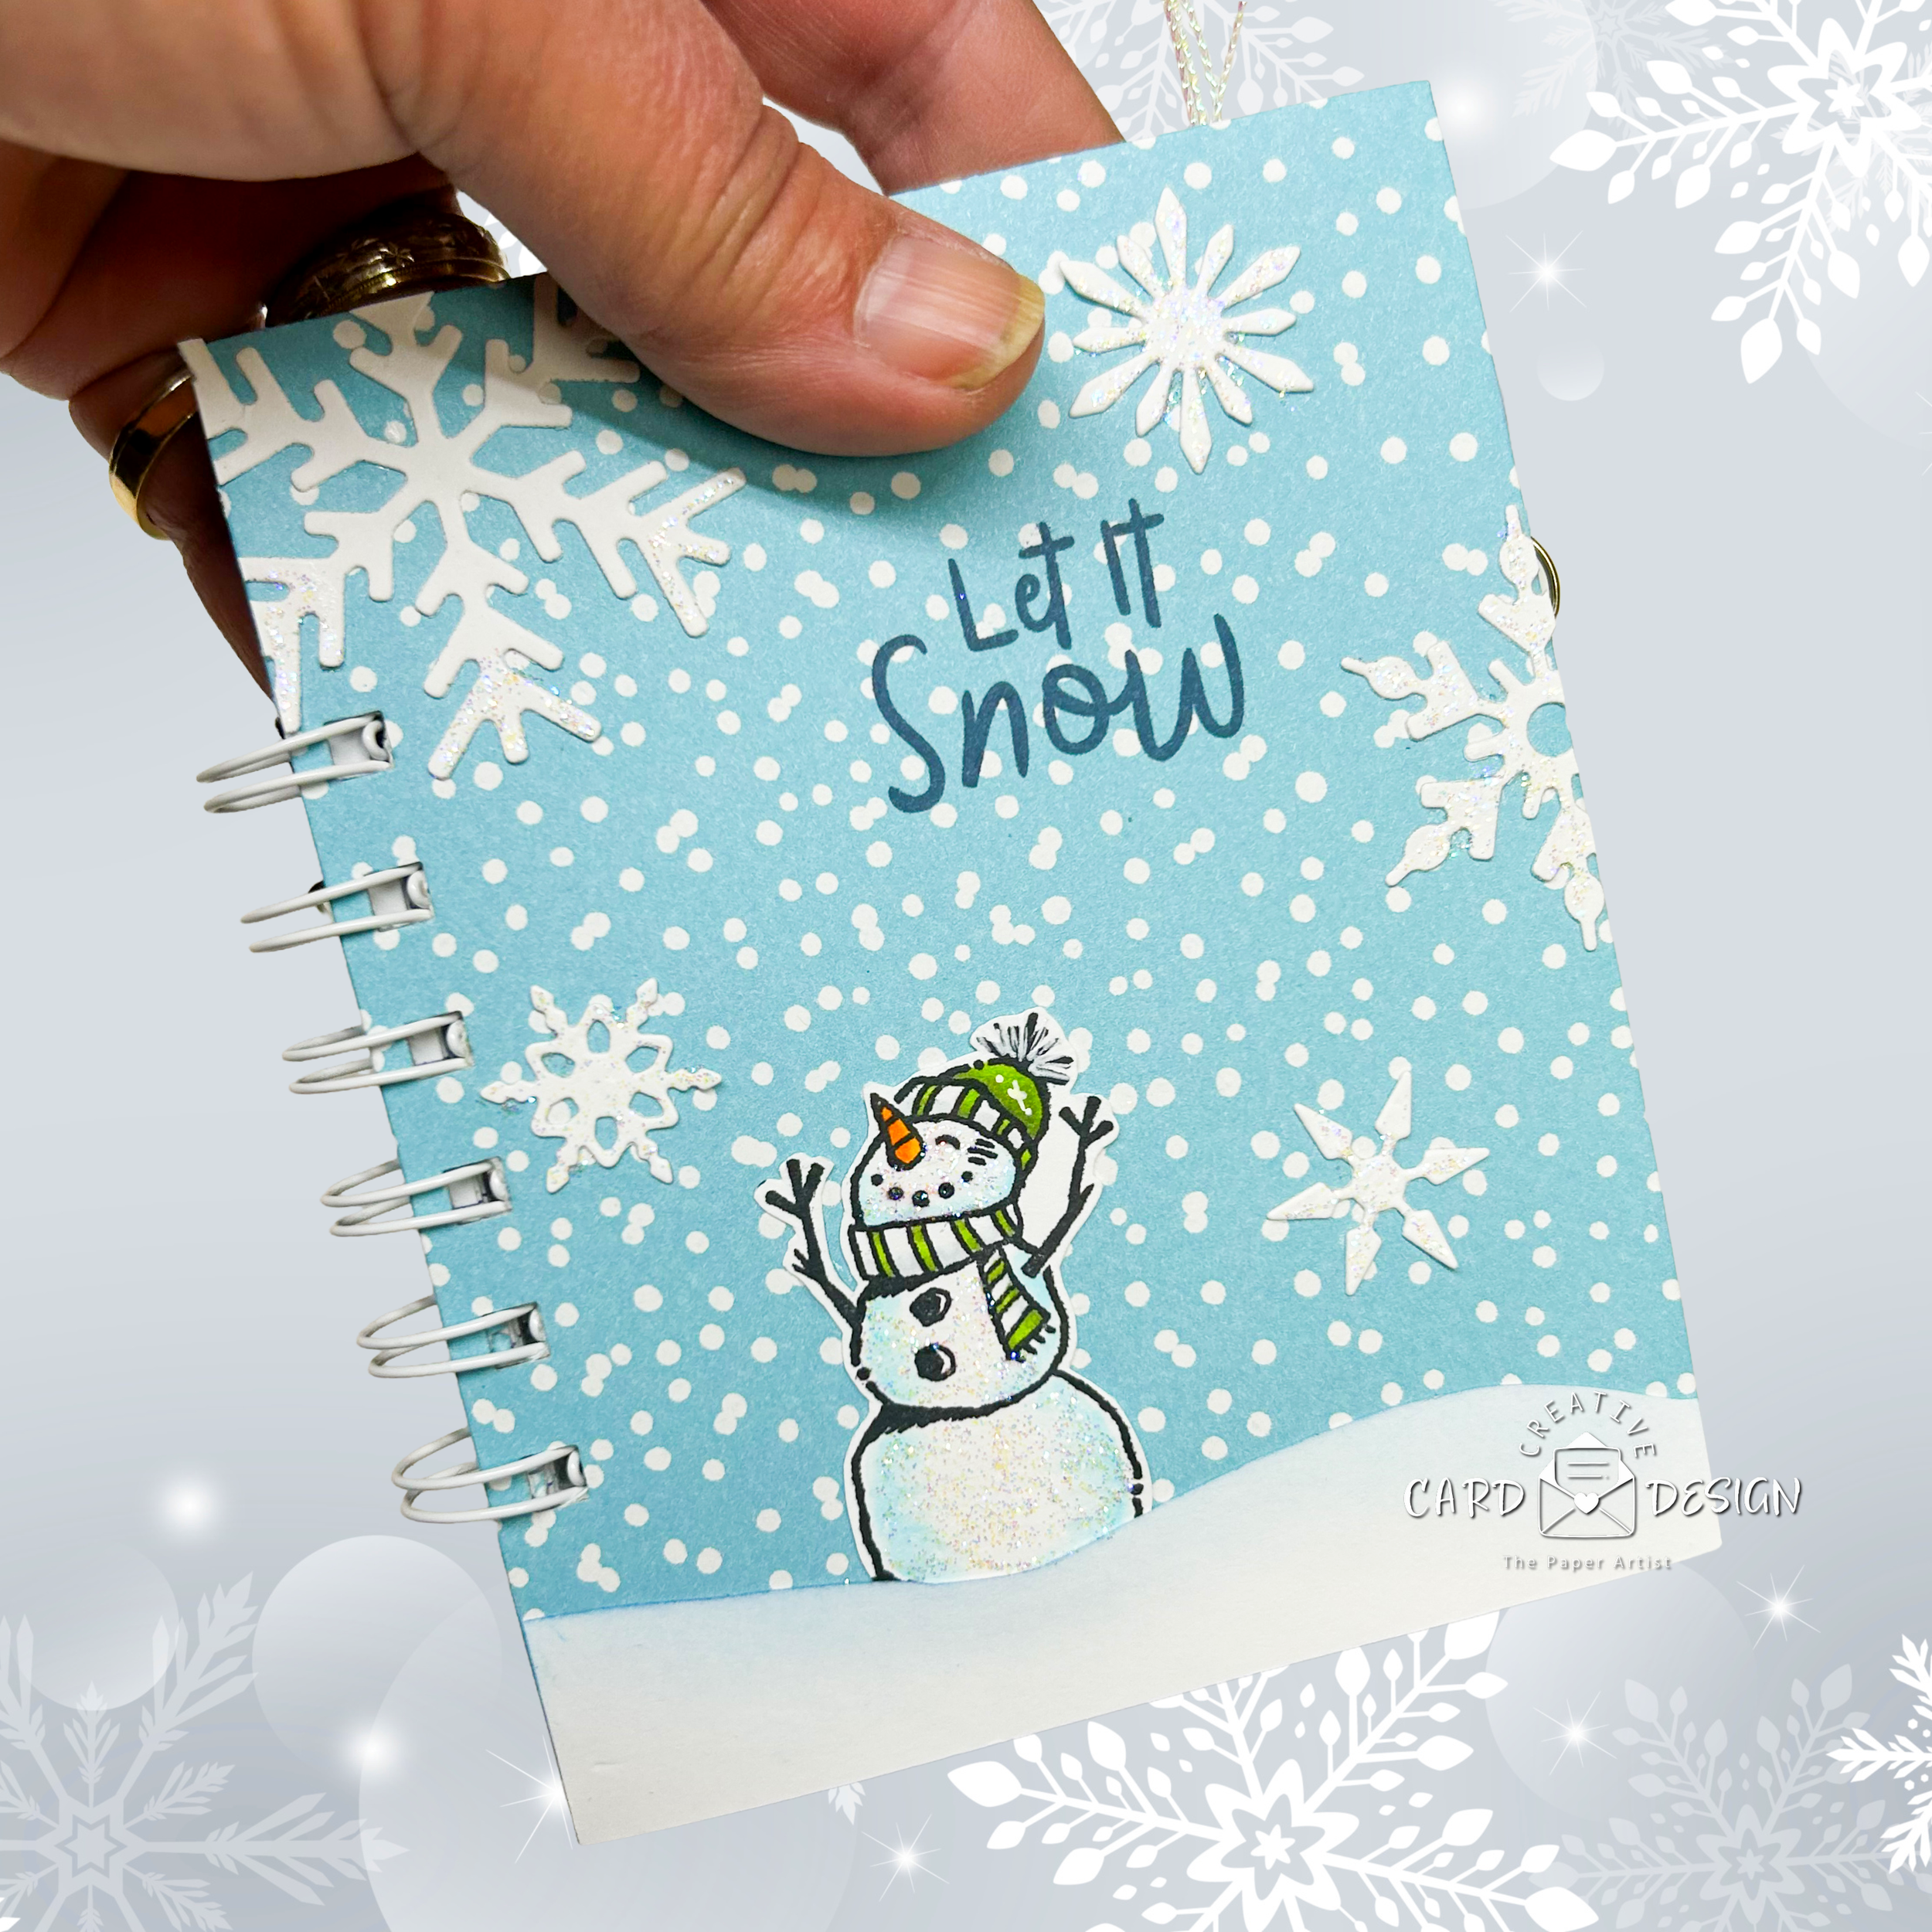
This wasn’t a rescue mission for a leftover card front—oh no, this design was made specifically with notebook potential in mind. The size, the layout, the embellishments… all created with the end goal of being a functional, adorable little notepad. The concept follows the same principles as cardmaking, just with a longer lifespan and a touch more practicality.
When you’re planning a project like this, think of your design as doing double duty: something that looks perfectly at home as a card front but transitions beautifully into a notebook cover. From there, it’s just a matter of adding your chosen pages (I’ll share what I used for mine), assembling it all together, and—if you’re feeling fancy—finishing with a handmade beaded keyring charm or other personal touch. These small details elevate your notebook from “cute idea” to “I-need-one-of-those” status.
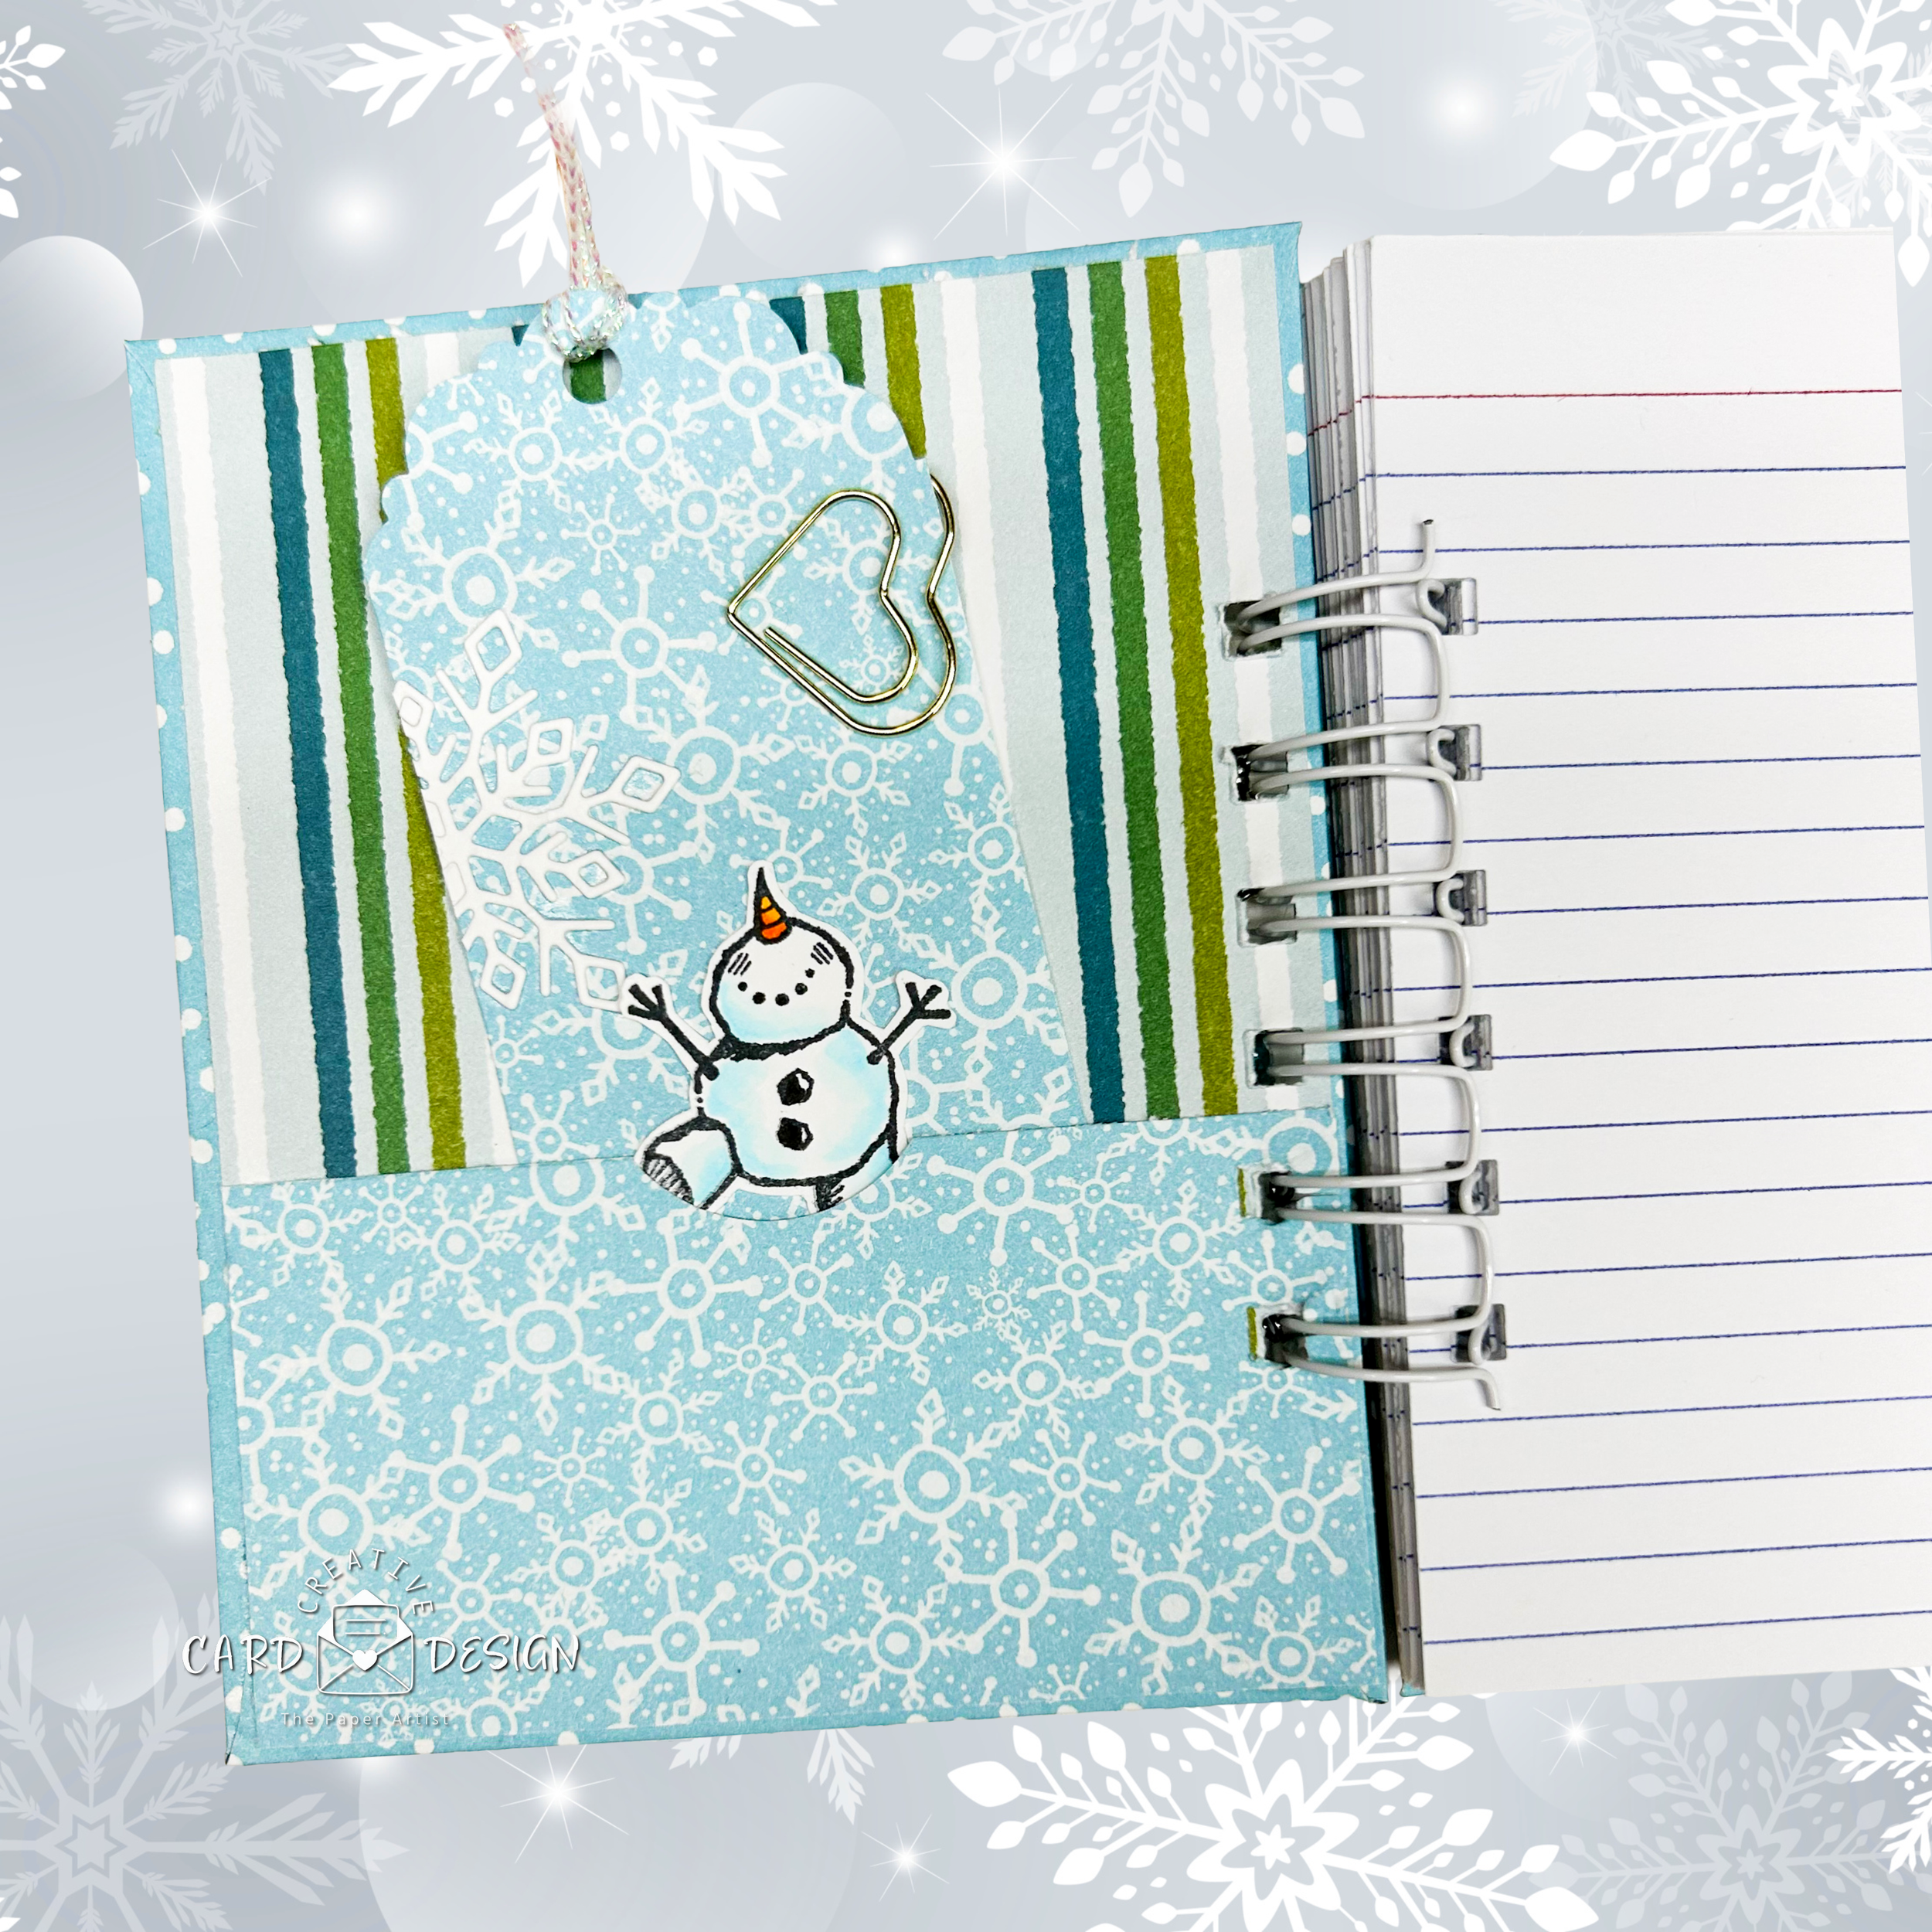
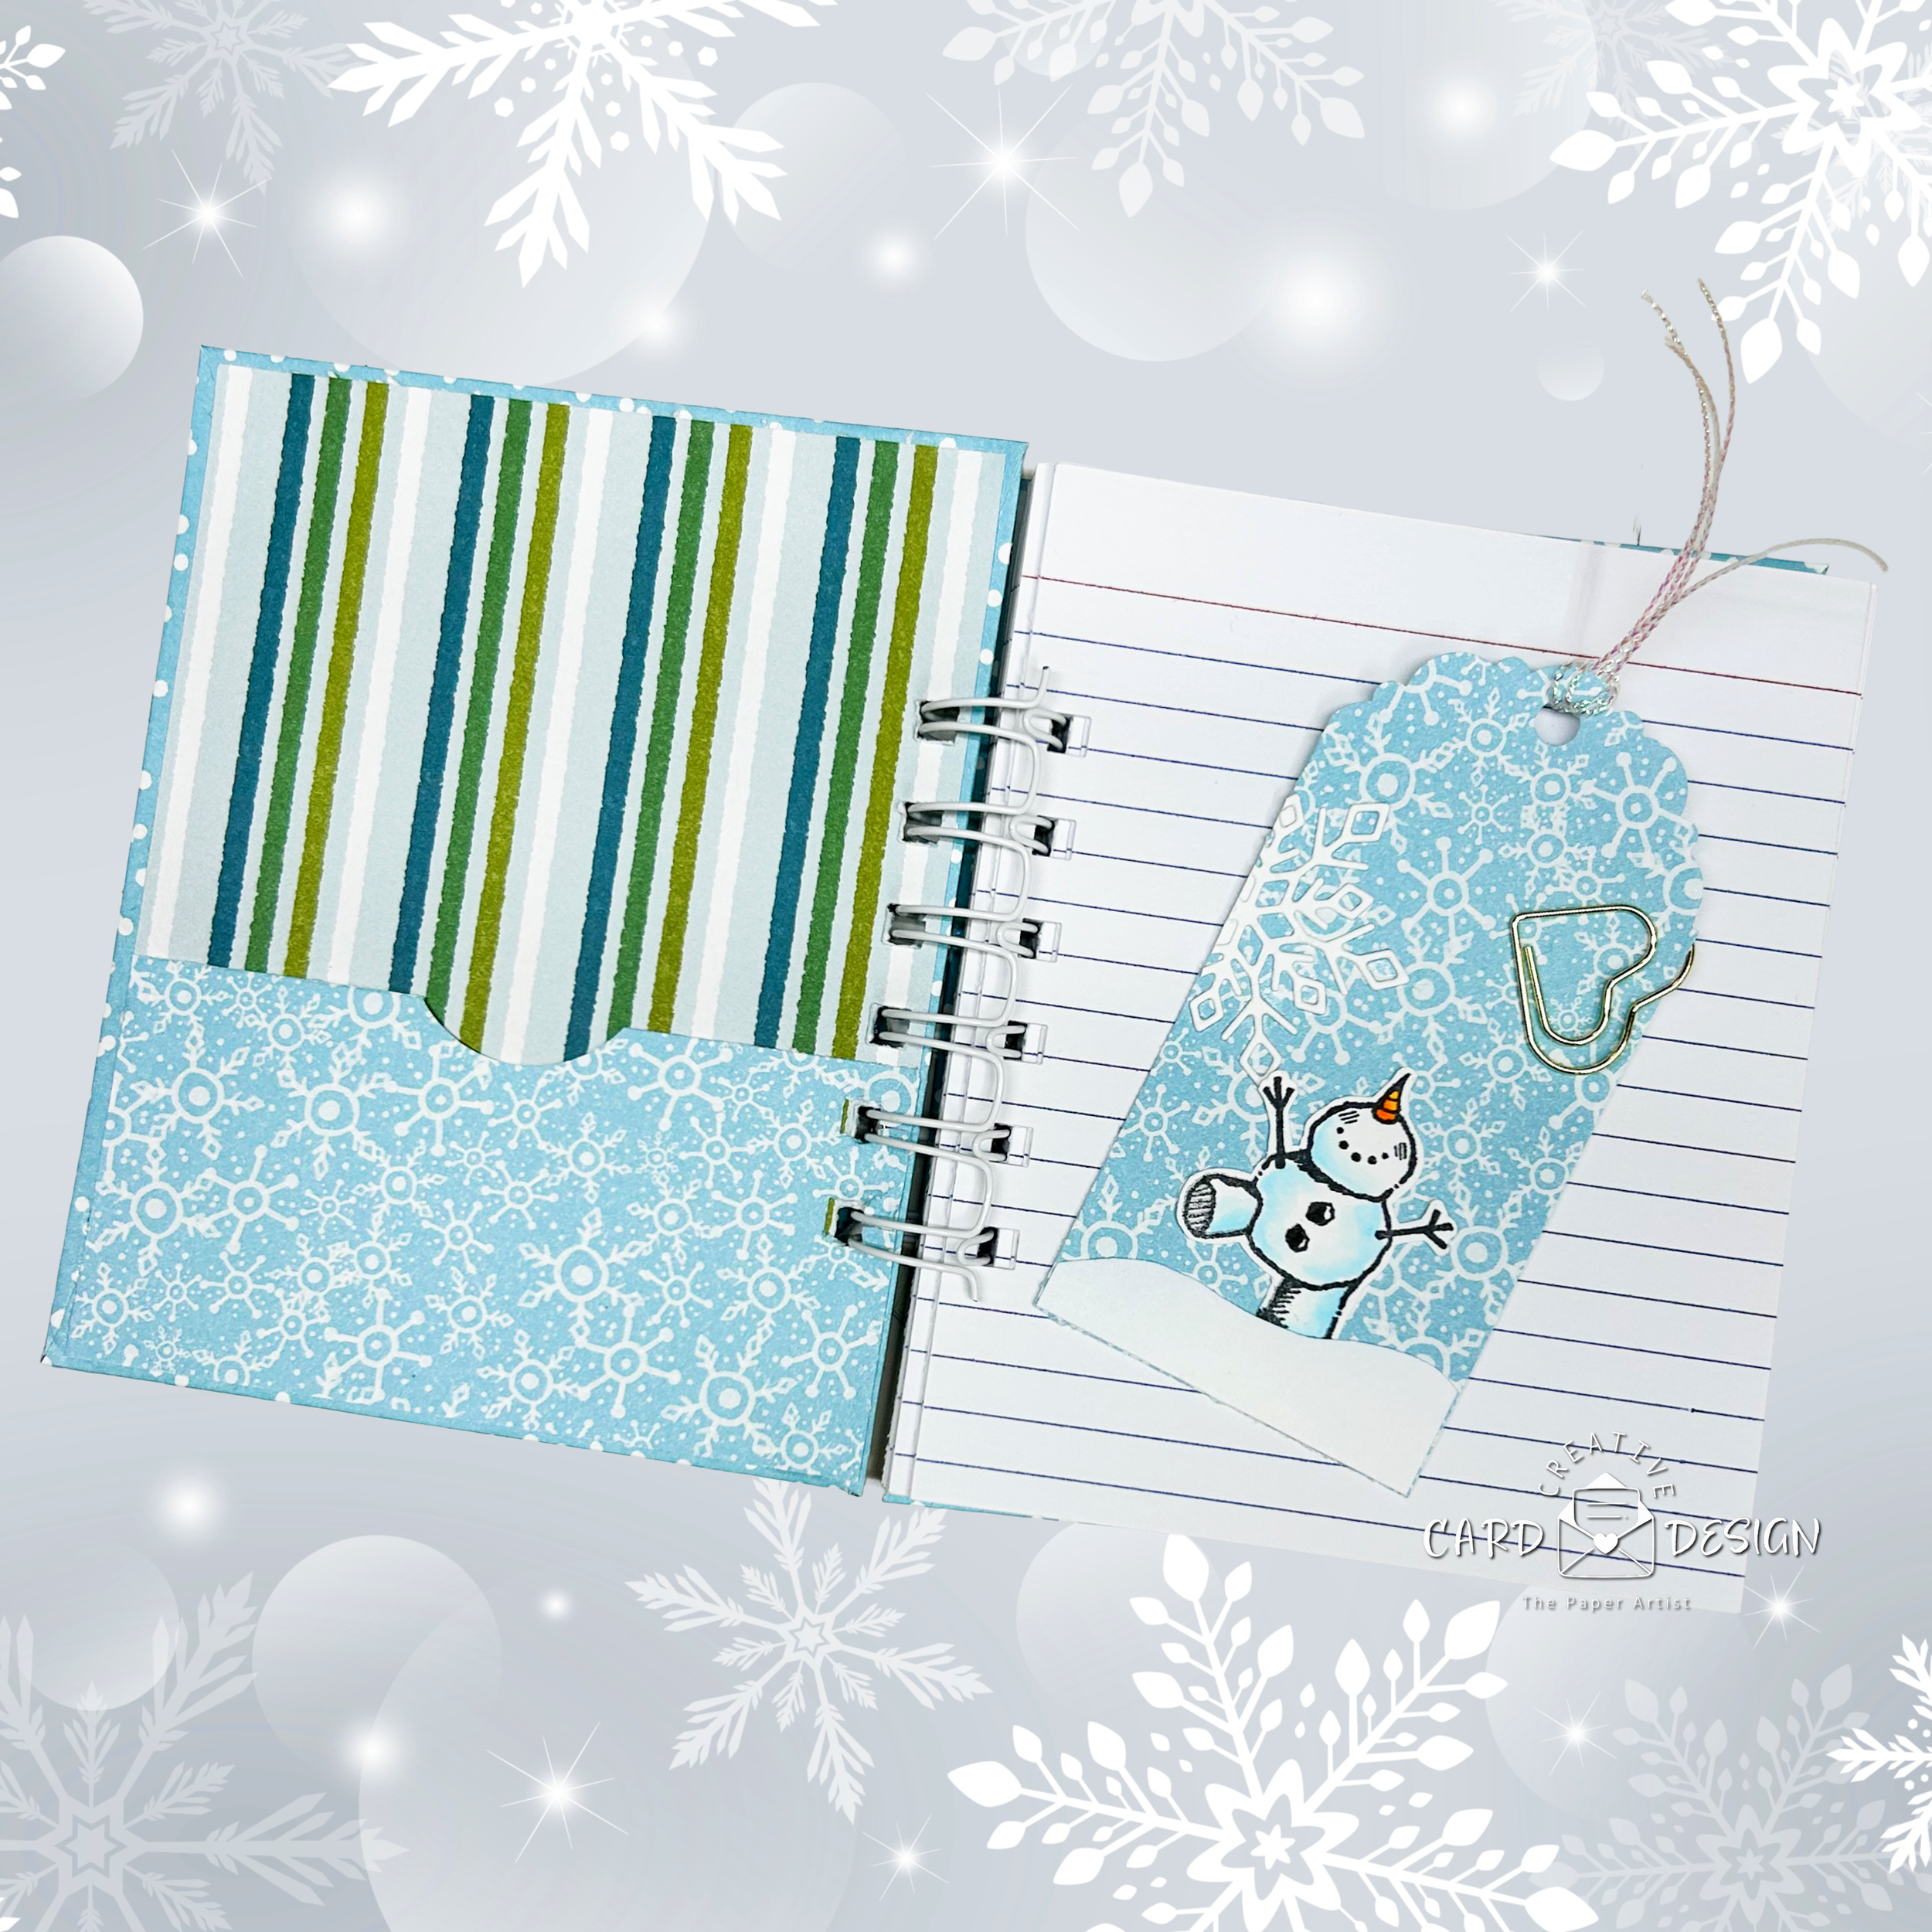
Add a pocket or a cutesy little tag!
And let’s pretend that I didn’t get the coil binding backwards :(
Let’s Make It!
To bring this idea to life, start with your card front—almost the same size you’d normally design for a greeting card. From there, you can build your notebook base using sturdy backing (something that gives it that satisfying flip-open feel). For the pages, choose whatever suits your vibe: plain, lined, or even a mix for added charm. I’ll share what I used for mine below, but the best part is how flexible this project can be.
Plenty of writing space!
This notebook has a good 1 1/2 inch thickness of pages. I use 5 x 8 inch recipe cards and cut them in half on the long side to create durable writing pages.
Once your pages are cut to size, simply bind or attach them to your card front however you like. The Mini Cinch Binding Tool works beautifully, or you can go the stitched route if you’re feeling extra creative. And of course, don’t forget those finishing touches—coordinating ribbon, a handmade beaded keyring charm (I do make the key charms for my notebooks), or even a tag that ties back to your card design. It’s those small, personal details that make your handmade notebook feel like a keepsake rather than a craft project.
Laminating the Notebook Covers
There’s a full on story to go with this — ask me about the day my laminator blew up?
I would highly suggest laminating the covers for these notebooks. It adds durability and protects the beautiful designs from daily wear and tear.
A Clever Twist on Tradition
So, there you have it—a little creative rebellion against the “admire and recycle” fate of handmade cards. By turning your beautiful card fronts into notebooks, you’re giving your artistry a purpose that lasts well beyond the holiday or birthday it was made for. It’s still the same heart, same handmade touch, just with a dash of practicality and a wink of ingenuity. And who knows? The next time someone asks if you’ve been drinking when you mention your latest craft idea, you can proudly say, “Nope, just thinking outside the envelope.” 😉
Measurements & Details to create this project — Let it Snow Notebook ( under construction)
A Laminating Story - BTW, I need a new laminator!
This post contains affiliate links, which means I may earn a small commission (at no extra cost to you). It helps keep the coffee warm and the cardstock flowing—so thank you for supporting my crafty adventures!