
Show off Pattern Paper Strips with Pride
Not just one but 2 quick & easy card layouts…
Create a card in a flash with this playful layout! Using vibrant patterned paper strips, you can quickly transform a blank card front into a stunning masterpiece. Simply arrange the strips in a fun, eye-catching design, then elevate your creation with a word die to spell out a cheerful greeting.

Product details below
To create the vertical card you will need:
Card base cut @ 4 1/4 x 11, Scored @ 5 1/2
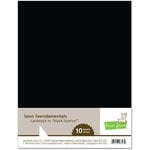
Black cardstock layer cut @ 4 1/4 x 5 1/2
Pattern Paper cut @ 1/4” x 4 1/4 (7 strips)
Gold watercolor paint + few drops of water
Scrap of gold cardstock.
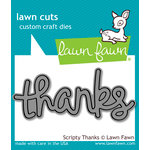
Sentiment word die
Gold rhinestones or gems
Instructions:
Glue the first strip about 1/3 of the way down on the card front.
Glue additional strips, leaving approx. 1/8 inch gap between each strip.
Mix water with gold watercolor - using a paint brush create a splatter onto the black cardstock with pattern paper strips.
Die cut the sentiment from a piece of gold cardstock - 2 times.
Adhere 2 die cut layers of the word sentiment together to create dimension.
Attach word sentiment to the black cardstock layer just above the pattern paper strips.
Add a few sparkly gold gems or rhinestones.
Glue this panel to the front of the card base.
Don’t forget to pull the design from the outside of the card to the inside of the card ( details below ).

To decorate the card inside:
Cut an additional strip of pattern paper @ 4 1/4 x 1/4”
Cut a strip of black cardstock @ 1/2” x 4 1/4, add gold splatter to the this piece.
Glue the pattern paper to the black strip of cardstock.
Glue to the inside of the card approx. 1 1/2 inches from the bottom of the card.
Stamp an additional sentiment just above the added paper strip.

Product details below
To Create the Horizonal version of the card:
Card base cut @ 8 1/2 x 5 1/2, Scored @4 1/4
Cut the pattern paper strips at 1/4” x 5 1/2 (5 strips)
Follow the instructions for the vertical card.

Card inside:
Pattern Paper strip cut at 1/4” x 5 1/2.
Black cardstock strip cut at 1/2” x 5 1/2
Same directions as for vertical card.
Specific Product Used to Create The Cards:


Inside sentiments:


And of course… I could not complete a project without my trusty glue press - game changer!!!

Or…

And finally: Metallic Water Color Paint Box - Amazon
From my tools of the trade page
I hope you have enjoyed today’s card tutorial and that it has inspired you to create with a little rainbow in your life…