
DIY Gift Wrapping : Learn to Craft the Perfect Paper Bow
If you’ve ever wrapped a gift and thought, “Hmm… this looks fine… but it could look fabulous,” then today’s project is for you.
It’s all about creating a super charming paper bow that takes your wrapping from “I tried” to“Pinterest called and wants a tutorial.”
It’s fun, it’s fresh, and it might just make people wonder if you’ve been secretly moonlighting as a professional gift stylist.

The best part? This bow is wonderfully simple to put together. We’re talking paper strips, a dab of glue, maybe a staple or two—everything your craft room already has hiding between last season’s scraps and your “I’ll use this someday” bin. Add in some easy measurements and a little folding magic, and you’re well on your way. Even better, this is totally the kind of project you can make while catching up on your favorite Hallmark movies. By the time the main character realizes the small-town baker was “The One” all along, you’ll have a whole pile of bows ready to pop onto your next gift.
Let’s get started!
Just grab your papers (I’ll link mine below), queue up something cozy, and let the bow-creating magic begin!
Supplies needed & Instructions:
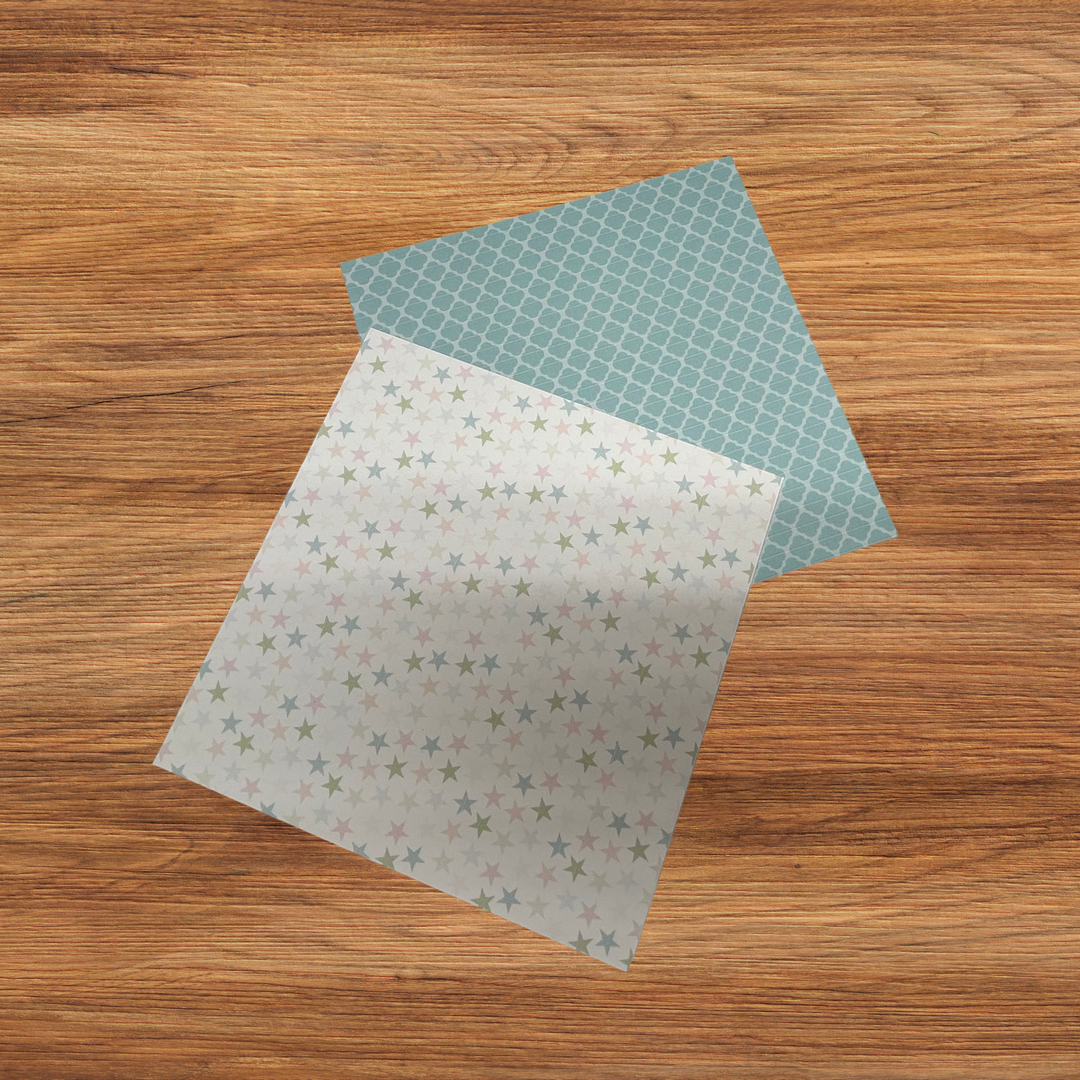
Pattern Paper:
Double sided pattern paper. I printed a pattern from Polkadoodles Pretty Winnie Daisy Papers, flipped the paper over in my printer and printed on the backside as well.
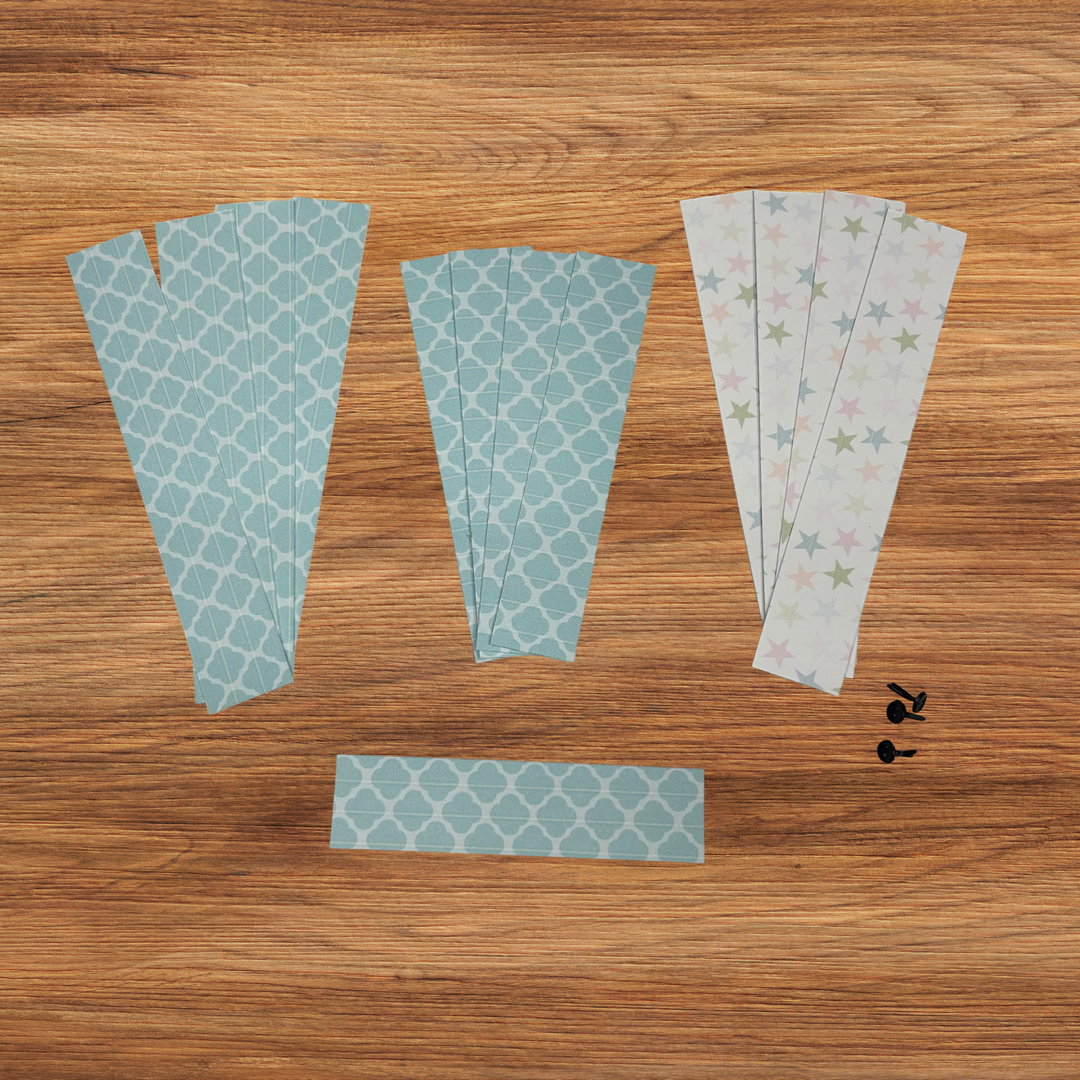
Cut 8 strips @ 1 x 6
Cut 4 strips @ 1 x 5
Cut 1 strip @ 1 x 3
Additionally you will need:
stapler
hot glue gun
3 brads
small hole punch
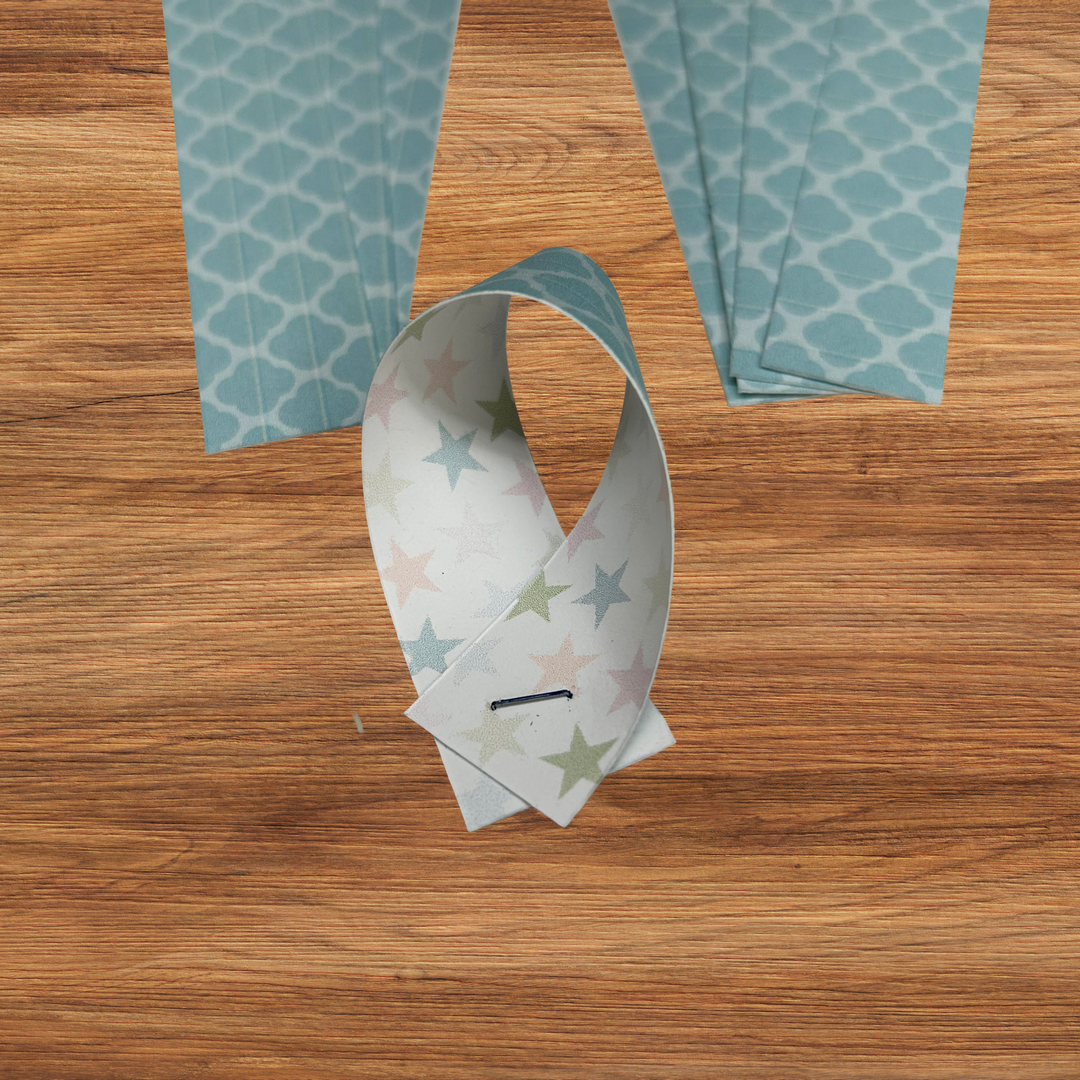
Twist 4 of the 6 inch strips and staple.
Twist the 4- 5 inch strips and staple.
With the remaining 6 inch strips - flip the paper over, twist and staple.
So the pattern is reversed on one of the larger sections and the small loop.
Curl the 1 x 3 into a circular type shape and staple.
You should have something similar to the photo.

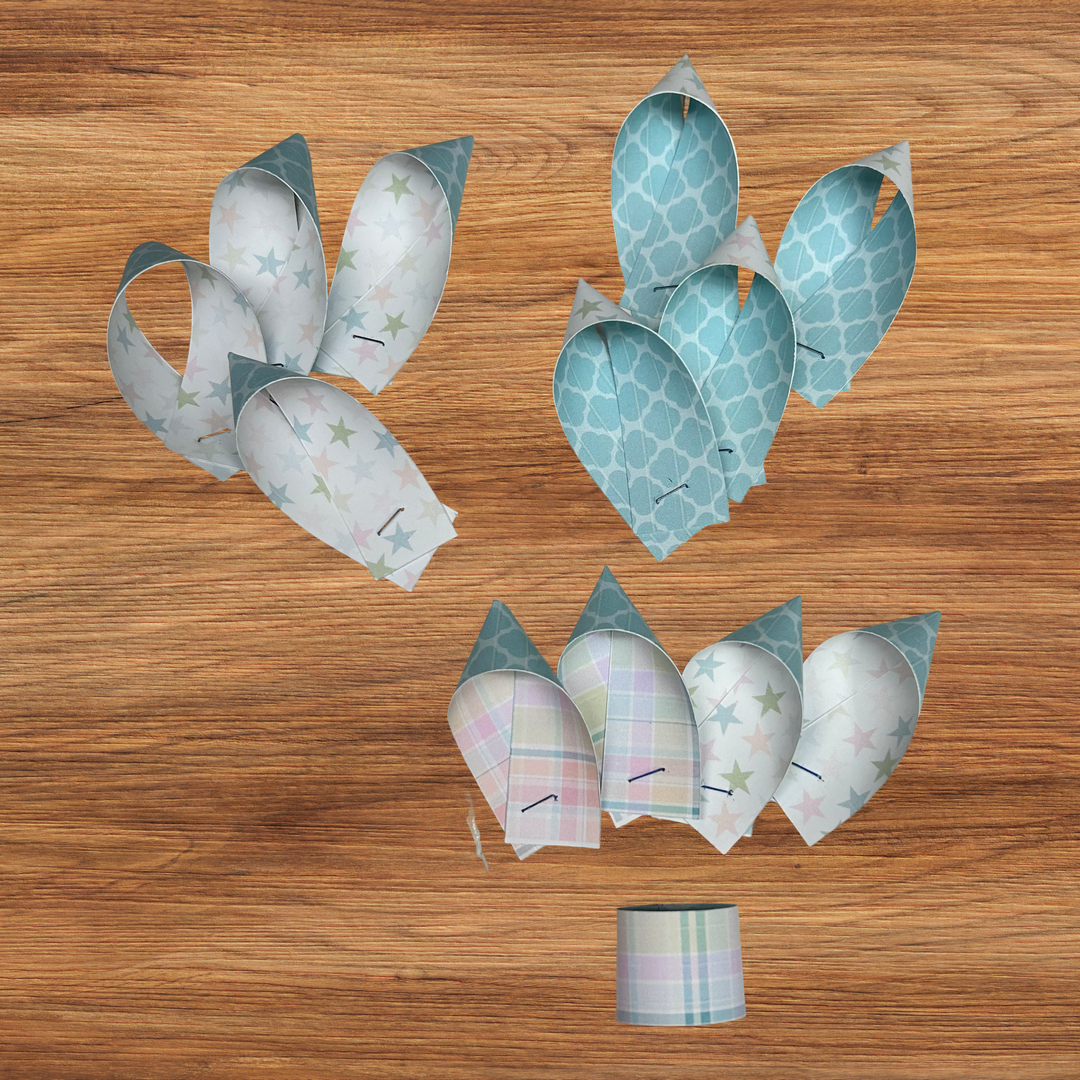
Using a small hole punch - punch a hole centered at the bottom of each paper twist.
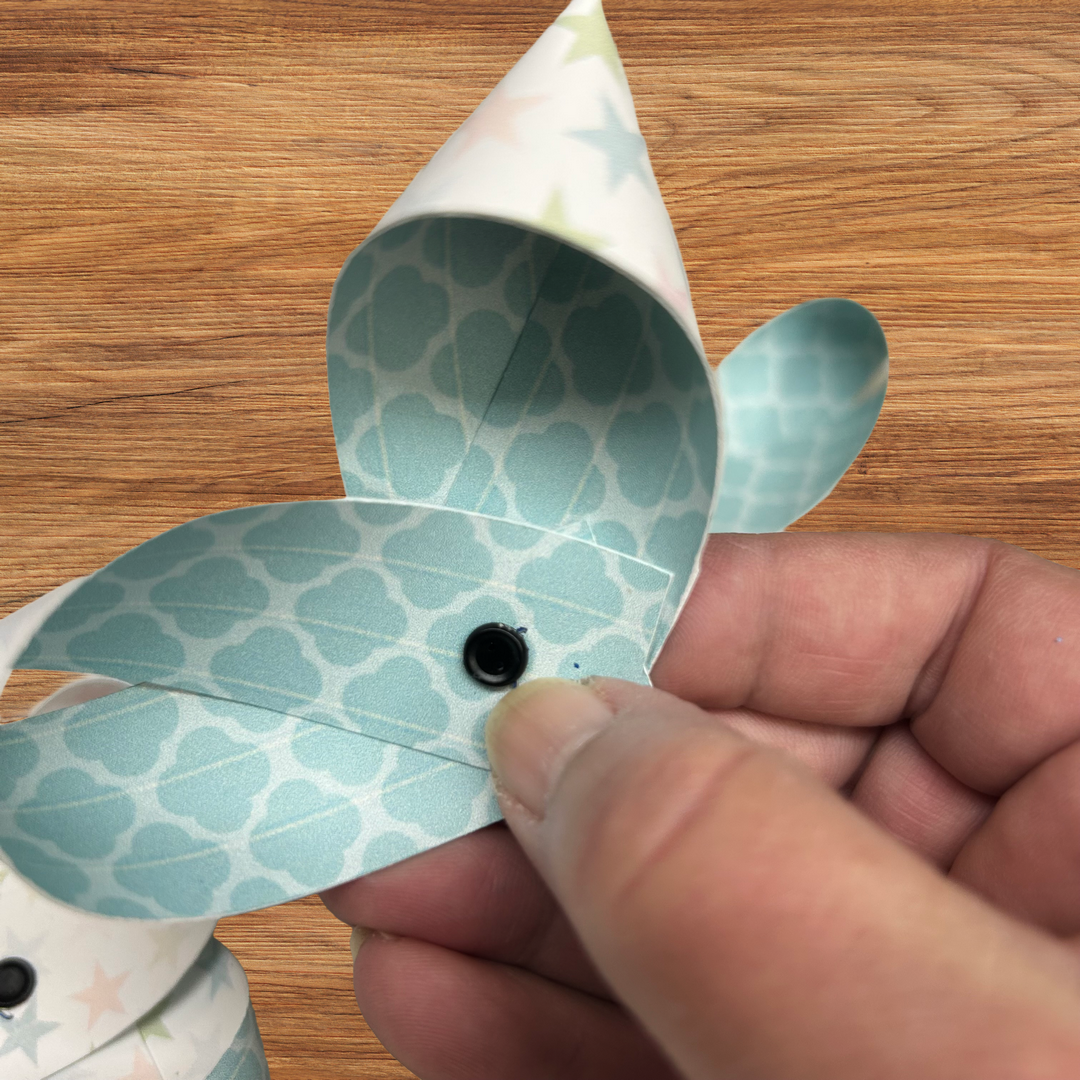
Place a brad fastener through the hole on each of 4 paper twists, secure the ends of the brad.
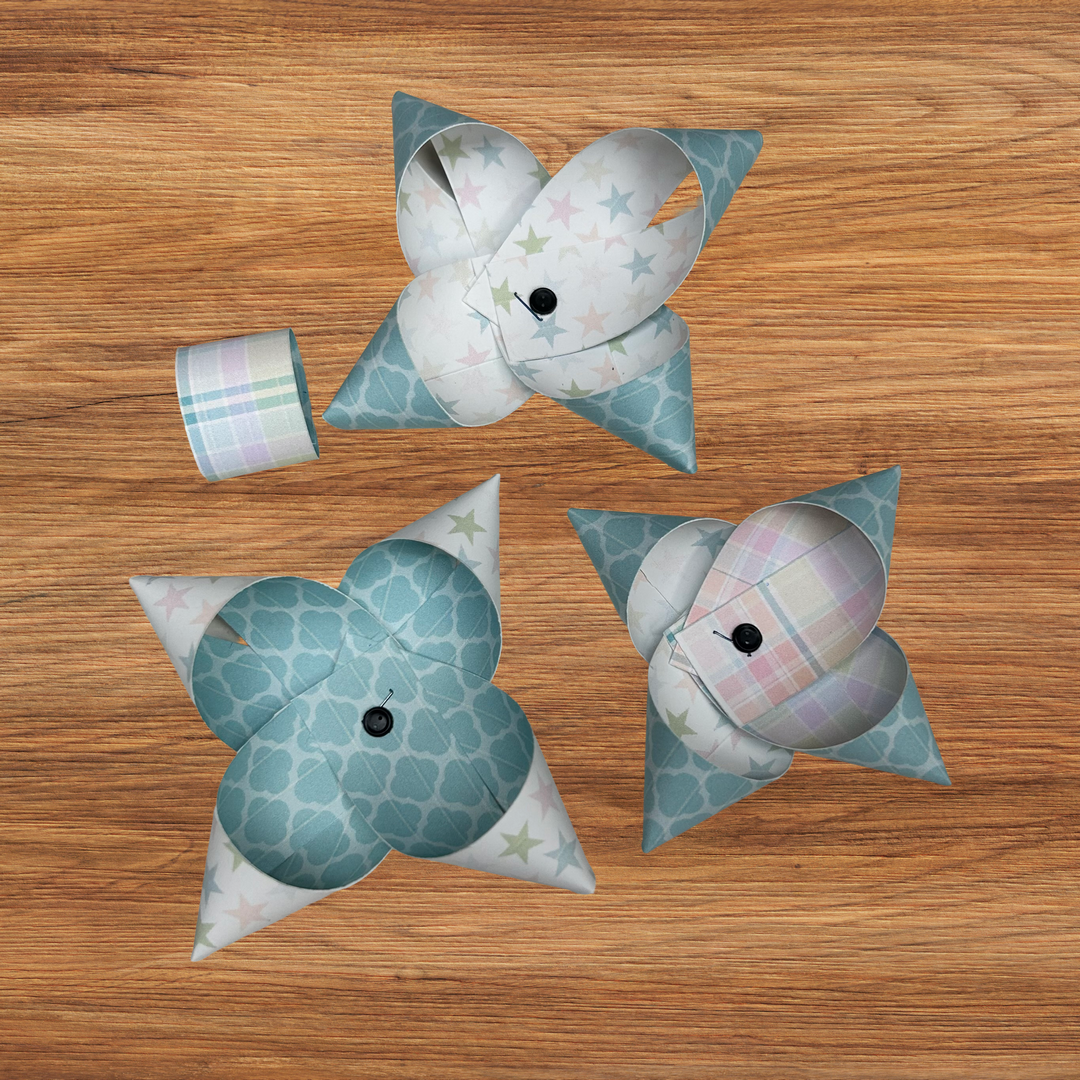
Complete this for all 3 groups of 4 paper twists.
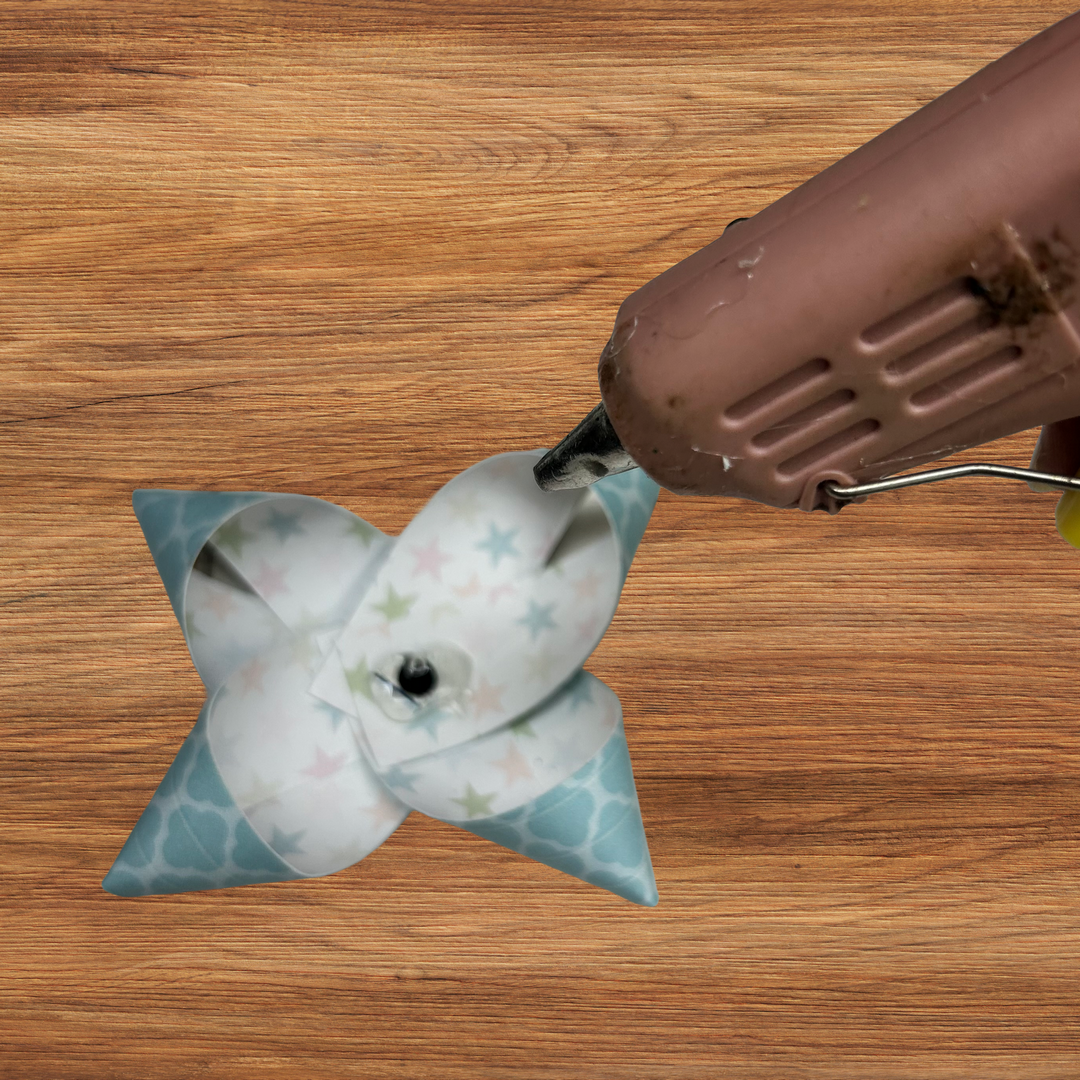
Place hot glue in the center of one of the groups made with the larger strips — adding the next larger grouping to the hot glue.
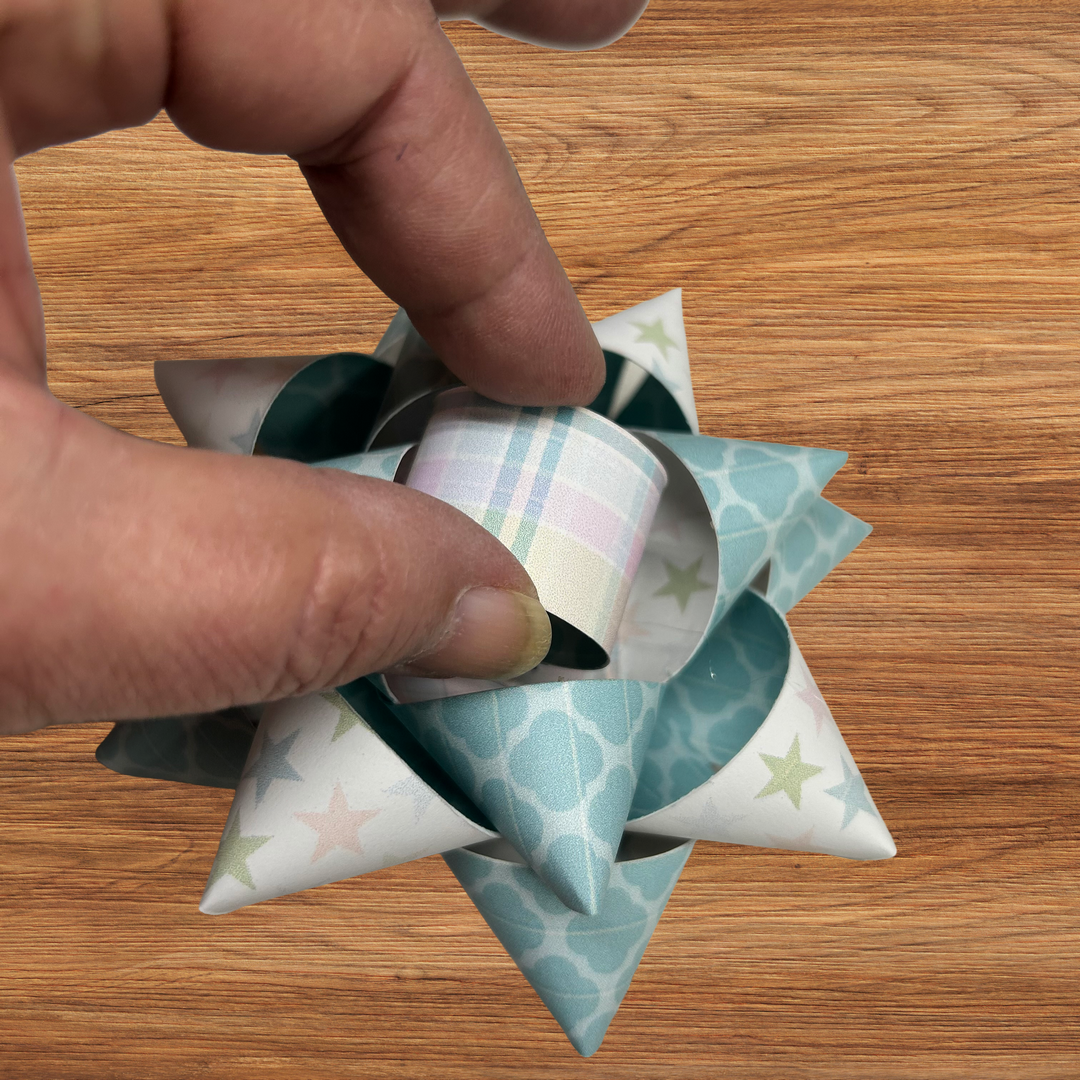
Repeat this with the grouping of smaller paper twists and finally the small circle to complete the bow.
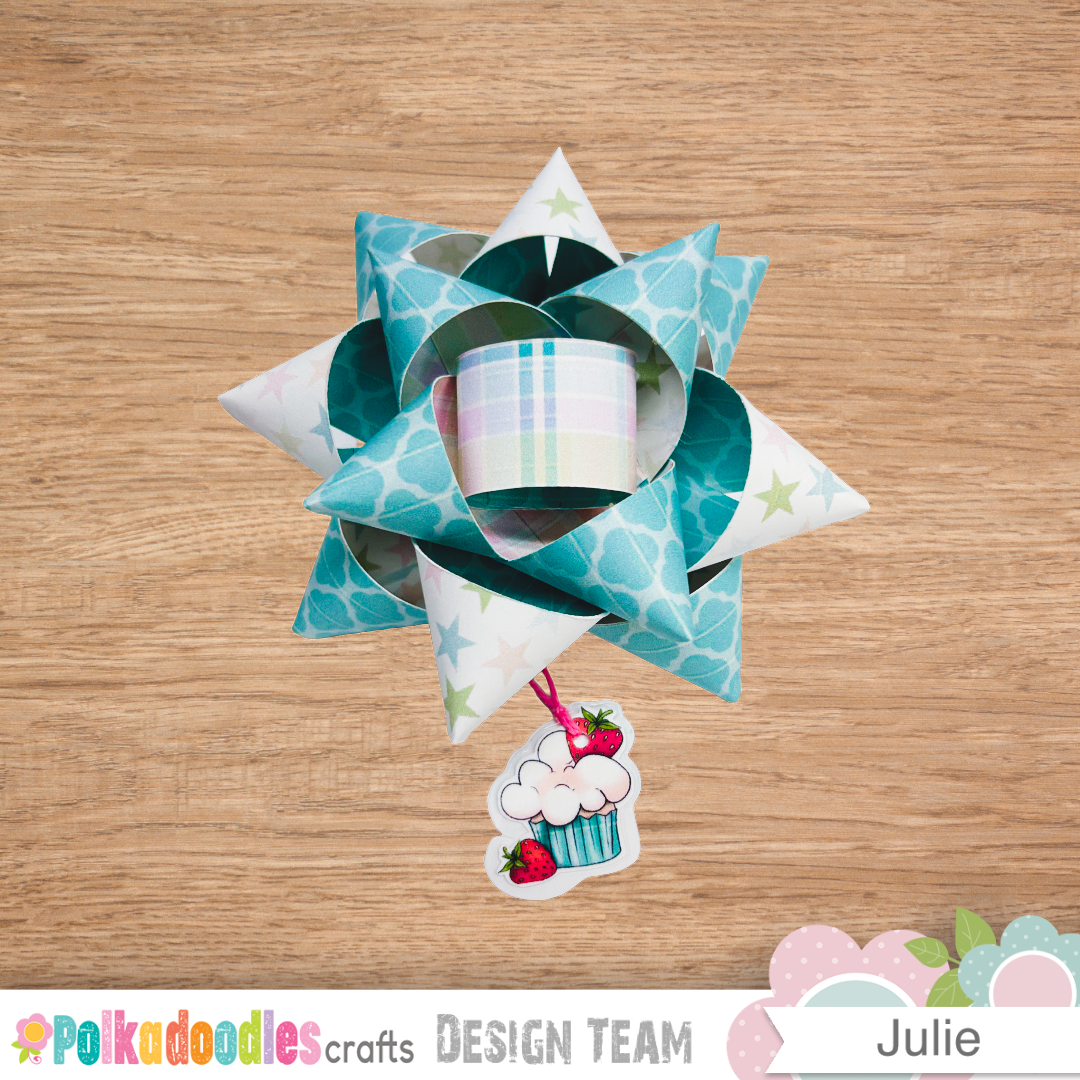
I printed a tiny cupcake from Strawberry Cream Cupcake, laminated it, punched a hole and attached a piece of twine to create an added little bow charm to this project.
So if you’re looking to take your gift wrapping up a notch—with minimal effort and maximum “wow”—this is your sign to give paper bow-making a try. It’s quick, it’s satisfying, and it may just make you feel like the crafty gift-wrapping guru you were always meant to be.
And remember, these bows are perfect for birthdays, Christmas, thank-yous, celebrations, or any moment that deserves a little extra pretty.
They’re a fun reminder that sometimes the wrapping is part of the gift—especially when it’s crafted with love and pretty paper.
This post contains affiliate links, which means I may earn a small commission (at no extra cost to you). It helps keep the coffee warm and the cardstock flowing—so thank you for supporting my crafty adventures!