
Some Bunny Ate the Carrots! – A Sweet & Simple Easter Card
Grab your coffee (or reheat the same cup for the third time like I usually do), because today I’m sharing this cheerful Easter card today as part of the Polkadoodles Design Team, using some adorable elements to build a fun Spring scene.
This cute little bunny looks like she’s been busy preparing for Easter morning — gathering eggs, nibbling carrots, and probably judging my ability to keep houseplants alive.
The card started with a soft embossed background. Nothing fancy or specific here — just grab whatever embossing folder in your stash makes you hoppy. Florals, dots, vines… if it brings Spring vibes, it works.
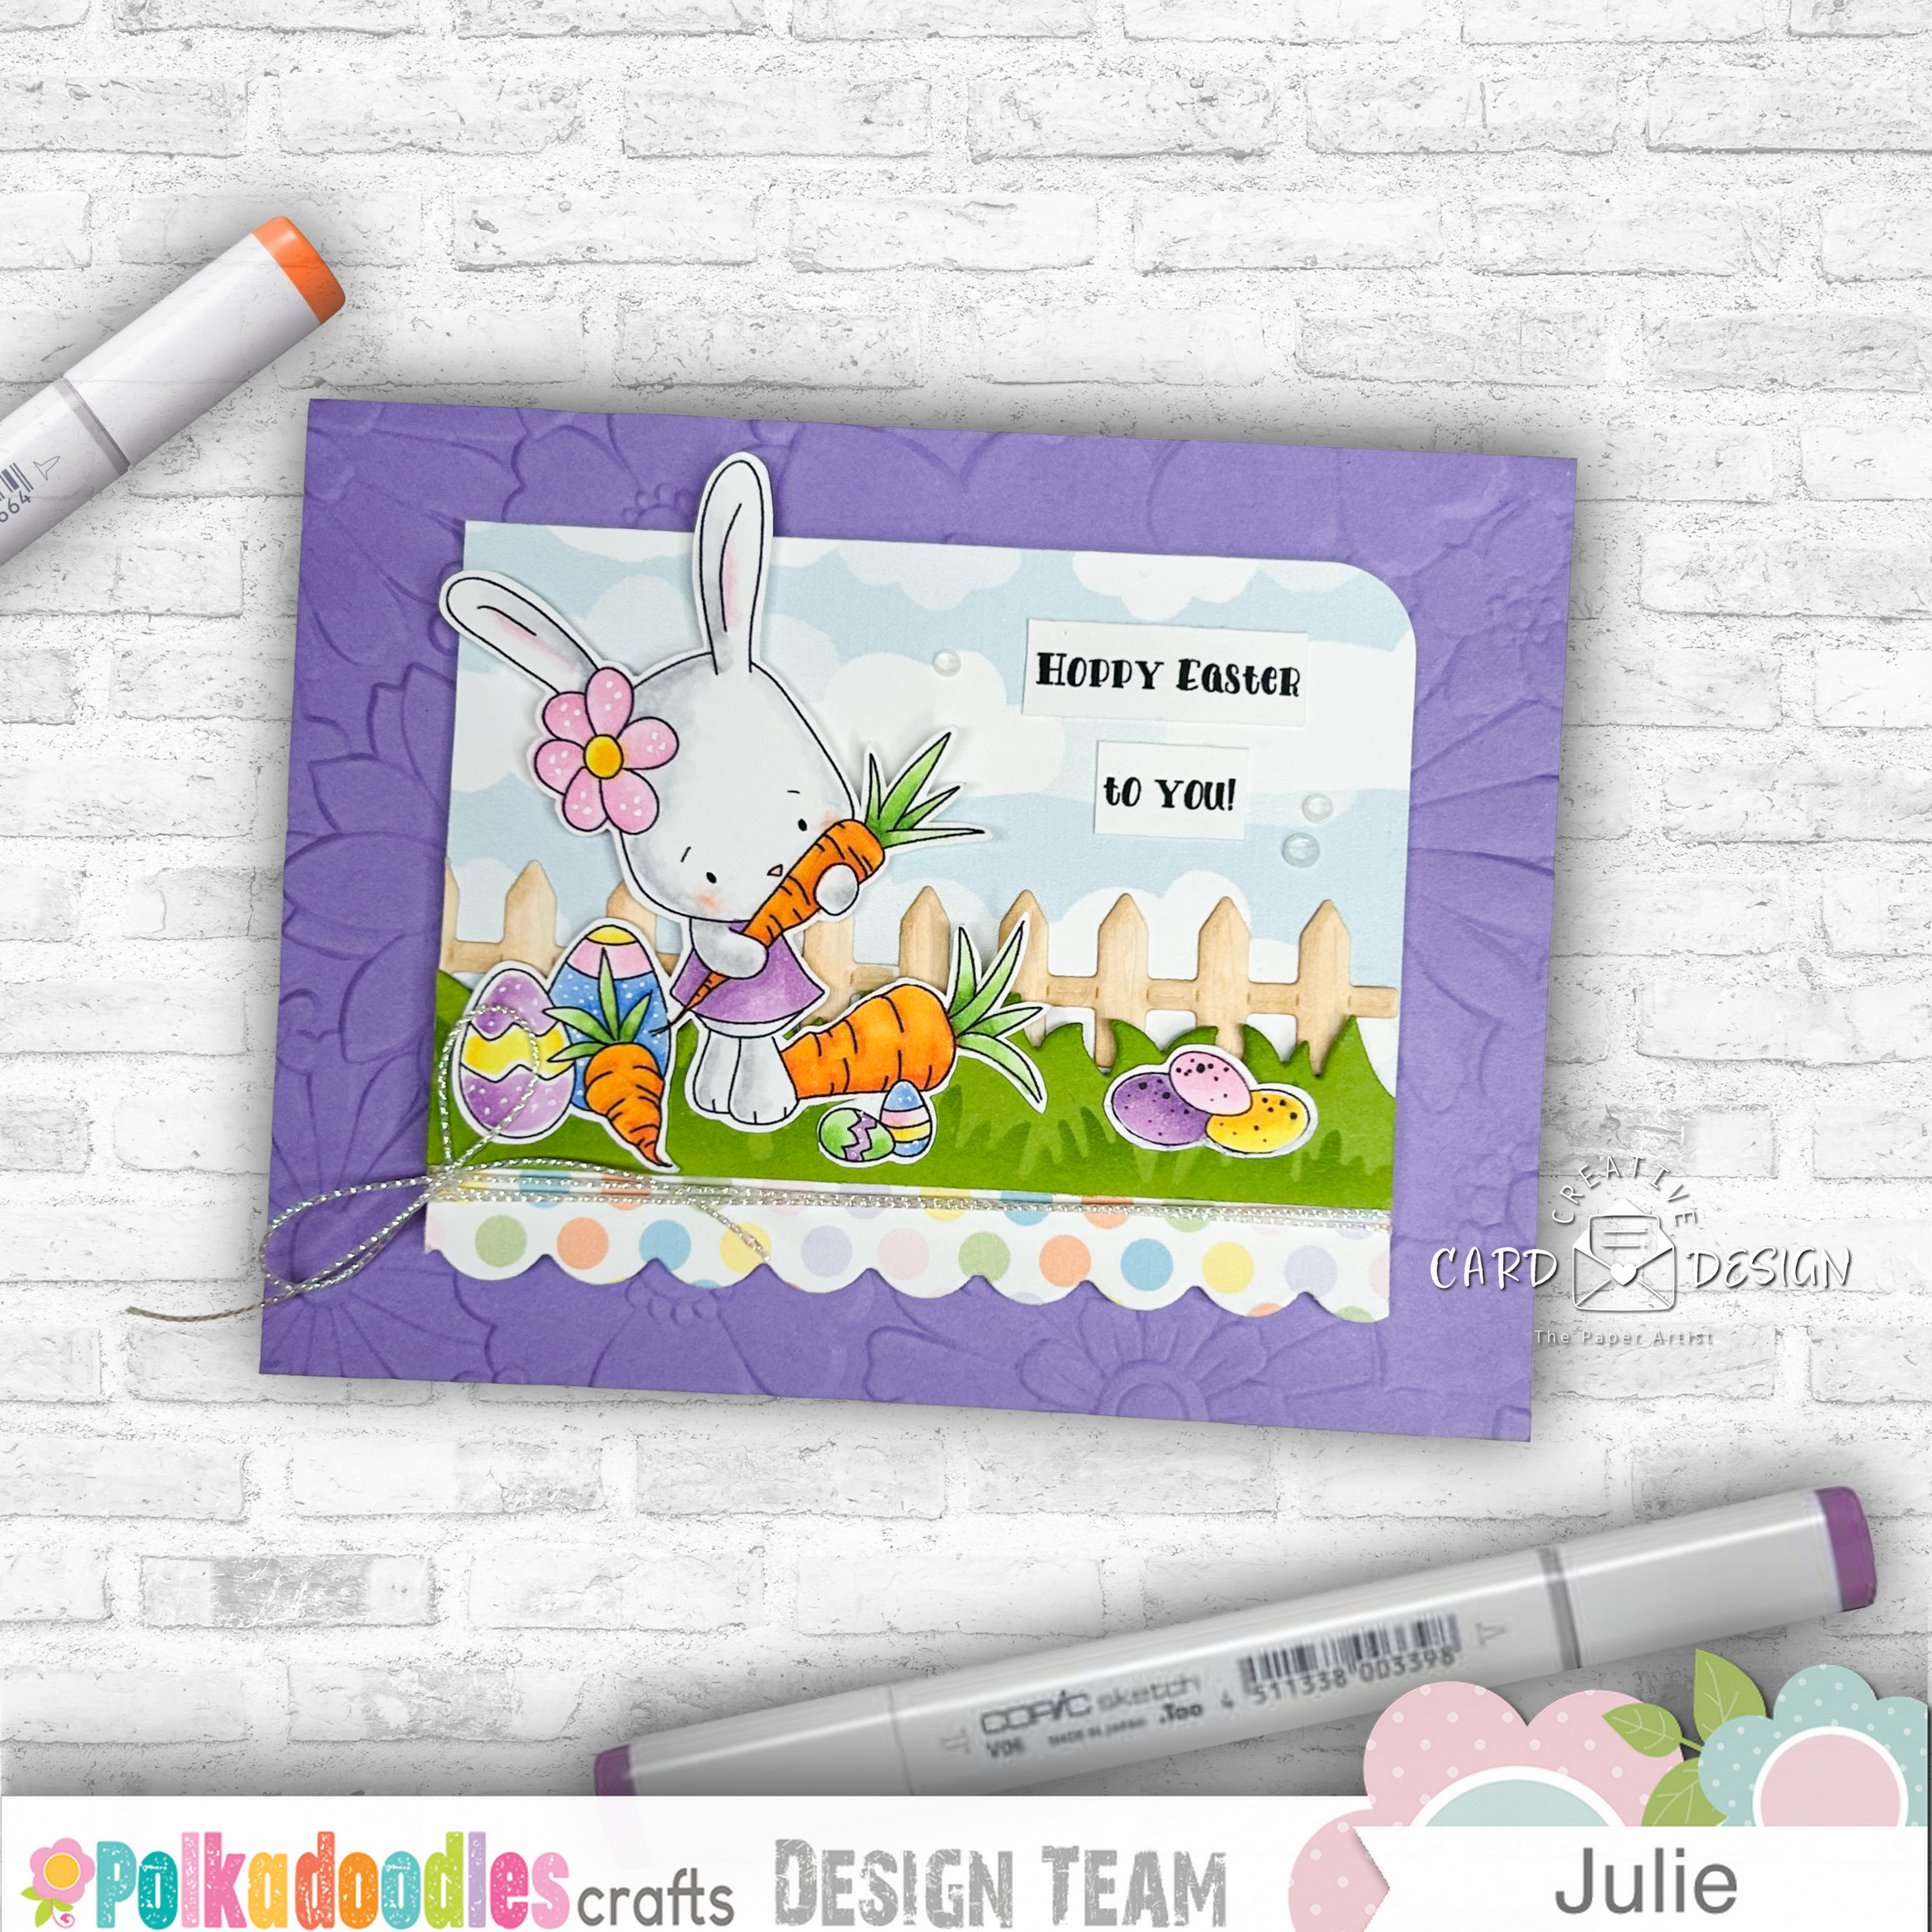
For the center stage of the card, I used a piece of the Pretty Spring Paper cloud printable and trimmed it down to 4 1/8 x 2 7/8 inches. The clouds make the perfect little sky scene for our carrot-loving bunny.
Next comes a bit of scene building. I used a random grass die cut to create a grassy border along the bottom of the panel. This layer gets popped up with foam tape because let’s be honest — dimension is the secret ingredient to cute cards.
Behind the grass, tuck in a small fence or any little scene-builder pieces you might have hiding in your stash. If you're anything like me, you probably have a tiny village worth of die cuts waiting for their moment to shine.
To add a bit of playful detail, cut a 1 x 4 inch strip from the dotted paper in the Pretty Spring Paper pack. Cut it with a border die (or leave it straight if your die cutting machine is currently buried under craft supplies… no judgment here). Glue this strip to the back of the scene panel, leaving about ½ inch peeking out along the bottom.
Now wrap some twine or ribbon around the panel where the grass meets the dotted paper and tie a bow. It’s one of those tiny details that makes everything look finished and fancy… even if you're crafting in pajama pants.
Next up is our star of the show — the Cute Bunny image. Print it, color it, and if you're feeling extra festive add a few Easter eggs. The eggs on this card were actually borrowed from another Easter image because around here we believe in creative recycling.
Attach the bunny with foam tape at the top and a little liquid glue at the bottom so she sits nice and evenly against the scene.
Add the extra eggs around the grass for a pop of color and a little Easter charm.
Once everything is assembled, attach the entire scene panel to the embossed background, then adhere that to your card base.
To finish it off, choose a sentiment from Easter Greetings and place it wherever it feels right on the card front. A few gems or sequins add just enough sparkle to make things festive — because Easter cards deserve a little shimmer too.
Now, I’m off to make another coffee and possibly hide the chocolate eggs from myself until Easter.
Happy Crafting!
Have you tried Polkadoodles Craft & Card Making Challenge
this challenge is all about having fun, getting crafty and sharing your handmade projects with our lovely community. Whether you’re brand new to crafting or a long-time card maker, everyone is welcome — and because one of our prizes is chosen at random, everyone has a fair chance to win!
You can enter any handmade project, in any style, using any theme — as long as it’s made by you. Cards, scrapbook pages, mixed media, tags… we want to see it all!
Even better? You can enter up to four times each month with four different projects, so don’t hold back!
🏆 Prize 1 – Random Winner
One lucky entry will be selected at random to win a $20 Polkadoodles store credit. Spend it on anything you like — yes, even physical products!
🏆 Prize 2 – Design Team Picks
Our team will also choose their top two favourite entries from across the four weeks. Each of these winners will receive a $10 Polkadoodles store credit.
That’s $40 in prizes every single month — just for doing what you love.
This blog challenge is sponsored by Polkadoodles Crafts
This post contains affiliate links, which means I may earn a small commission (at no extra cost to you). It helps keep the coffee warm and the cardstock flowing—so thank you for supporting my crafty adventures!