Father’s Day Bag & Tag
Happy Saturday Everyone!
Time for me to share my inspiration as part of the Polkadoodles Design Team. You can find even more inspiration and actually join the “Anything Goes” challenge over on the Polkadoodles Blog.
Scroll to the bottom of that blog and hit “click here to enter” on the any of the current challenges.
Upload your unique project and enter for a chance to win great prizes.
Whether you’re a seasoned crafter or just starting, this is your moment to shine. Don’t let your hard work go unnoticed—join the fun and inspire others in our vibrant community.
**Don't forget the fab Digi Choosday discount off all crafty printable downloads on Tuesdays!
Just before you dash over there - here’s a little about my DT project today.
The challenge was Father’s Day and not a card.
So I chose something to put the Father’s Day gift in… I think I nailed it!
This Gift Bag started out with one of my favorite Polkadoodles paper packs - Gnome Fishing Printable Paper. I used one pattern for the gift bag and a 2nd paper to create the trim around the top of the bag, and added some coordinating ribbon for handles.
This gift bag needed something else… A tag of course! I used more of the pattern papers from this pack to create an adorable gift tag featuring images from the Fishing Gnome Bundle and “Reel-y” cute sentiment included in the Gnome Men Greetings.
I’m loving that super glossy fish!
To Create the Gift Bag:
First off the gift bag measures 4 inches wide, 5 inches tall, and 2 inches deep.
These measurements could be adjusted to create a smaller or larger bag.
So 2 options, this happens a lot, I know. However it’s great to have options.
Option 1: (for the bag above using Polkadoodles printed pattern paper).
When I print a pattern paper, I can resize that to many different sizes, though nothing larger than what is capable of printing on my 8 1/2 x 11 cardstock page. For this option I printed 2 pages of chosen pattern papers and the measurements required will go from there.
6 1/2 x 7 (Cut 2)
Score at 1/2 on each 6 1/2 inch side of each piece.
**Join the 2 pieces together using one of the 1/2 tabs.
Using the seam as if it were a score a line - Score 4 inches from the seam, from the other side score at 2 inches from the seam. ( 2 - 4 inch sections, 2 - 2 inch sections, 1 1/2 inch section.
Turn the paper a quarter turn and Score @ 2 . You may have to fold in half at the seam line to score since the full measurement of the paper is 14 1/2 x 7.
Crease the score lines. Snip and create tabbed edges as in photo. Fold into bag/box shape.
Glue the remaining 1/2 tab to create closure of the bag. Glue bottom flaps into place to create the bottom of the gift bag.
Top Edge Border:
Repeat the scoring and tab gluing from above to create a 14 1/2 inch x 1 inch border section. After scoring is complete, glue the border into place along the top outside edge of the bag.
Using a small hole punch, create 2 holes on the top edge of the bag on both sides of the bag. Attach a coordinating ribbon on either side of the bag to create handles.
Option 2: (if you are creating this bag with a 12 inch piece of pattern paper)
12 x 7 pattern paper.
1 inch x 7 pattern paper.
Score the 1 x 7 section of pattern paper in half at 1/2 inch.
Attach the 1/2 tab using glue to the 12 x 7 section. Giving you 12 1/2 inches in total.
Score 12 1/2 x 7 inch piece of pattern paper at 2, 6, 8, (there will be a 1/2 tab left at the end).
Turn the paper section a quarter turn and score @2.
Crease the score lines. Snip and create tabbed edges as in photo. Fold into bag/box shape.
Glue the remaining 1/2 tab to create closure of the bag. Glue bottom flaps into place to create the bottom of the gift bag.
Creating the Tag for the Father’s Day Gift Bag:
Start with a gift tag die, or a 2 1/2 x 3 3/4 Piece of Pattern Paper.
Punch a hole in the top or add or cut any design for the top of the tag.
Cut a 1 1/2 inch section of coordinating paper from the Gnome Fishing Printable Paper and glue to the bottom of the tag. Use a corner rounder on the bottom 2 corners of the tag.
Attach the printed greeting strip centered over the joining of the 2 pattern papers on the tag.
Size & Print the fishing rod and the fish images from Fishing Gnome Bundle. Color & cut out the images. You can cut the images out with scissors or using the print then cut feature on a Cricut machine.
Using liquid glue to attach the images to a small piece of vellum cardstock. Then fussy cut around the entirety of both images.
Using foam tape attach the vellum section to the tag.
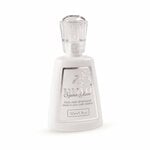
I completely covered the fish in Nuvo Crystal Glaze ( I use this a LOT! ). It adds to much fun and dimension to images - just a special little touch.
I also used a Iridescent White Cord from Simon Says Stamp that greatly resembled fishing line.
These small final touches along with amazing images and pattern paper from Polkadoodles created a simply adorable gift bag for my gift.
NOW….


