
Five rolls of washi tape, one handmade card, and more than 20 attempts to prove that cheap tape doesn't stick. Spoiler alert: I failed.
Coffee in hand? Good. Because we're back for another installment of Dollarama Made Me Do It!, where I spend a few dollars on craft supplies and then put them through their paces to see if they're actually worth bringing home.
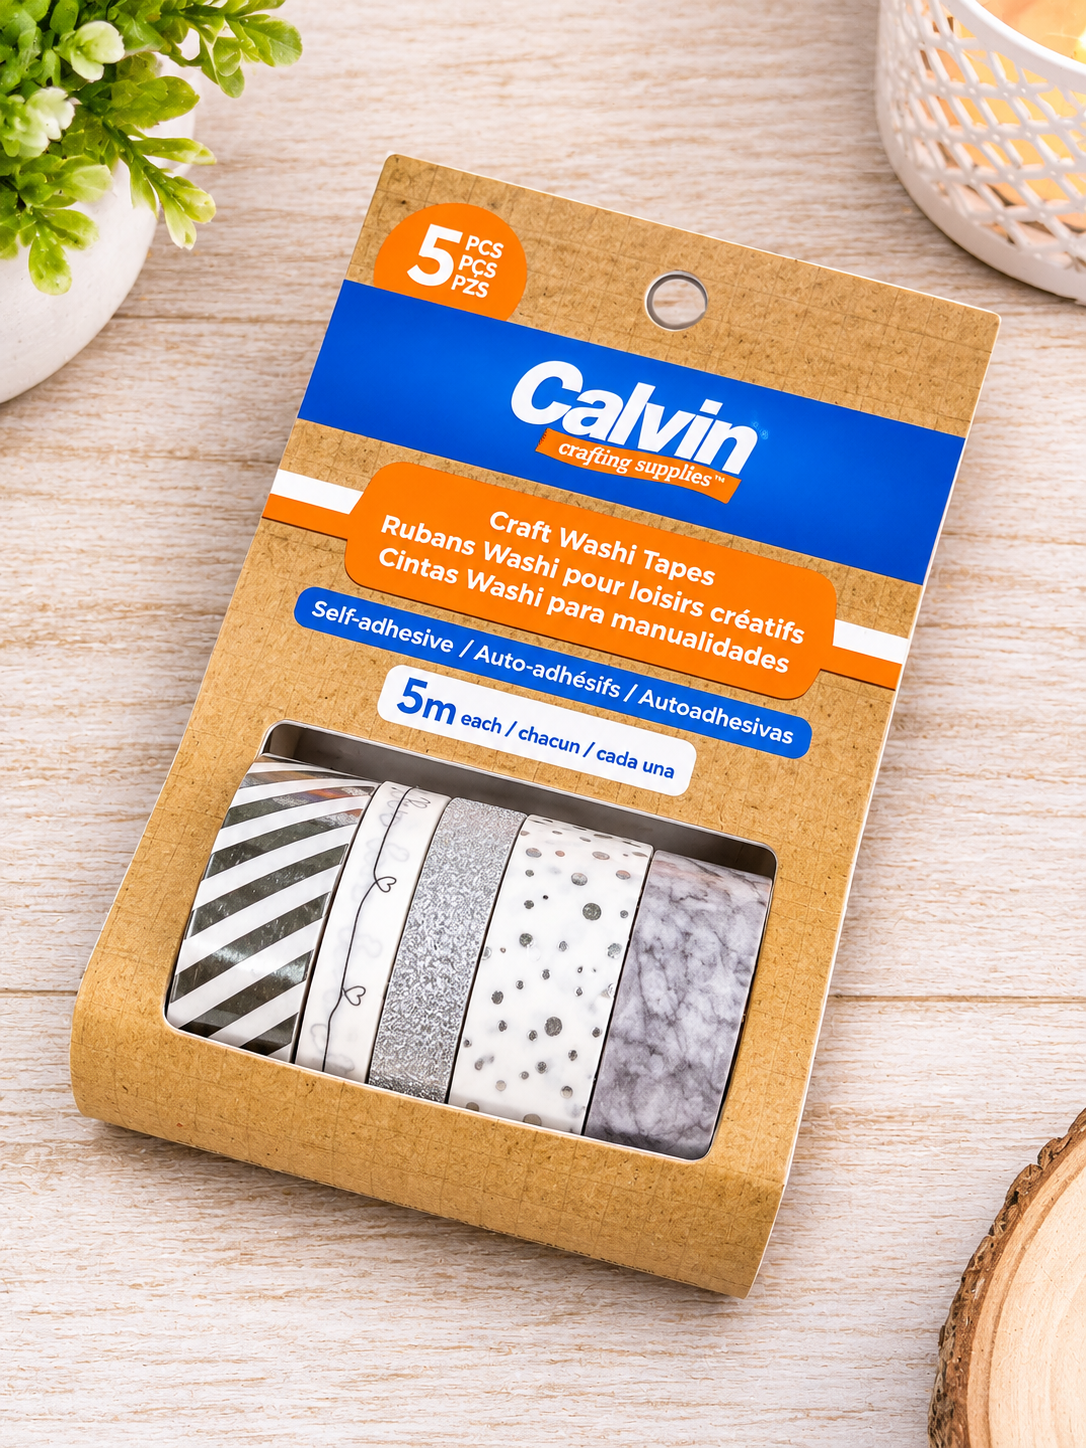
Today we're talking about a little $1.50 package of Calvin Craft Washi Tapes.
Five coordinating rolls for a buck fifty.
Now, I've been crafting long enough to know that inexpensive supplies can go one of two ways. Sometimes you discover a little treasure. Other times, you discover why something only cost $1.50.
Let's see which one we've got here.
First Impressions — Five Rolls for $1.50?
The package contained five rolls of coordinating washi tape, each with five meters of tape.
The patterns were pretty, with silver metallic details, soft grays, and designs that worked nicely together.
For $1.50, I wasn't expecting miracles. I was, however, expecting the tape to actually stick to something.
And that's where the testing began.
The Great Washi Tape Adhesion Experiment
I started by applying the tape to different surfaces, peeling it off, and sticking it down again.
And again.
And again.
At some point, this became less of a product test and more of a personal challenge.
More than 20 applications later, the darn stuff was still sticking!
I peeled it up, moved it around, and repositioned it repeatedly.
Now, I'm not suggesting you spend your afternoon applying and removing washi tape 20 times. Some of us apparently have nothing better to do.
But I wanted to know whether this tape would survive the kind of handling that happens when you're actually making something.
You know how it goes. You lay down a strip, decide it's crooked, peel it back up, change your mind, and try again.
This tape handled all that surprisingly well.
So far, so good!
Let's Make a Card!
Of course, testing the tape was only half the fun. We needed to actually make something with it.
And what better way to test five coordinating rolls of washi tape than to use them together on a handmade greeting card?
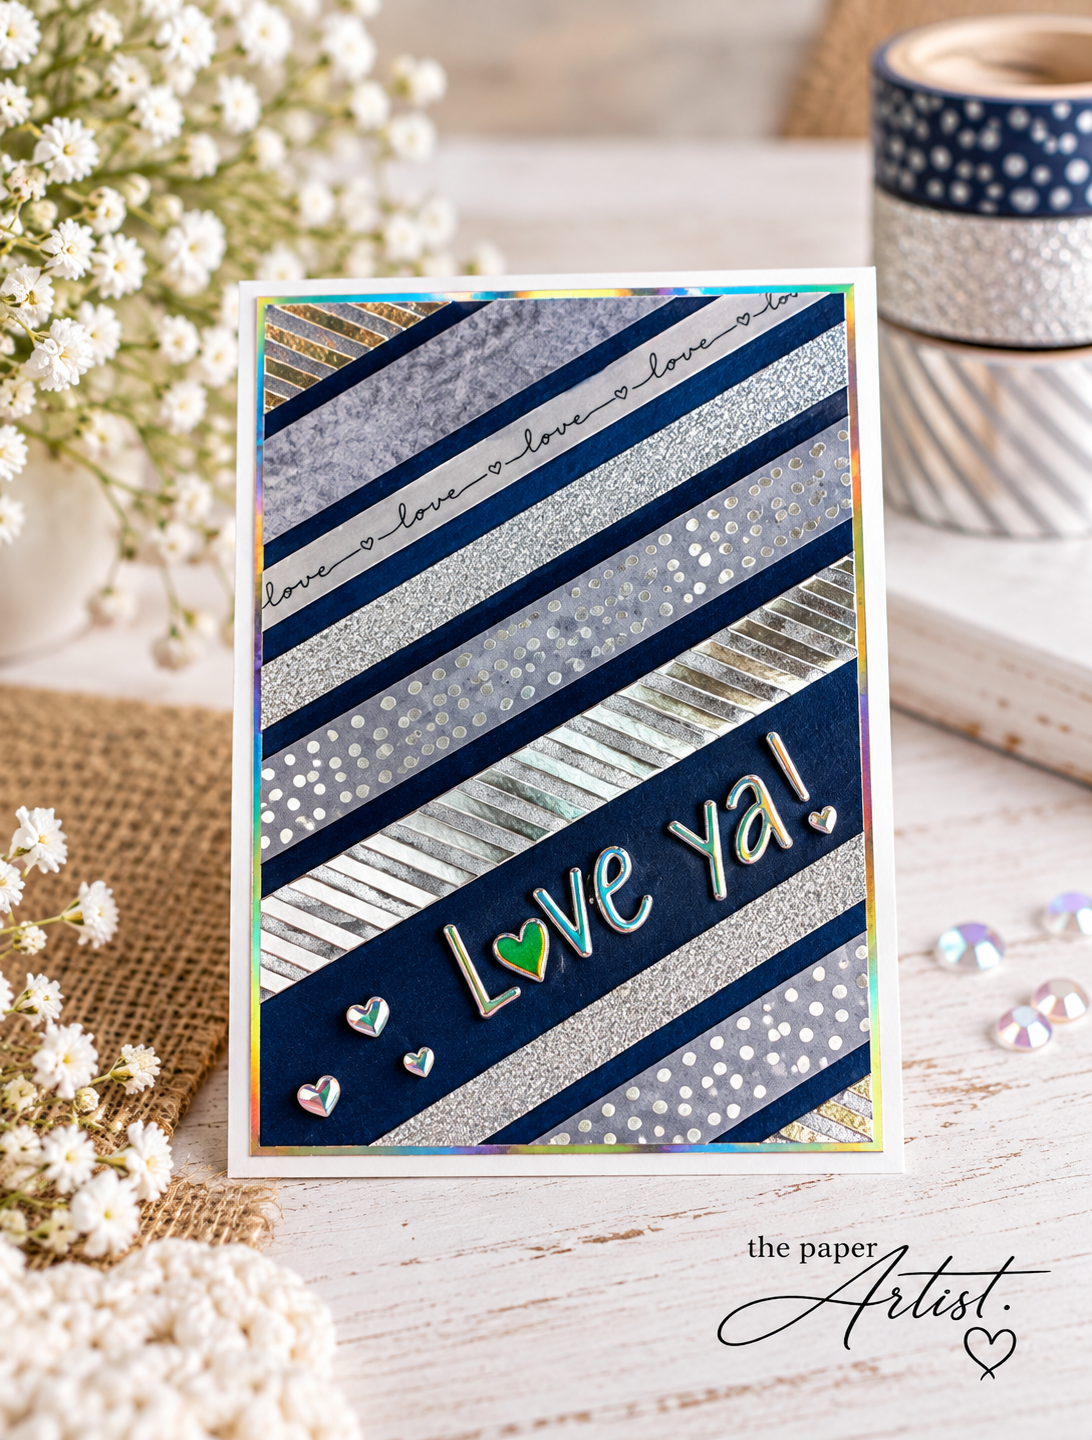
I decided on a simple diagonal design, combining the patterned tape with deep navy cardstock and some silver holographic accents.
The result?
A sparkly little Love Ya! card that looks like it required considerably more effort than it actually did.
And that's my favorite kind of cardmaking!
What I Used
Calvin Craft Washi Tapes — $1.50 at Dollarama
White cardstock for the card base
Deep navy cardstock
Silver holographic cardstock
A word die-cut and a little heart die
Paper trimmer and adhesive
You can easily substitute colors and sentiments from your own stash.
How I Made the Card
Step 1 — Start with the cardstock.
I began with a piece of navy cardstock to create a rich background for the silver and gray washi tape.
The dark navy really makes those metallic patterns pop!
Step 2 — Add the washi tape.
Working diagonally across the panel, I applied strips of the different washi tape patterns.
I alternated the designs, leaving some navy cardstock showing between them.
This is where the coordinating patterns really shine. You don't have to spend half an hour deciding whether one design goes with another.
They already do!
And if you don't get a strip quite straight?
Peel it up and try again.
Trust me. I tested that feature thoroughly.
Step 3 — Leave room for your sentiment.
Rather than cover the entire card with tape, I left a wider diagonal section of navy cardstock open.
This gave me the perfect spot for my sentiment without adding another bulky layer to the card.
Step 4 — Trim and layer.
Once I was happy with the tape arrangement, I trimmed the panel neatly and mounted it onto a piece of silver holographic cardstock.
That little holographic border gives the entire design a beautiful finished look.
Then I attached everything to my white card base.
Step 5 — Add the finishing touches.
For the sentiment, I used a die that says Love Ya!, along with a few tiny hearts.
Here's a little trick I used.
To keep the delicate sentiment pieces positioned correctly, I lifted them with another piece of washi tape, applied adhesive, and placed them back where they belonged.
Sometimes the simplest little tricks save the most frustration.
A few holographic hearts finished the design.
And just like that, we had a card!
A Little Cardmaking Tip
Here's something worth remembering.
You don't have to cover every inch of your cardstock to create an interesting background.
Leaving spaces between the washi tape strips allowed that gorgeous navy cardstock to become part of the design.
The diagonal arrangement adds movement, while the metallic details provide all the sparkle we need.
And don't feel you need a fancy die-cut sentiment either.
A stamped sentiment, a heat-embossed greeting, or even a small sentiment strip attached with foam tape would work beautifully.
You could also use a piece of coordinating washi tape to decorate the inside of the card.
Simple, inexpensive, and a nice way to tie everything together.
So, Was the Calvin Washi Tape Worth $1.50?
Absolutely!
For the price, I was impressed.
The designs coordinated beautifully, the metallic details looked lovely, and the tape survived my rather enthusiastic repositioning experiment.
It was easy to work with and gave me a pretty card without requiring expensive specialty supplies.
Now, I haven't tested whether this tape will remain perfectly adhered for the next ten years. That's a different experiment, and I'm not quite prepared to wait around for the results.
But for making this card?
The Calvin Washi Tape gets a thumbs-up from me.
Would I buy it again?
Yes. At $1.50 for five rolls, I'd happily pick up another package.
One Last Thought Before the Coffee Gets Cold
I think we sometimes overlook inexpensive craft supplies because we assume they can't possibly be as good as the more expensive alternatives.
And sometimes that assumption is correct.
But every now and then, a little Dollarama find surprises you.
This was one of those times.
A few strips of tape, some cardstock from my stash, and a sparkly sentiment turned into a card I'd be happy to give someone.
And isn't that what crafting is really about?
Not how much we spent making something, but the little bit of ourselves we put into it.
Besides, I now have four more rolls of tape to play with.
Well, slightly less than four, considering the amount I spent peeling, sticking, and testing.
Until next time, keep your coffee hot, your scissors handy, and never underestimate a $1.50 craft supply!
Coffee in hand & something always on the craft table,
Julie — The Paper Artist
This post is part of my Dollarama Made Me Do It! series, where I'm testing four craft finds from a $10 shopping trip. If you missed the original haul, be sure to check out:
Dollarama Made Me Do It! — A $10 Craft Haul Put to the Test and see what else came home with me.
Dollarama Made Me Do It! A $3.50 Winter Forest Paper Pad Review
and see what else came home with me.
