
Making a Beaded Spider for Halloween — A Crafting Experiment
Grab yourself a coffee, pull up a chair, and come sit with me at the craft table. We're making a spider.
Yes. A spider.
Not a paper spider. Not a cute little pom-pom spider with googly eyes.
We're making an actual eight-legged, beaded, slightly glamorous spider.
Now, before we get too far into this adventure, I should probably mention that I've never made one of these before.
I have no formal spider-building qualifications. I've never attended spider school, and I'm reasonably certain there isn't a certificate hanging on my wall that says Professional Arachnid Engineer.
But I have beads. I have wire. And I have a rather dangerous habit of looking at craft supplies and thinking, "Well, I wonder if I could make THAT?"
So here we are.
With Halloween quickly approaching, I thought it might be fun to try something a little different.
And by different, I mean something with eight legs that could potentially end up looking like a tangled coat hanger.
What could possibly go wrong?
First, Let's Gather Some Supplies
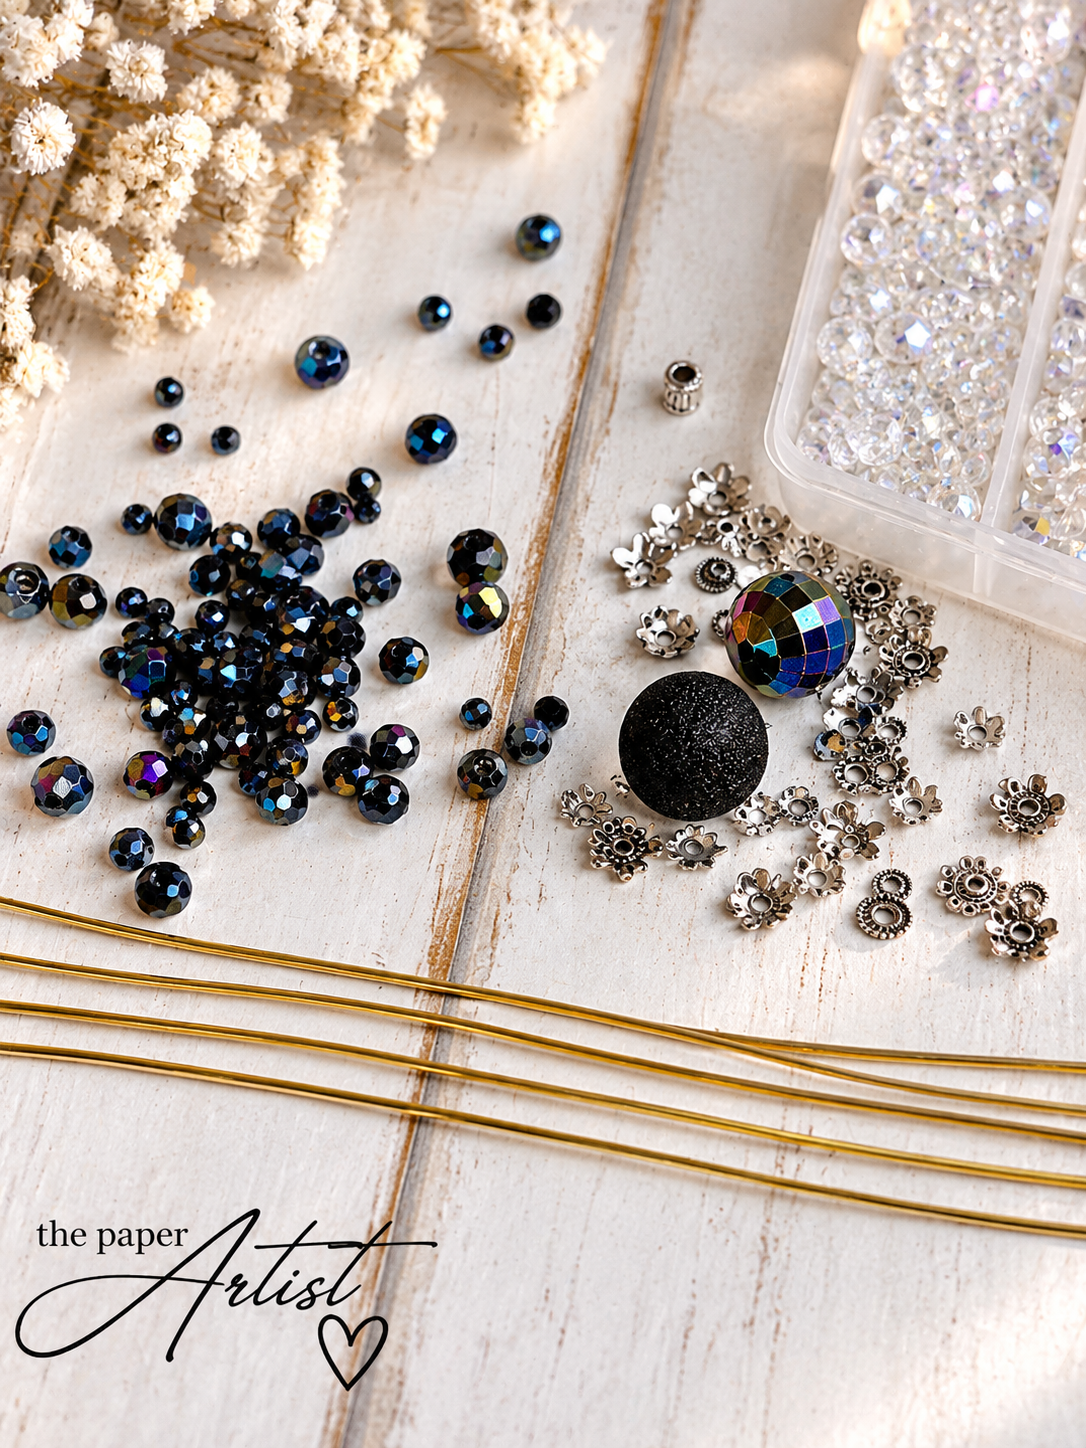
Here's what I used for my first beaded spider experiment:
16-gauge aluminum wire — four pieces cut to 8 inches each
Black AB beads in assorted sizes
White or clear AB beads in assorted sizes
Bicone and faceted round beads
A few decorative silver bead caps for each knee joint
One 16 mm black bead
One 12 mm bead for the head (I chose a gorgeous dark, iridescent faceted bead)
One eye pin
Wire cutters and jewelry-making pliers
A quick note about the wire: I used 16-gauge aluminum wire because that's what I had available.
Was it the perfect choice? I couldn't tell you. Remember, we're experimenting here!
The important thing is choosing wire that can hold its shape once you've added the beads and bent the legs into position.
And if you're wondering what AB beads are, AB stands for Aurora Borealis. It's the beautiful iridescent finish that gives beads that lovely rainbow shimmer when the light catches them.
Which, naturally, is exactly what a Halloween spider needs.
A little sparkle.
A little drama.
Possibly a tiny handbag.
Step 1: Let's Give This Spider a Body
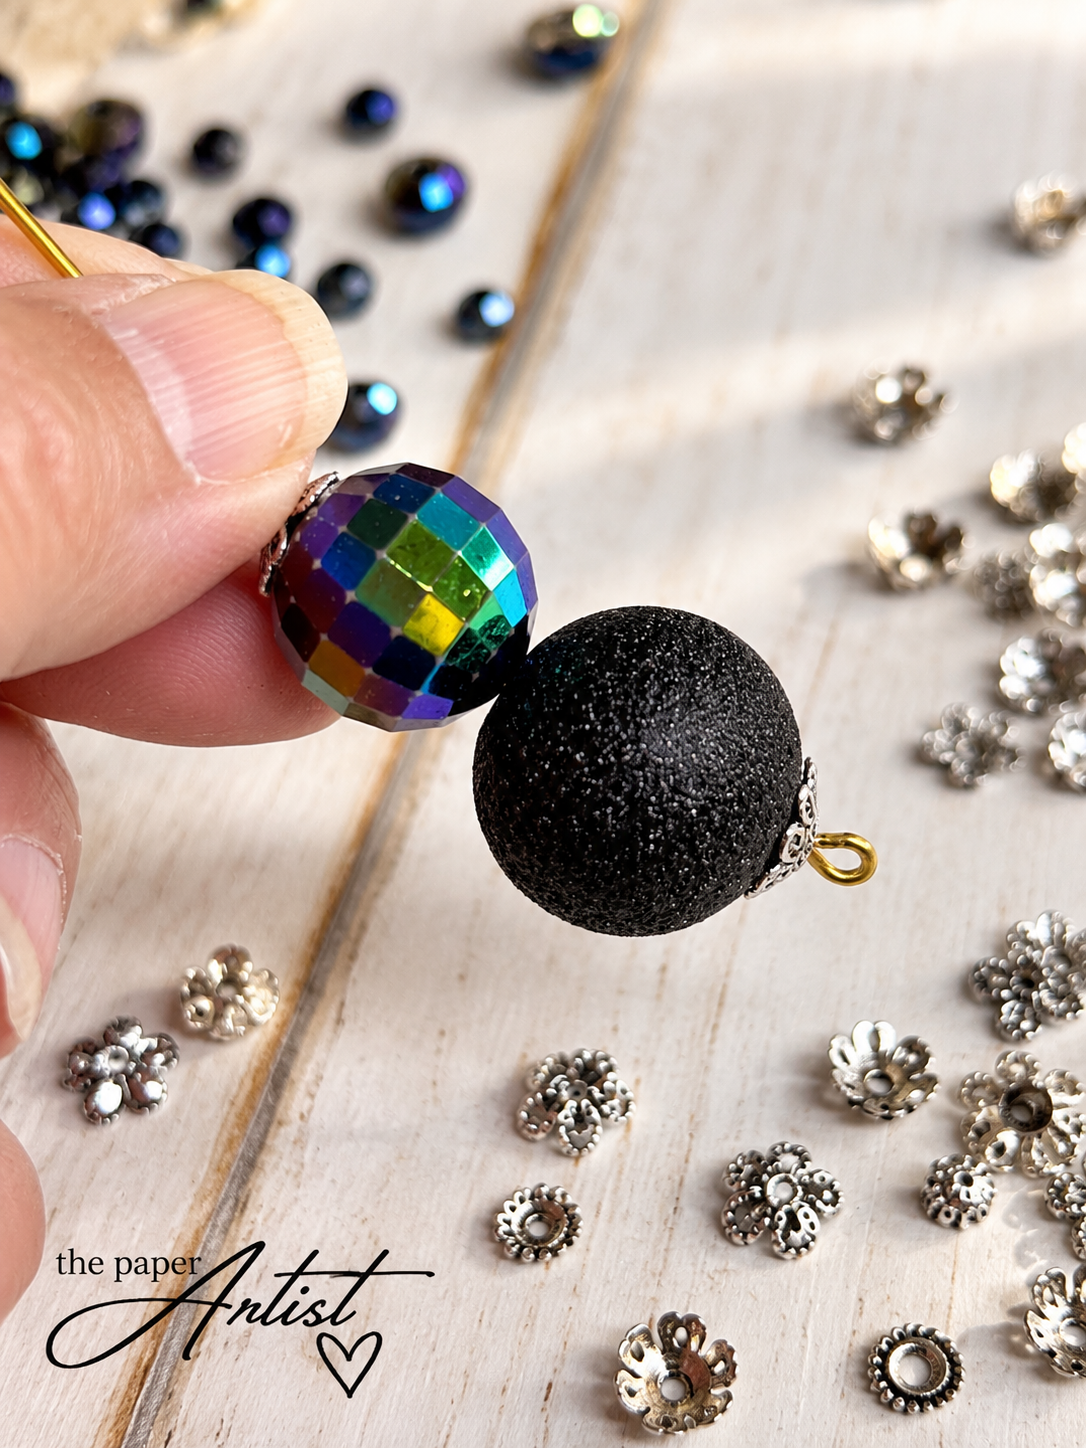
I started by assembling the spider's body.
Using an eye pin, I added the two body beads, with decorative bead caps for a little extra detail.
The larger 16 mm black bead creates the rounded body, while the smaller 12 mm iridescent bead becomes the head.
I absolutely loved the contrast between the textured black bead and that colorful, almost disco-ball-looking head.
Already, this spider was showing signs of having a personality.
At this point, though, she was basically two beads on a pin.
Not terribly intimidating.
Step 2: Eight Legs. Four Pieces of Wire. Stay With Me.
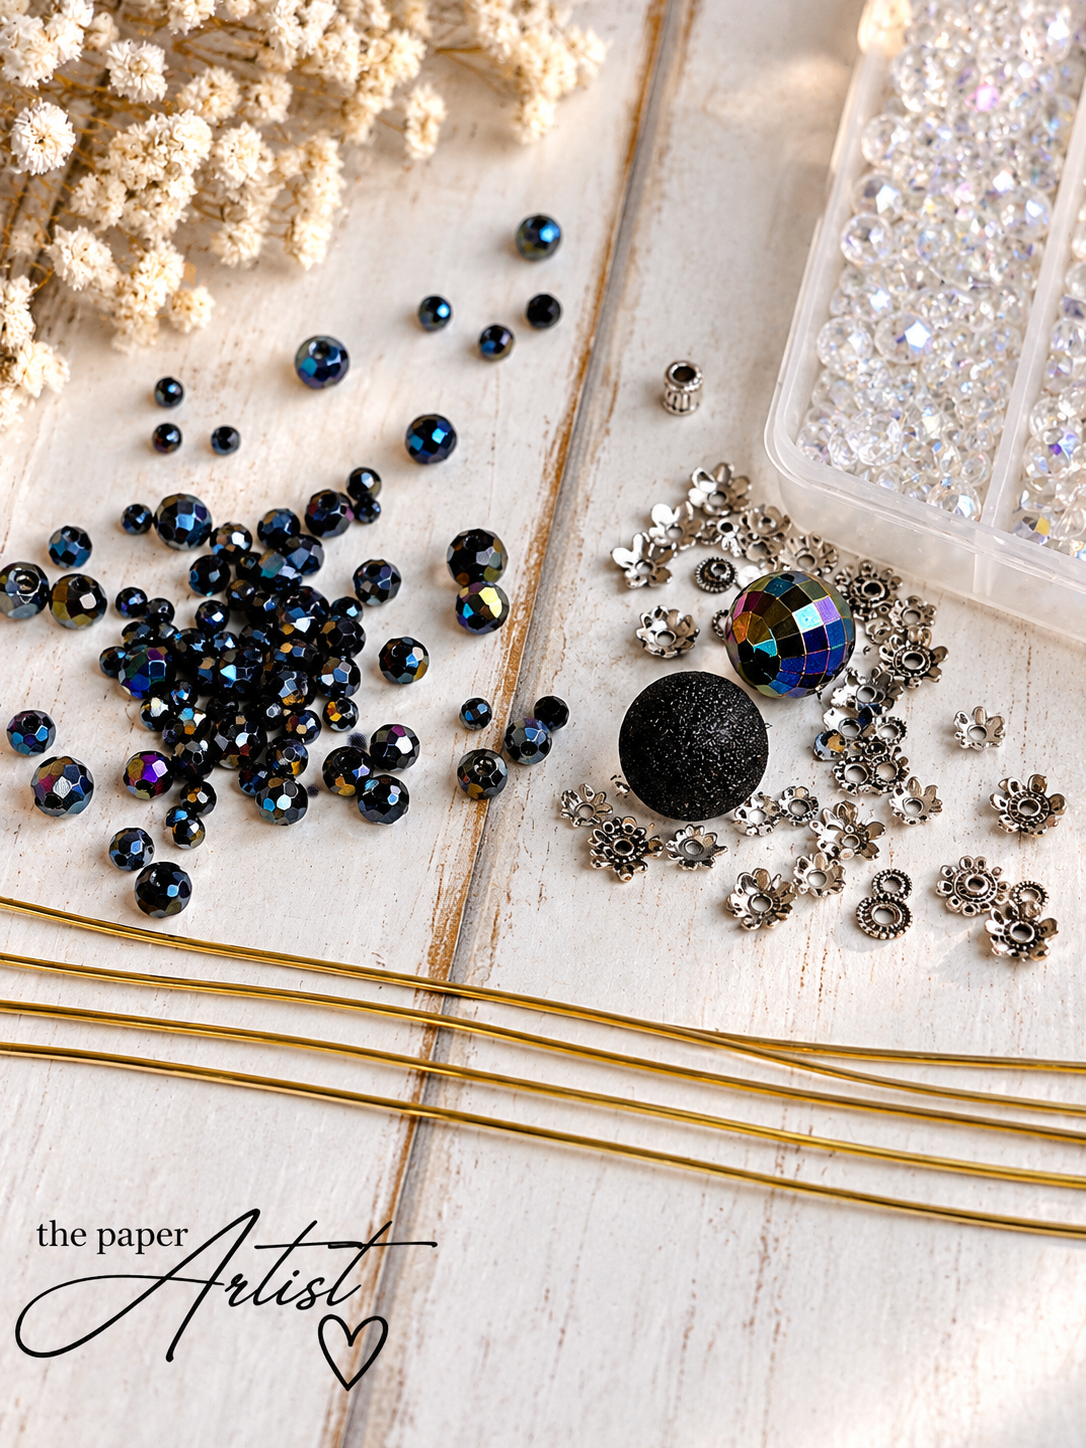
Here's where things started getting interesting.
I cut four pieces of 16-gauge aluminum wire, each measuring approximately 8 inches long.
Now, you might be wondering how four pieces of wire are going to give us eight legs.
Well, each piece has two ends.
Four pieces. Eight ends.
Eight spider legs!
See? We're practically scientists already.
Next, I held all four pieces of wire together, found the middle, and gave them a few twists.
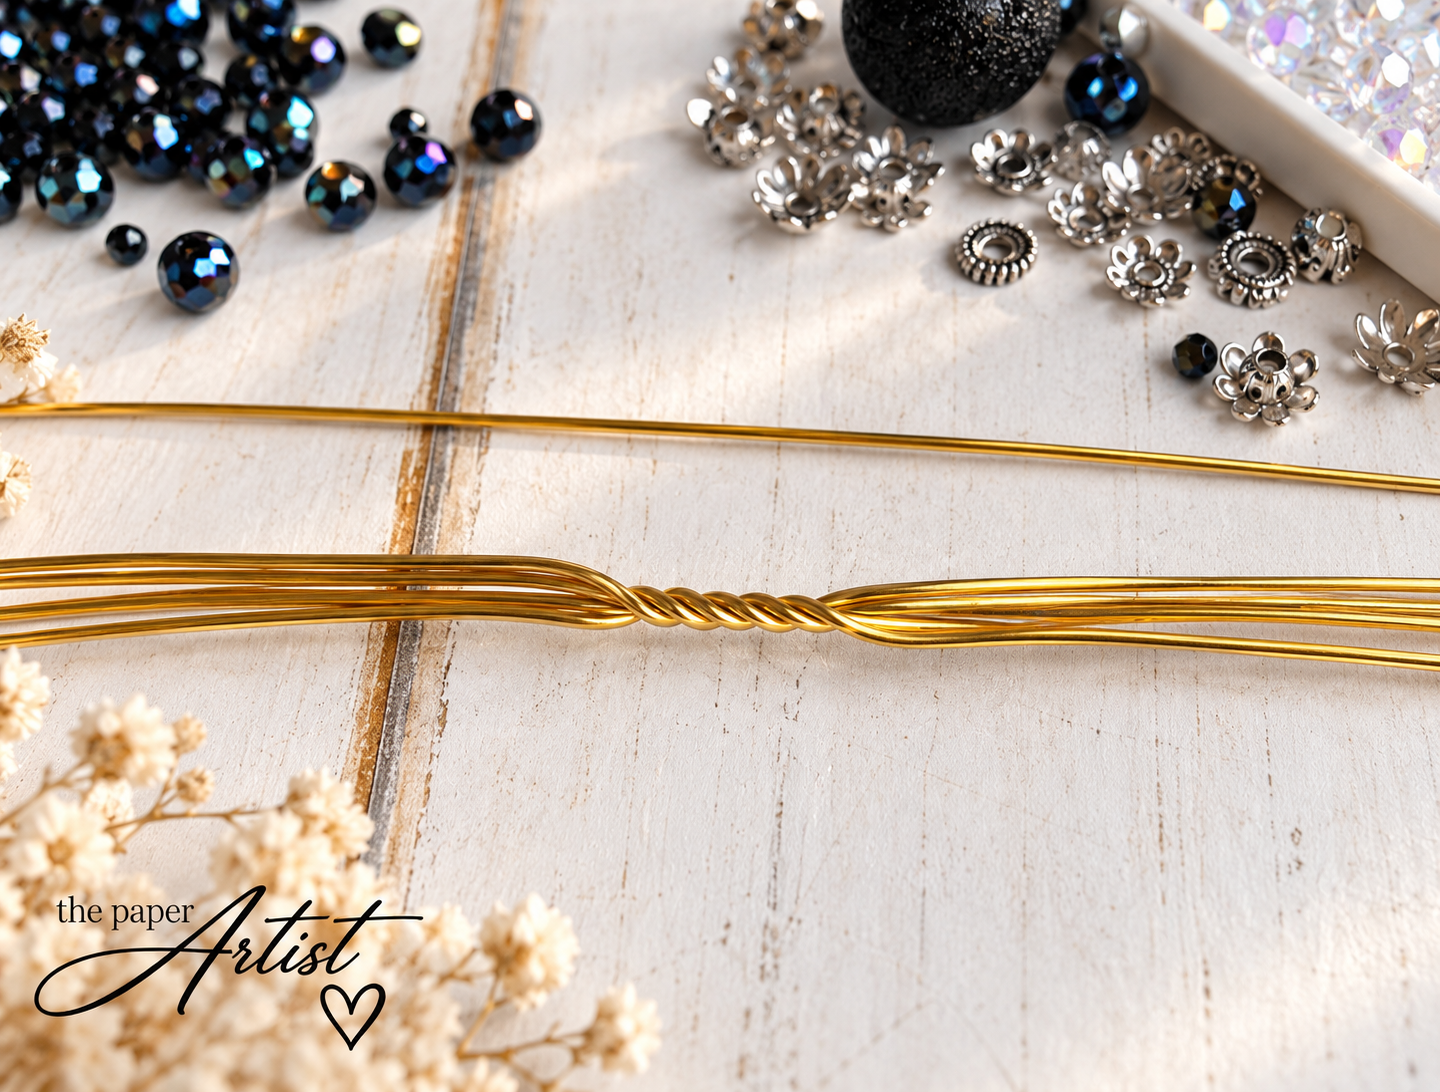
Nothing complicated. Just a few firm twists to hold everything together.
The idea was to create a secure center while leaving the eight wire ends available for beading.
Little crafting tip: Keep the twisted center reasonably compact. You don't want a giant lump of wire in the middle of your spider.
We're making a spider, not repairing the plumbing.
Step 3: Attaching the Legs
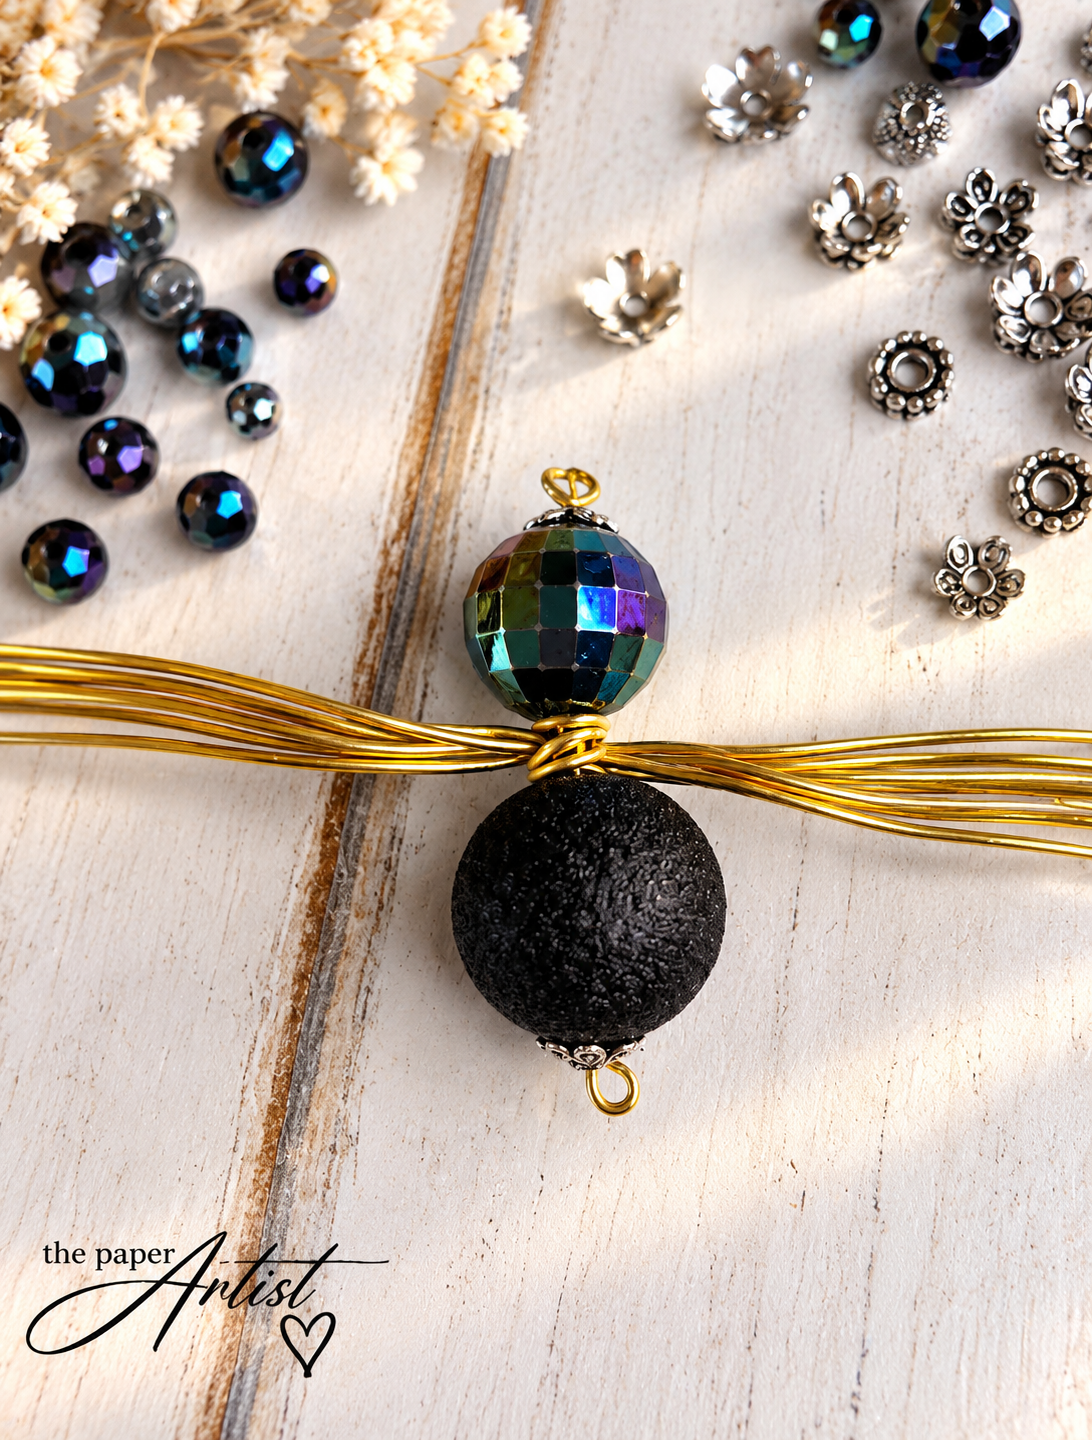
With the body assembled and the wires twisted together, it was time to bring everything together.
I positioned the twisted section of wire between the spider's head and body, then carefully wrapped the wires around that connecting area.
I made sure to give them enough twists to hold everything securely.
This is important because those eight legs are eventually going to be covered in beads, and we certainly don't want the whole spider shifting around once she's finished.
After securing the wires, I gently separated the ends and spread them into a fan shape on either side of the body.

And there she was.
Sort of.
A head. A body. Eight long, skinny wire legs.
At this point, I decided this creature needed a name.
Ursula.
I don't know why. She just looked like an Ursula.
And once you've named your spider, there's really no turning back.
Step 4: Choose a Leg. Any Leg!
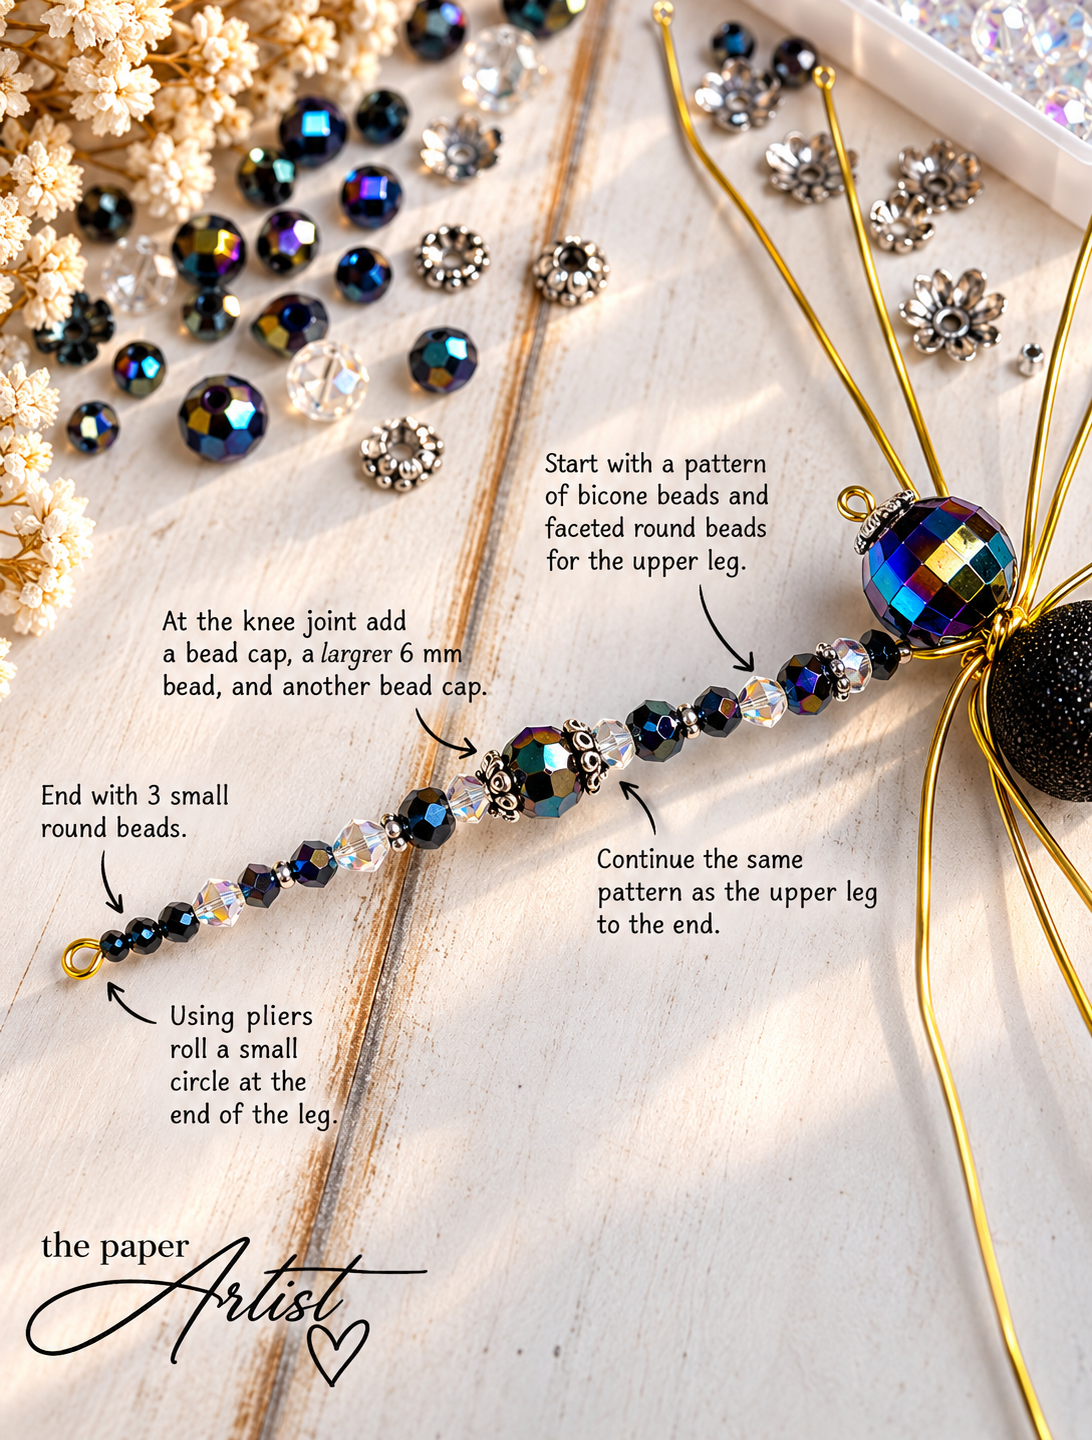
Now came the fun part.
The beads!
I chose one wire leg and started adding beads in a repeating pattern, mixing black AB bicone beads with faceted round beads and clear AB beads.
I played around with the sizes until I found a combination I liked.
There wasn't a complicated mathematical formula involved.
I was simply looking for a pattern that gave the legs some texture, sparkle, and a little visual interest.
I continued adding beads until I reached the point where I wanted the knee joint.
And that brings us to a very important question.
WAIT. DO SPIDERS ACTUALLY HAVE KNEES?
Because apparently this is the sort of thing that becomes extremely important when you're sitting at a craft table decorating spider legs.
I actually stopped to wonder.
And guess what?
YES! Spiders have knees!
Technically, a spider's leg has seven main segments, including one called the patella — the anatomical equivalent of a kneecap.
Who knew?
And here's another fascinating little fact: spiders use hydraulic pressure to help extend their legs. When that pressure disappears after death, the flexor muscles cause their legs to curl inward.
So there you have it.
We came here to make a Halloween decoration and accidentally wandered into a biology lesson.
The Paper Artist: Where crafting occasionally becomes educational, whether we intended it or not.
Anyway, back to Ursula's knees.
Step 5: Give Those Knees Some Jewelry
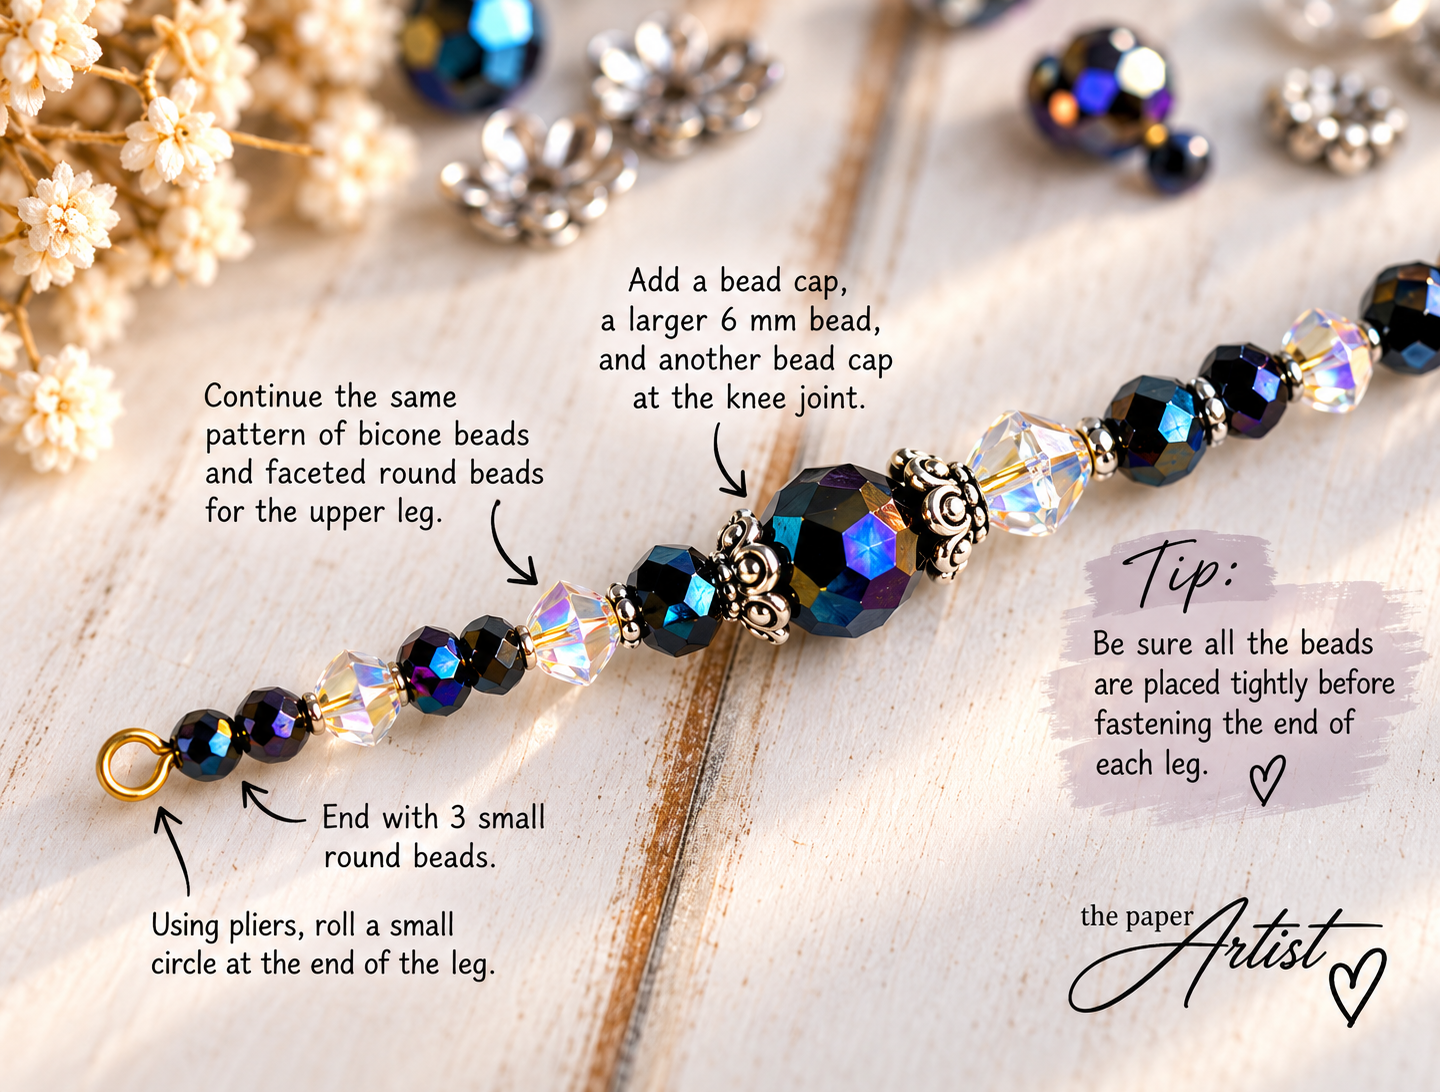
When I reached the knee joint, I added:
One decorative bead cap
One larger 6 mm bead
Another decorative bead cap
This creates a lovely little decorative feature right where the leg will eventually bend.
It also gives the leg a more interesting shape instead of looking like one long, straight string of beads.
Once the knee was finished, I continued adding beads using the same general pattern I'd used on the upper portion of the leg.
Toward the end, I finished with three small round beads.
Then, using my jewelry pliers, I carefully rolled the remaining wire into a small loop to secure everything in place.
A Very Important Tip: No Loose Knees Allowed!
Before making that final loop, push all your beads snugly together.
Make sure there are no unnecessary gaps between them.
Once you're happy with the fit, use your pliers to close the wire into a small loop.
This helps keep the beads secure and prevents them from sliding around on the wire.
Because the last thing Ursula needs is loose beads and rattling knees.
She's a sophisticated lady, not a shopping cart with a wonky wheel.
Step 6: Repeat. Seven More Times.
Now that I had one leg finished, it was time to repeat the process on the remaining seven.
Yes.
Seven.
More.
Legs.
This is the point where you might want to refill your coffee.
I followed the same general bead pattern on each leg, adding the decorative bead-cap knees and finishing with three small beads and a little wire loop.
I wanted the legs to coordinate, but I wasn't concerned about making every single bead placement absolutely identical.
This is handmade.
A little variation adds character.
Besides, I seriously doubt real spiders are standing around comparing their knees.
One thing I learned: Once you've created a bead pattern you like, it's much easier to follow it for the remaining legs than to reinvent the design eight separate times.
And if you're working with several different bead sizes, keeping them organized before you begin makes the process much more enjoyable.
Eight legs are quite enough to keep track of without chasing runaway beads across the craft table.
Step 7: Ursula, Flat as a Pancake
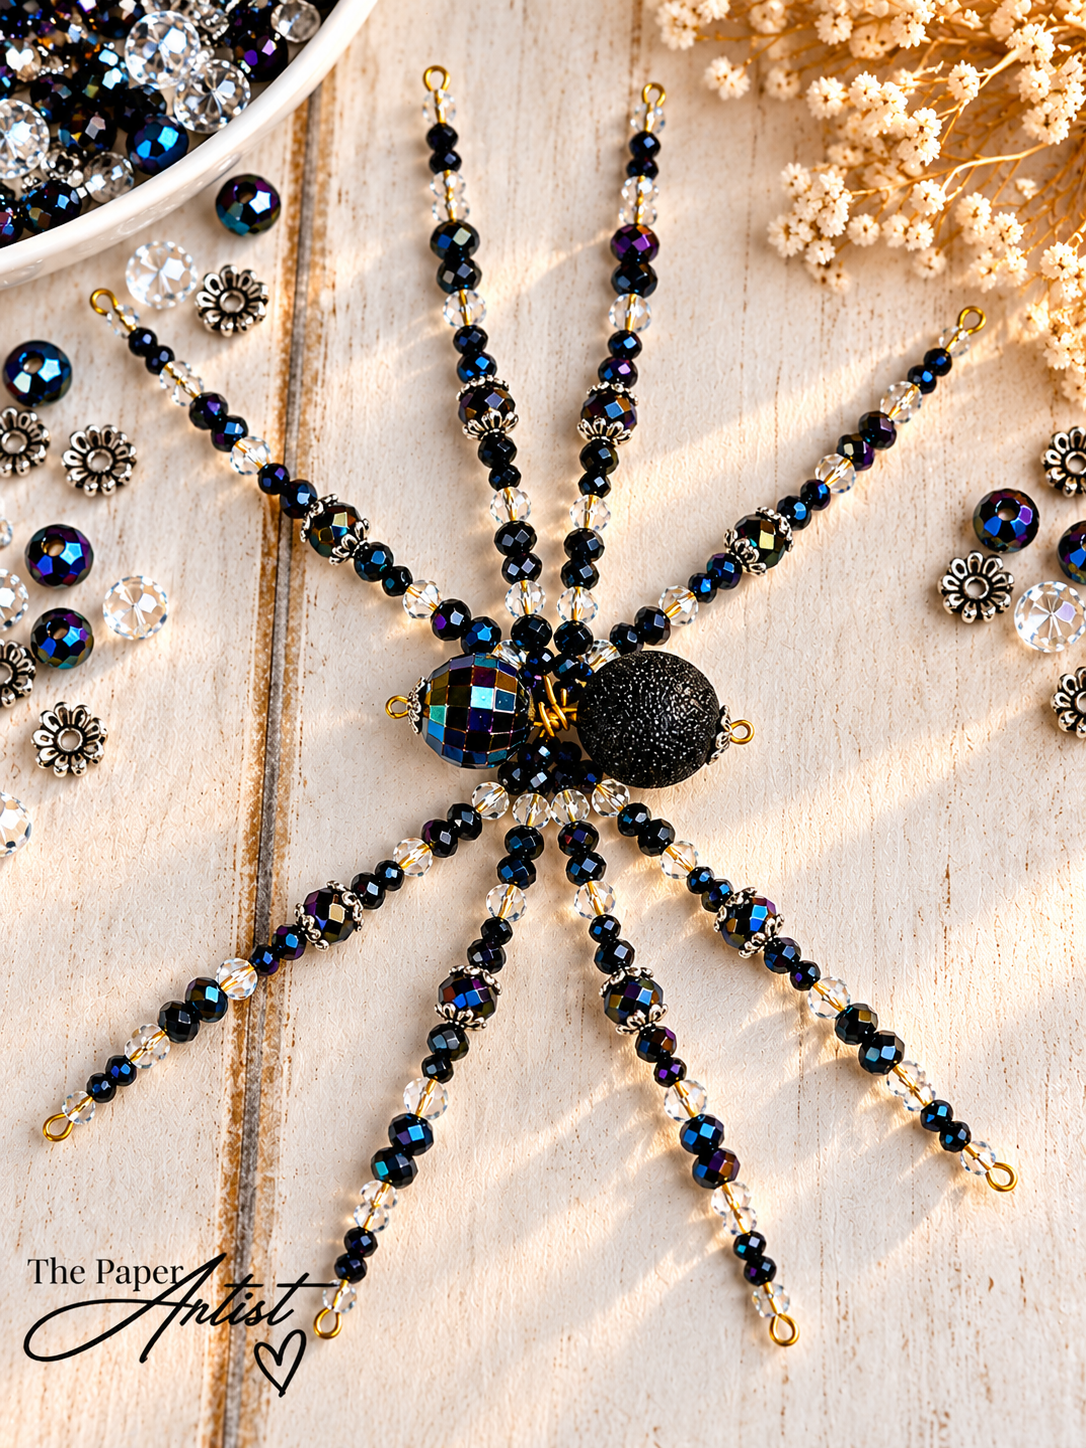
Well, would you look at that!
Eight finished legs.
A head.
A body.
And one very flat spider.
At this stage, Ursula looked like she'd been run over by a very small truck.
But this was exactly where I wanted her.
With all eight legs beaded and secured, I could finally start giving her some shape.
And this, my friends, is where the magic happened.
Step 8: Time to Get Those Knees Bending!
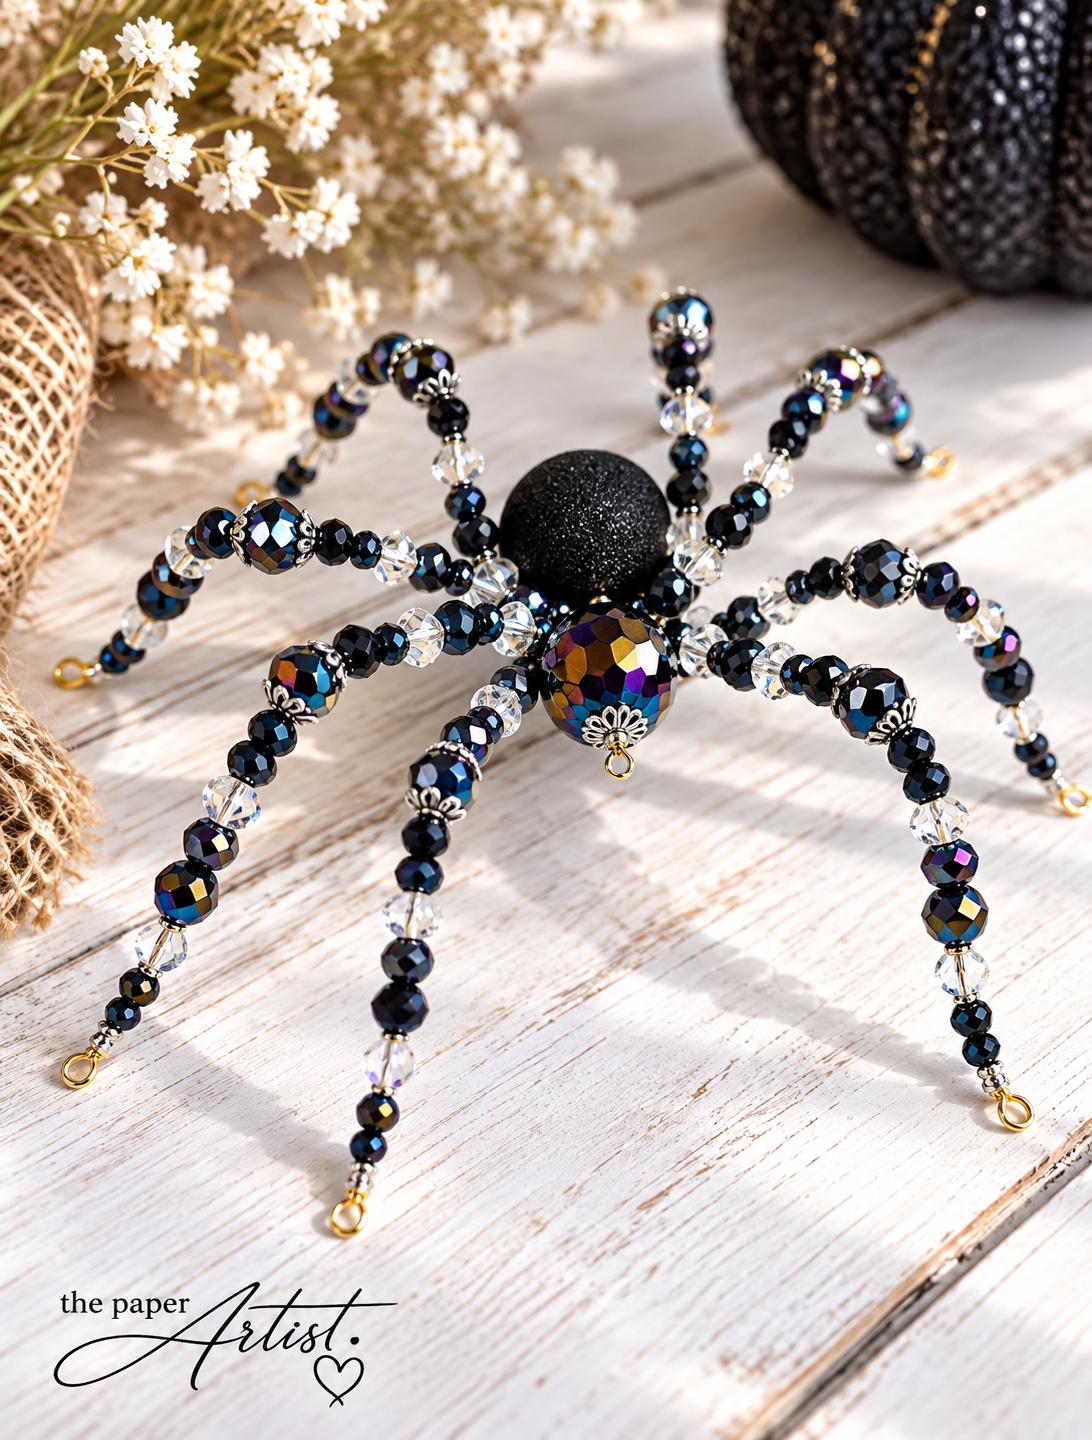
Working carefully, I began bending each leg into position.
I shaped the legs around those decorative knee joints, creating the raised, angled appearance of a real spider.
I adjusted them one at a time, spreading them out so Ursula could stand comfortably.
Well, as comfortably as a spider made from wire and beads can stand.
I made little adjustments until I was happy with the overall shape and balance.
My tip here is to take your time. Make small bends and adjustments rather than repeatedly bending the wire sharply back and forth in the same spot, which can weaken it.
And then...
There she was.
URSULA!
Eight fabulous legs.
A sparkling head.
A rather impressive collection of jeweled knees.
And an attitude that suggested she'd been waiting her entire life for this moment.
Ursula was officially ready to ramble!
So, Was This Experiment a Success?
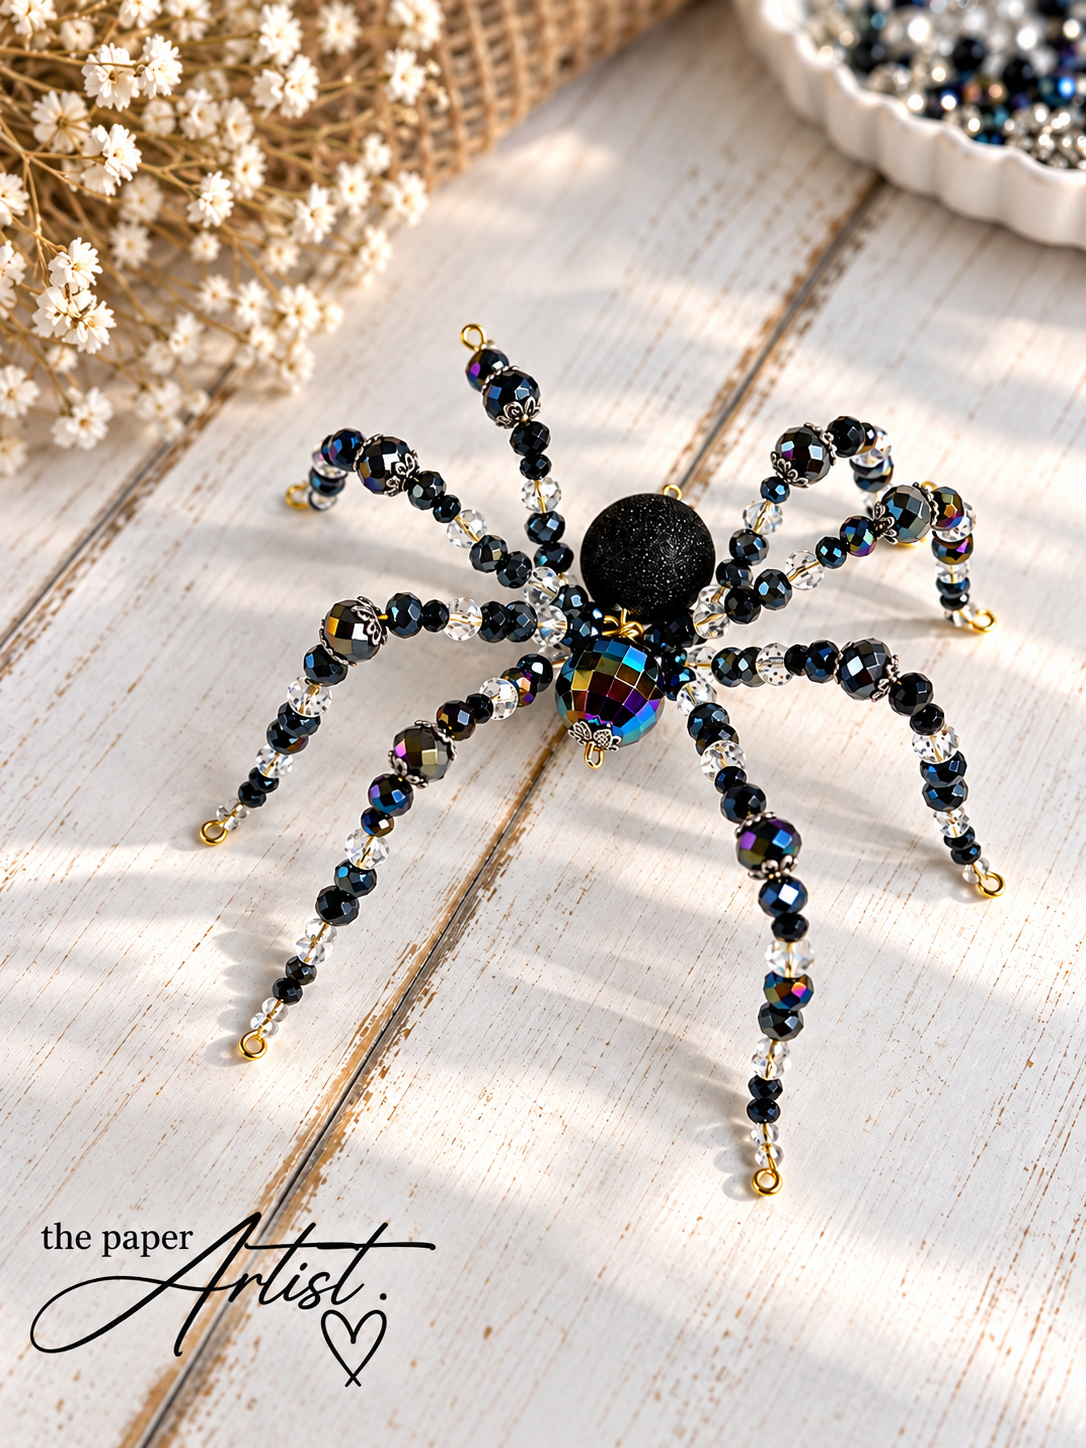
I'm going to say YES!
For a first attempt at making a beaded spider, I'm delighted with how she turned out.
Would I do anything differently next time?
Probably! That's the beauty of experimenting.
I'd be interested in trying different wire types, different bead combinations, and perhaps even making a smaller spider.
But what I really enjoyed about this project was discovering how something as simple as four pieces of wire and a collection of beads could turn into a three-dimensional decoration.
And I learned a few things along the way.
My biggest takeaways from this project:
You don't need to be an expert to try something new.
Experiment with your bead pattern before committing to all eight legs.
Secure the wire foundation before adding beads.
Keep your beads snug before closing each wire end.
Take your time shaping the finished legs.
And apparently, spiders have knees. Who knew?
Sometimes the best crafting projects are the ones where you have absolutely no idea whether they're going to work.
You simply sit down, gather your supplies, and give it a try.
If it works, wonderful!
If it doesn't, well, you've probably got a pretty good story to tell.
And around here, a good story is almost as valuable as a finished project.
And Speaking of Spiders...
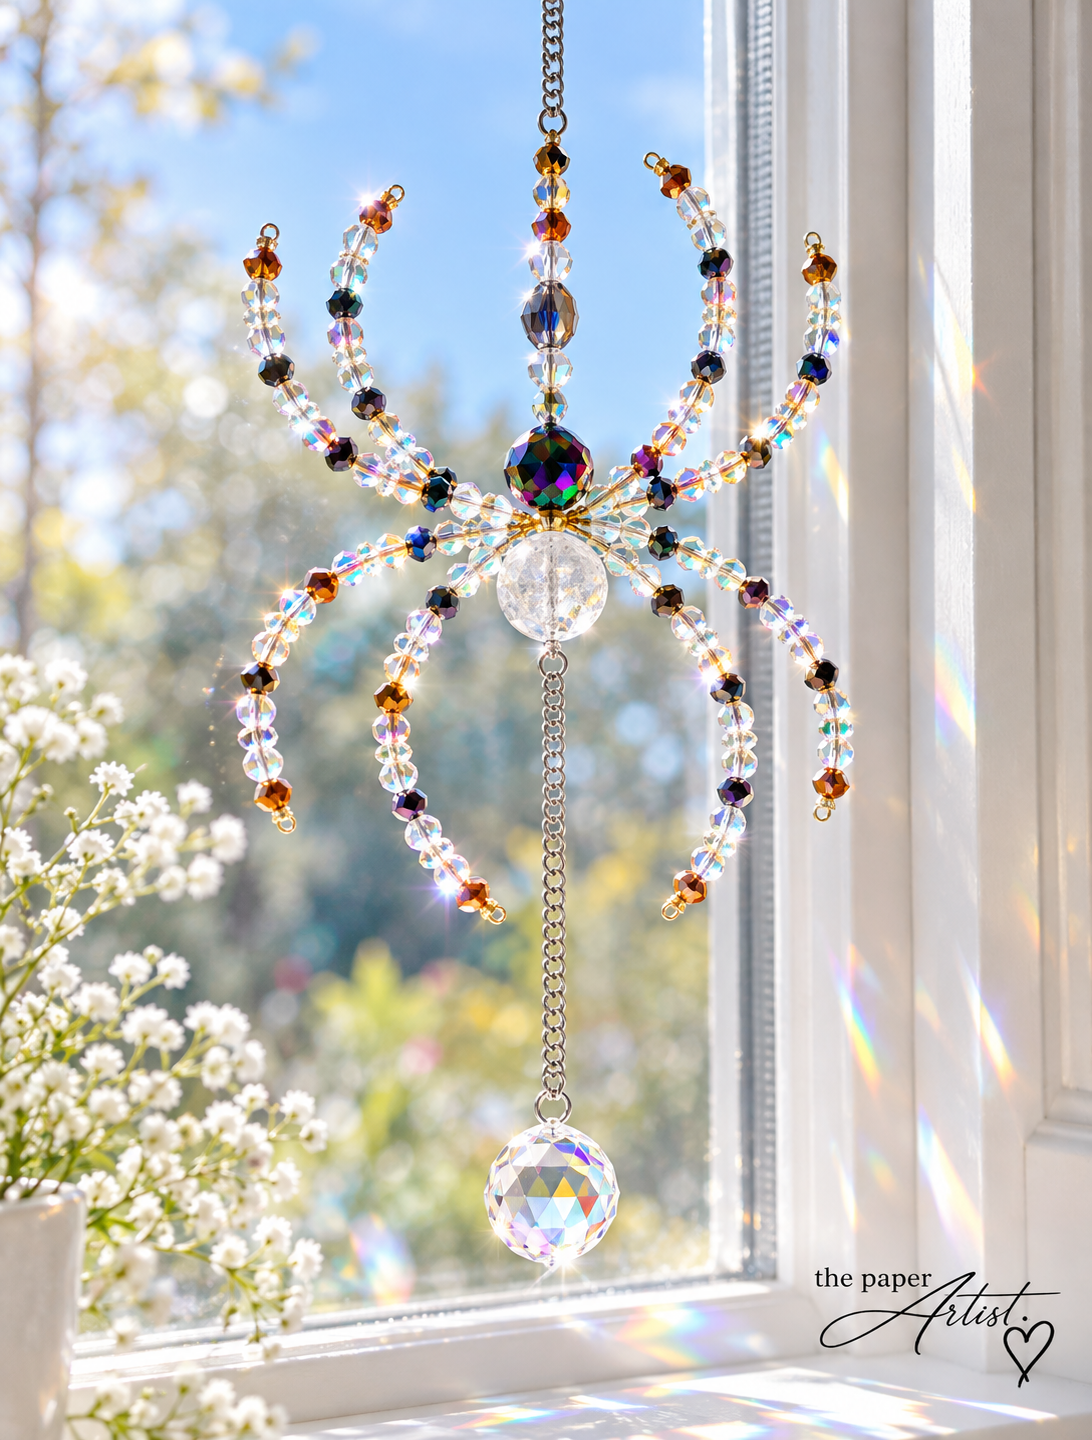
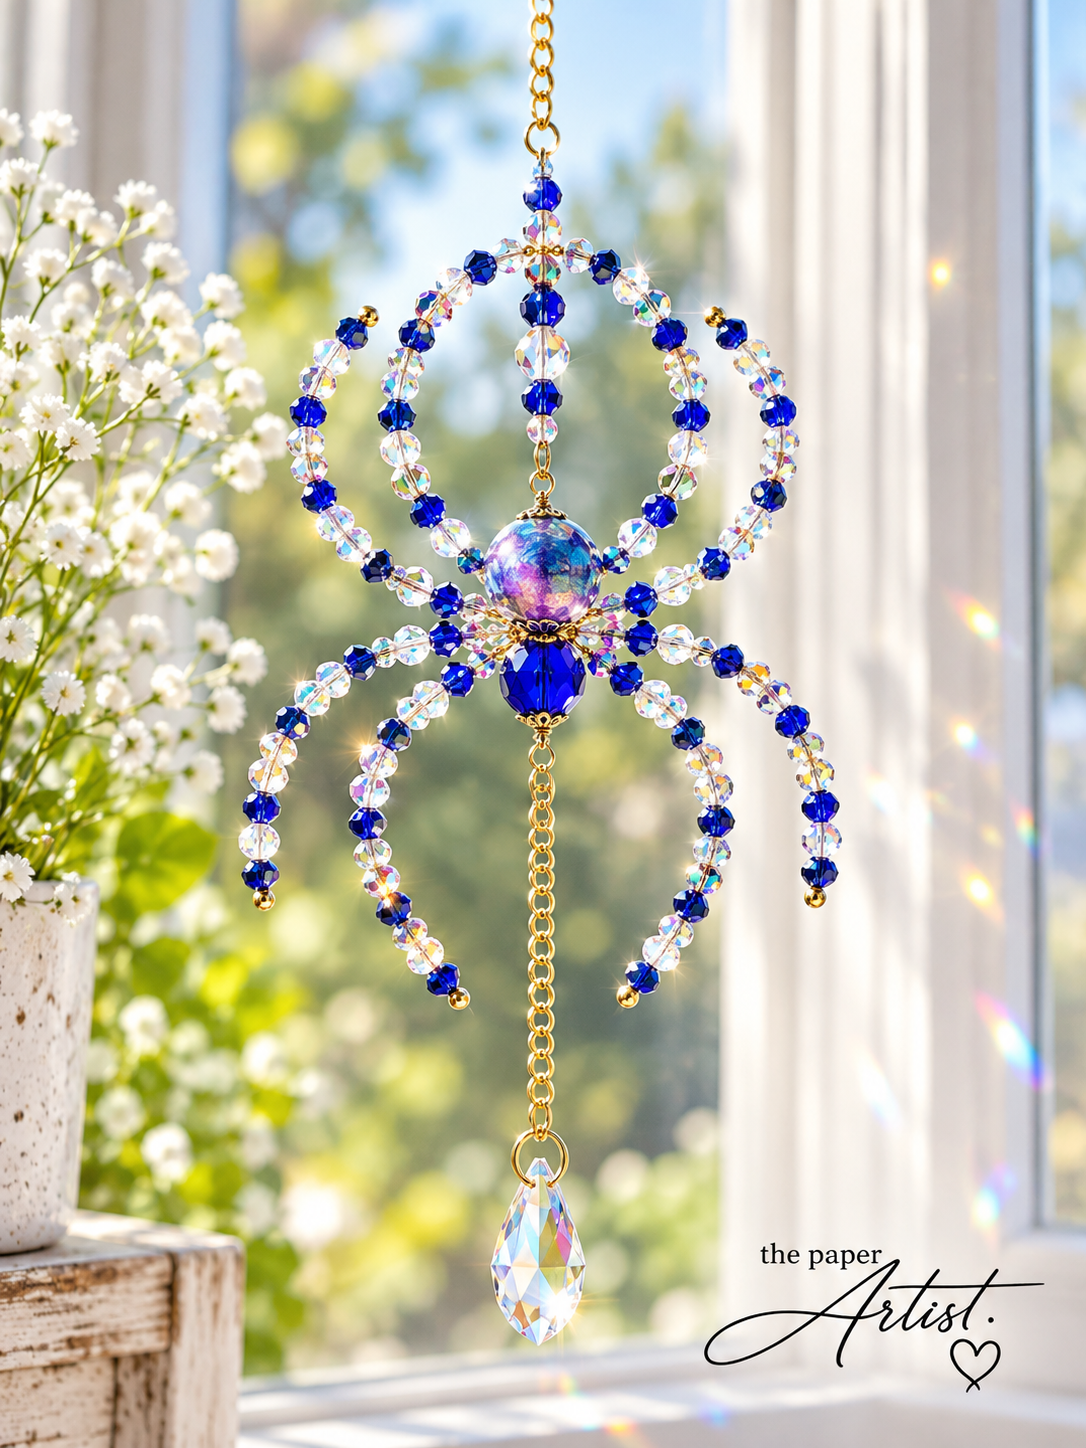
Ursula isn't the only eight-legged creature to have appeared at my craft table!
I've also created a couple of beaded spider suncatchers, and somehow they've never made an appearance here on the blog.
With Halloween approaching, it seemed like the perfect opportunity to introduce them.
Unlike Ursula, who's quite happy standing around looking glamorous, these spiders are designed to hang where they can catch the light.
I love how the beads sparkle and reflect different colors.
And there's something rather amusing about taking a creature that usually sends people reaching for a shoe and turning it into something pretty enough to hang in a window.
A little Halloween sparkle without the actual spider.
Because while I don't mind making beaded spiders, I still have no intention of inviting the real ones in for coffee.
One Last Thought From the Craft Table
I started this project with a few beads, four pieces of aluminum wire, and absolutely no guarantee that I'd end up with anything resembling a spider.
Somewhere along the way, I learned about spider knees, discovered that I could build eight beaded legs, and ended up with a new little creature named Ursula.
Not bad for an afternoon of experimenting.
And that's really what I love about crafting.
You don't have to know everything before you begin.
Sometimes you just have to be curious enough to try.
So if you've been thinking about making something new but you're worried you don't have the experience, consider this your invitation.
Grab the supplies.
Make the first cut.
String the first bead.
See what happens.
You might surprise yourself.
Or you might end up with a slightly questionable-looking spider.
Either way, I'd love to hear about it!
Now tell me — would you make a beaded spider, or are eight legs about seven too many for your liking? 😂
And if you've enjoyed Ursula's little adventure, pull up a chair again soon. There's always another experiment happening around here, whether it's jewelry making, handmade cards, notebooks, or something I've spotted in a dollar store and decided absolutely needs testing.
In fact, I've been putting a few Dollarama craft supplies through their paces lately, and those adventures are coming to the blog very soon.
Some have been surprisingly wonderful.
Others... well, you'll have to come back and see.
Until next time, happy crafting!
The Paper Artist
Where the coffee is hot, the beads are everywhere, and apparently even the spiders have names.
