
Mer-mazing Shaker Card
Our Design Team project this time was Ocean/Mermaid theme. A wave crashed over me and I knew it had to be a shaker card with bright blues and greens and a touch of purple. Meribelle Mermaid Swimming was the perfect image and background to create this card. Meribelle is popped up on foam tape to create dimension inside this ocean bubble in the form of a Rocker Card. She swims above tons of glitter and shaker bits that float all over when the card shakes. The sentiment was printed from Coral Mermaid Quotes.
Skill level: Easy!!

This card is so much easier to create than you might think.
The images and background are going to be the easiest part of the project! There isn’t even going to be any coloring - unless of course you love to color and then you can use the black and white image to color the Mermaid.
So let’s start there, with the image and the background available from Polkadoodles crafting as a digital download. Purchase the image, download it to your computer, open it and the files will look like this ( only on separate pages):

You simply print the images from your download files. I printed 2 of the colored image that includes the background. If you want to color the image yourself you would print the file with the black and white image.
Using a die or cutting machine cut a 5 inch circle centered around the mermaid image on one of the printed copies. If you don’t have either you could use a plate/saucer/bowl to trace around the 5 inch diameter and then cut with scissors.
This brings us to circles:
There are a lot of circles going on, so again, circles are usually a shape that most crafters have in their die cut stash, or perhaps have a Cricut machine or something similar. The project will require a few more 5 inch circles.
3 - 5” circles cut from cardstock (preferably an aqua color for this project)
Create a circle frame with 1 of these circle cuts by turning it into a frame cut using your cutting machine with a 1/4 in frame. Or use a die to cut a quarter inch smaller from the 5 inch circle.
5” inch circle cut above from the background paper and image.
5” inch circle cut from window sheet or clear packaging.
1 1/2” circle cut from around a printed version of the sentiment. Print the sentiment from Coral Mermaid Quotes and use a circle die to cut it out.
1” circle cut from white cardstock (scrap from cutting out the sentiment)
3/4” circle cut from the scrap of the background pattern paper.
Going back to the Mermaid image: Using the 2nd printed copy of the mermaid and background - fussy cut the mermaid out of the background. Don’t worry if you don’t get it perfect, the same image is going to be behind this one, so it will never be noticed how perfectly it is cut.
After cutting the mermaid image I used some stickles all over the mermaid tale to add sparkle and glitter, and allowed for that to dry.
Back to the circles:
Adhere the background printed circle to one of the 5” inch aqua circles.
Using the remaining 5” cardstock circle, fold it in half. When it meets perfectly score the fold line to create a nice crease in the paper. This piece will be glued to the back of the background panel ( be sure it is centered on the bottom of the background) to create the rocker part of the card.
Adding half of a 5 inch circle to the inside of the rocker mechanism provides a place to write a personal message on this positively Mermazing Card!
Use foam tape on the back of the mermaid image that was cut out and adhere the image overtop of the same image on the background panel. Brush a bit of cornstarch or anti static powder around the edges of the foam to be sure there is no “sticky” residue to interfere with the upcoming shaker bits.
Using liquid glue around the edge, adhere the 5” window sheet panel to 5” inch aqua cardstock circle frame. Be sure there is no excess glue coming out from behind the frame onto the window sheet. Allow this to dry for a sec.
Use narrow foam tape to create a layer of dimension around the circle frame. Be sure the foam tape is hidden behind the cardstock frame.
This is a good time to a apply a little brushing of anti static powder or cornstarch to the window sheet piece to cut down on static, in order for the shaker bits to move freely within the shaker compartment.
Lay the background panel down flat on your work surface. Add all of your choices for aquatic looking shaker pieces on the top of that circle background layer.
Peel the backing from the circle frame ( window panel ) and adhere to the background circle layer. Press firmly around all of the edges to be sure it is adhered tightly.

At this point the shaker card is almost complete, there are just a few little last minute details to finish!
There are 3 small circle die cuts remaining. We are going to turn those into bubbles. Bubbles seem fitting for a mermaid/ocean themed shaker card that is actually shaped like a bubble, right?!
The smallest circle already has bubbles as it was cut from the scrap paper of the background scene. I used an epoxy sticker (Amazon) over the top of this circle to create dimension and give this circle the look of an actual bubble.
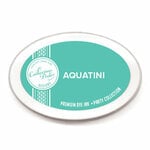
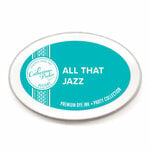
For the medium circle and the sentiment circle I used a blending brush and inks - CP All that Jazz & CP Aquatini to blend around the circles to create bubbly looking color.
I then adhered these to the bottom right side of the card making sure they didn’t impede with the rocking motion of the card.
The card is now ready to rock back and forth in gusty waves, or give it a shake to watch flakes of sea coral and other water bits float around Meribelle Mermaid as she swims about under the sea.

I hope you have as much fun creating this card as I did! Let me know in the comments below!