
Grab your coffee, pull up a chair, and welcome back to 5 Minute Monday!
If you've been following The Paper Artist for a while, you might remember my original 5 Minute Monday series, where I shared quick and easy cardmaking ideas that didn't require hours at the craft table.
I've always loved making elaborate cards with layers, coloring, die cuts, and all those wonderful little details. But sometimes we just want to sit down, make something pretty, and get on with our day.
And that's why I'm bringing back 5 Minute Monday!
A little creativity, a few supplies, and a handmade card without turning the entire craft room upside down.
Well, that's the theory anyway. My craft supplies have never been particularly cooperative when it comes to staying tidy.
For today's Christmas edition, I'm sharing two cards using the same basic design but two slightly different approaches.
And there's a little bonus!
The Christmas patterned papers I've used are my own creations, and I'm sharing a free printable so you can make these cards too!
A Little Christmas Paper from My Craft Table to Yours
I've been having a wonderful time creating my own collection of Christmas patterned papers.
Snowmen in cozy plaid scarves, snowy evergreens, pinecones, berries, and all those lovely traditional Christmas colors have been finding their way onto my computer screen.
And once I'd finished designing them, I naturally had to make something!
Because creating beautiful patterned paper and then refusing to cut into it is a very real problem in the crafting world.
I may have some experience with that.
For today's cards, I've chosen two designs from my collection.
The first features cheerful little snowmen, while the second uses a more traditional arrangement of evergreen branches, pinecones, and red berries.
Both are included in the free printable I'm sharing today.
Your Free Christmas Paper Printable
I've put together a 6×6-inch sheet of coordinating Christmas paper strips for you to download and use in your own cardmaking projects.
You can recreate today's cards or use the strips in an entirely different design.
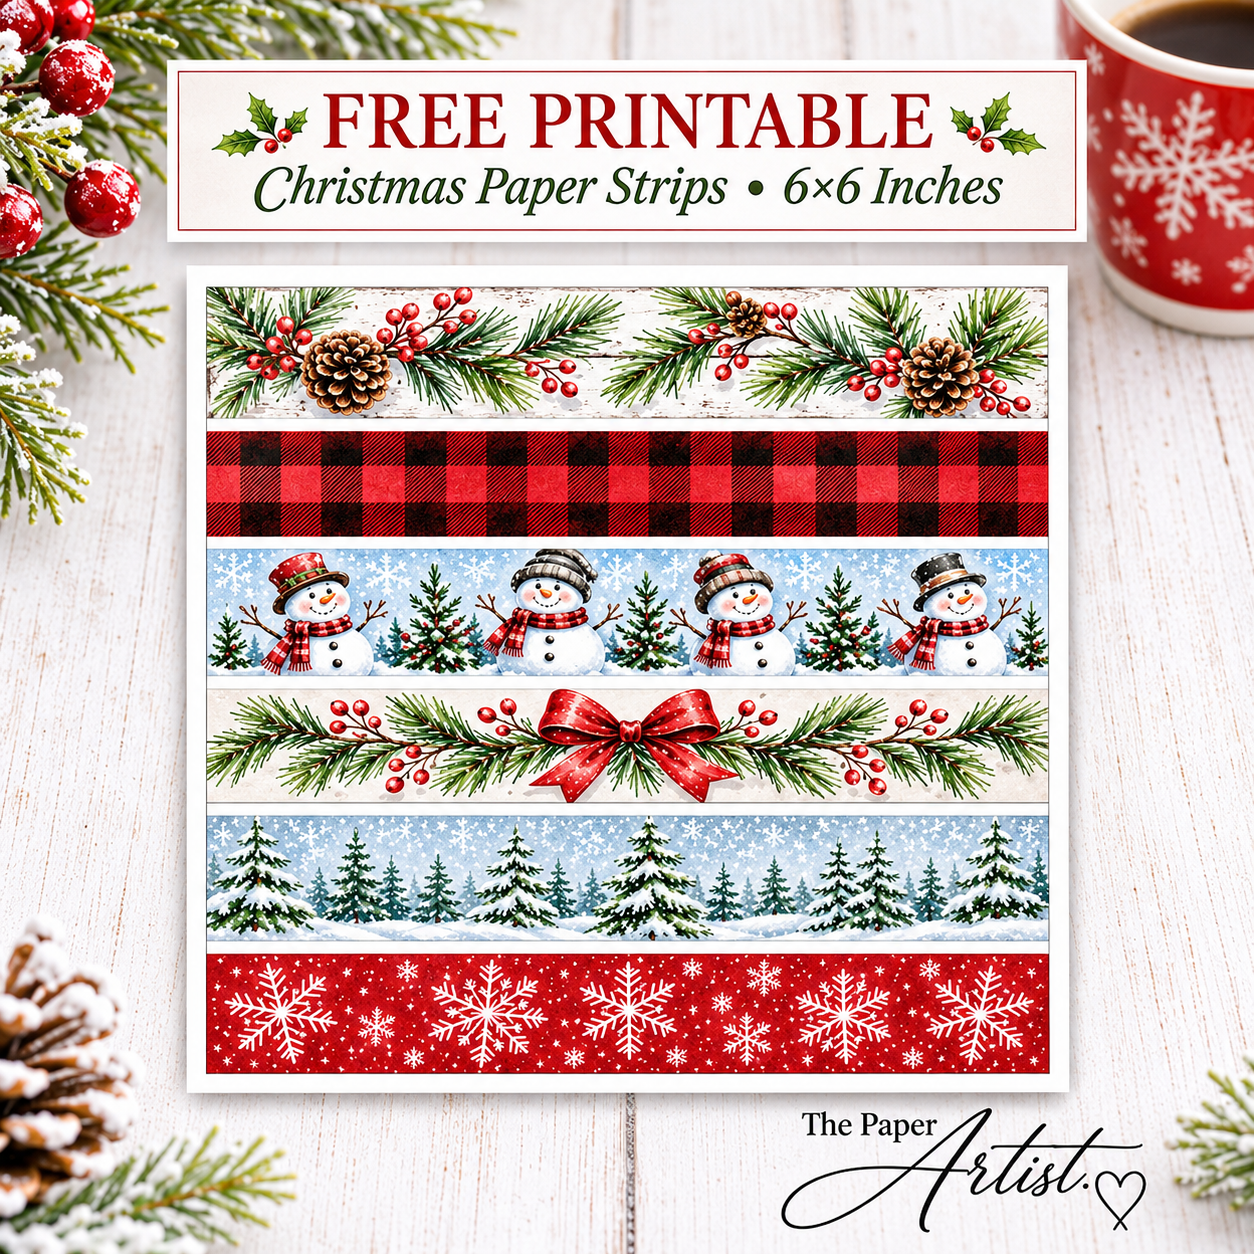
FREE DOWNLOAD — Christmas Paper Strips (6×6 inches)
A Quick Note About Printing
For the best results, download the file before printing.
Use these settings:
Print size: Original size (100%)
Scaling: Do not select Fit to Page or Shrink to Fit
Print quality: High or Best
Paper: Good-quality white cardstock or presentation paper suitable for your printer
Color: Full color
The sheet is designed at 6×6 inches, so printing at its original size preserves the intended measurements.
You can print it on standard letter-size paper and trim away the excess.
Now, let's put those papers to work!
What You'll Need
Nothing too complicated today!
A standard A2 card base
White cardstock
Your favorite Christmas paper strip
Paper trimmer
Scoring board and scoring tool
Adhesive
Foam tape (optional)
Christmas sentiment
Ink or embossing supplies
Metallic paint or ink for splattering
A few coordinating gems
And, of course, a cup of coffee.
I don't believe that's technically a cardmaking supply, but it certainly helps.
Card One: Warm Wishes & Snowflake Kisses
Let's start with our cheerful little snowmen!
For this card, I decided to let Adobe Express do some of the work.
I created a digital panel sized for my card, added my snowman patterned paper strip, and positioned the sentiment directly in Adobe Express.
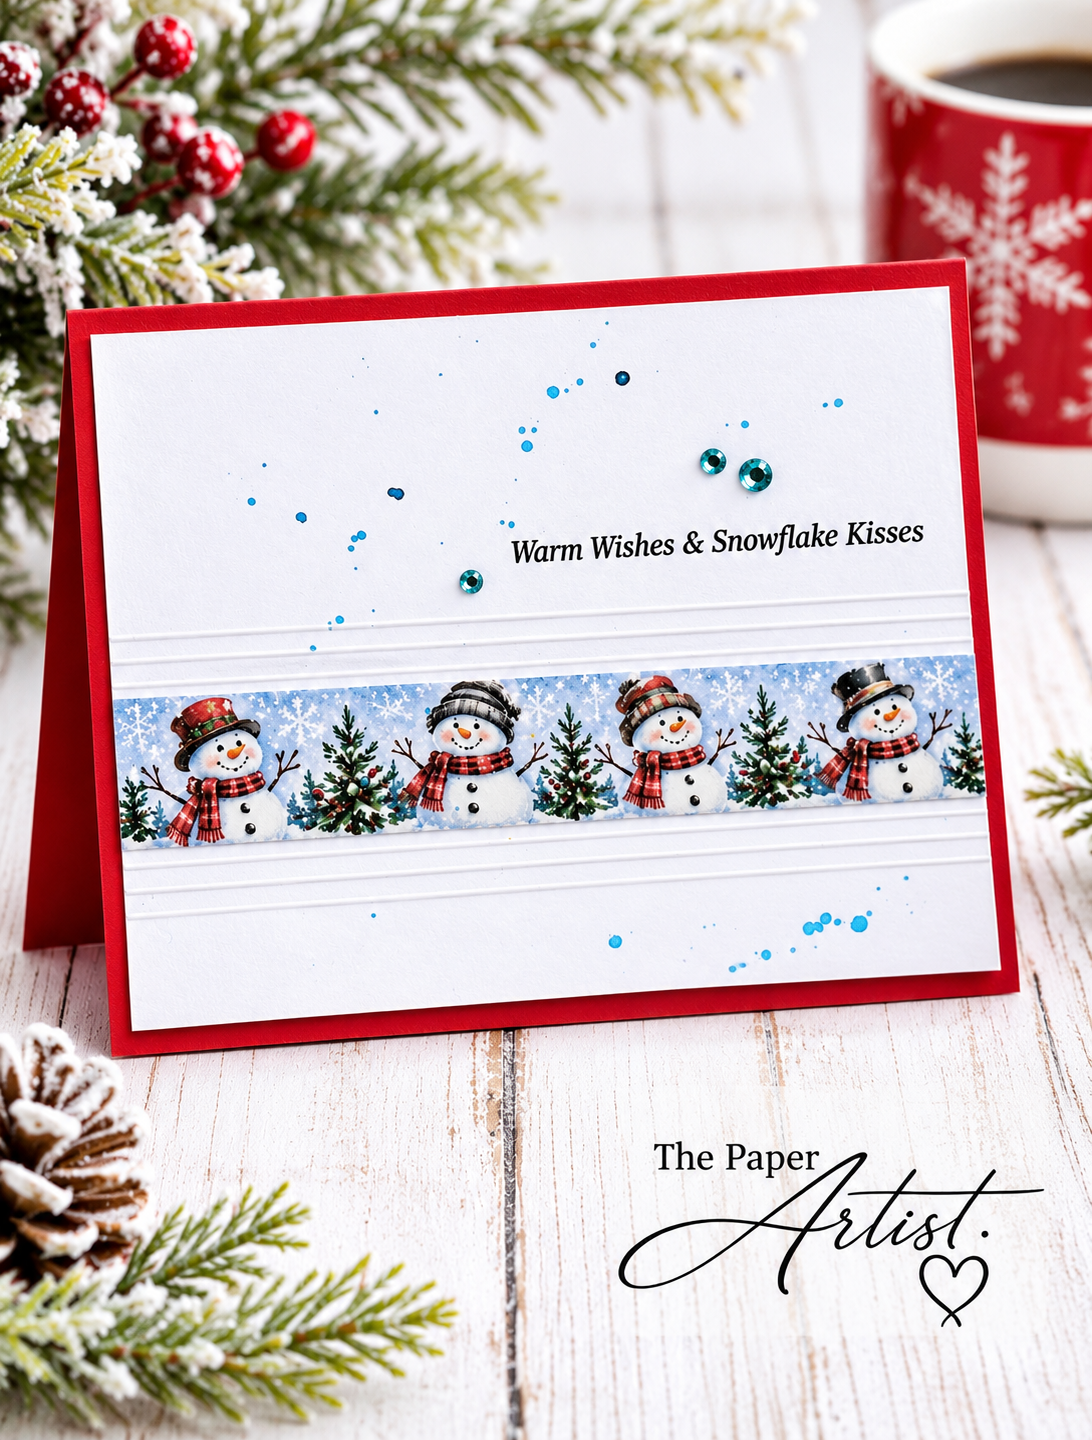
Warm Wishes & Snowflake Kisses
Once I was happy with the layout, I printed the panel.
This is one of the things I love about combining digital design with traditional cardmaking. You can do as much or as little on the computer as you like.
And if you're making several cards, having the patterned paper and sentiment already positioned can save a surprising amount of time.
Adding the Handmade Details
With my printed panel ready, I added a few blue splatters to give the background a little extra interest.
Then I reached for my scoring board.
I added three score lines above and below the patterned paper strip, spacing them ⅛ inch apart.
These little lines create a subtle embossed border that frames the snowmen beautifully.
It's one of my favorite simple cardmaking tricks.
No additional layers, no special dies, and no complicated techniques.
Just a scoring tool and a few minutes.
I finished the panel with a handful of blue gems and mounted it onto a red card base.
And there we have it!
A cheerful Christmas card with a little texture, a little sparkle, and four snowmen who look entirely too pleased with themselves.
Card Two: A Traditional Christmas with a Little Dimension
For the second card, I used another paper from my Cozy Winter collection.
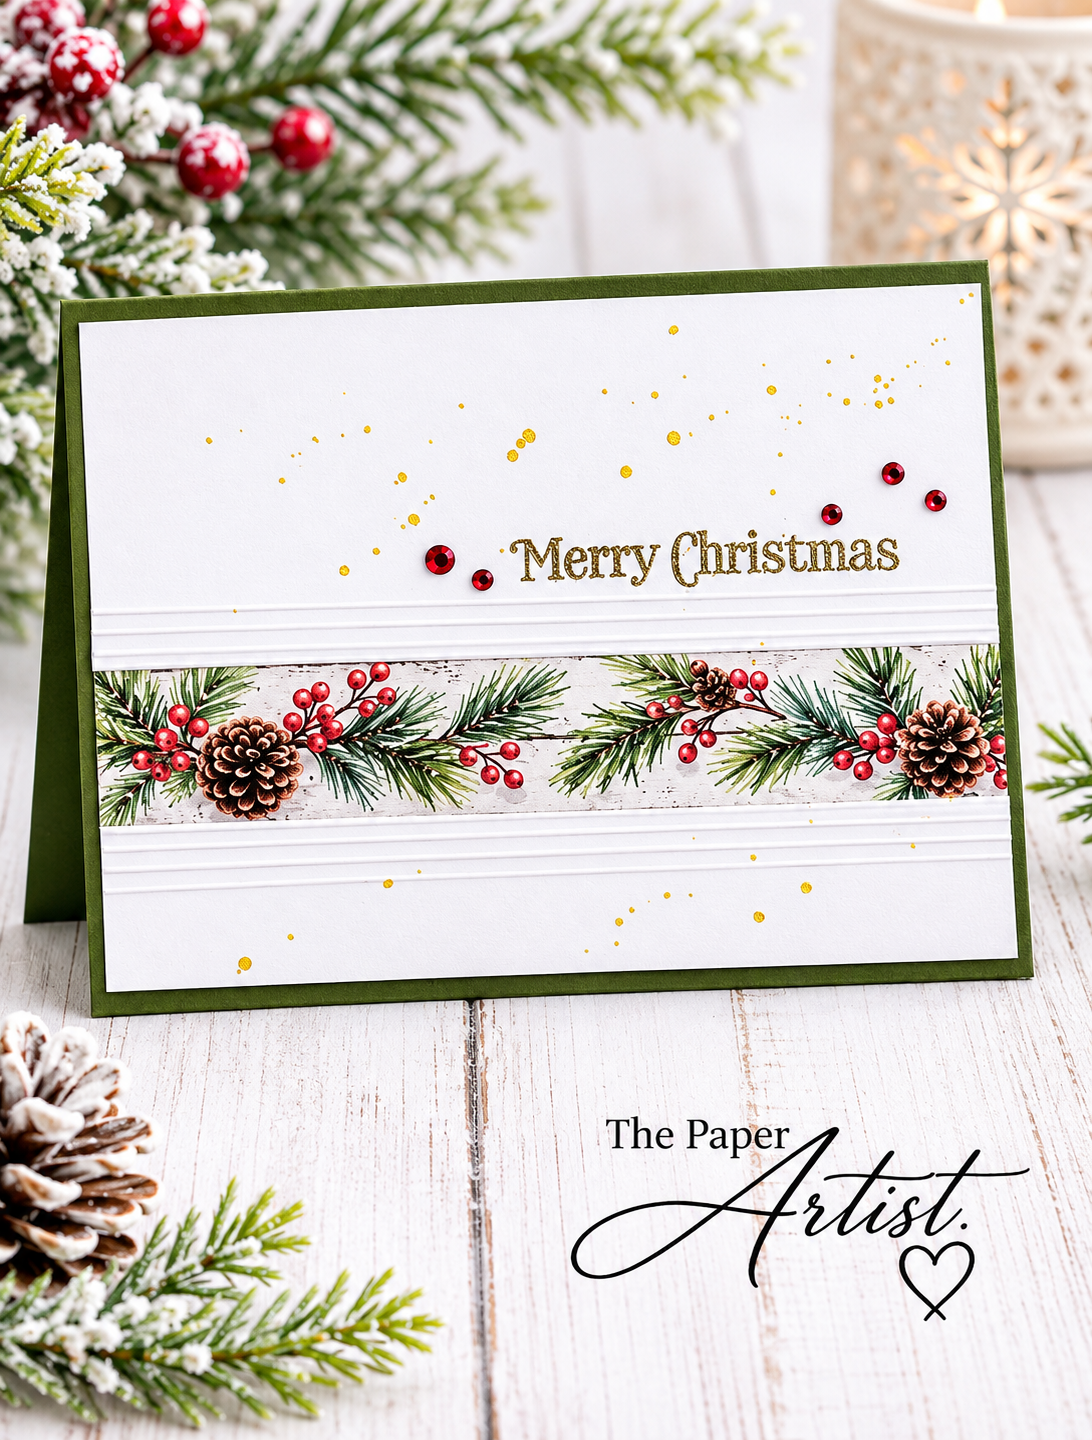
This one features evergreen branches, pinecones, and red berries.
I wanted a slightly more traditional Christmas look, so I chose a deep green cardstock to complement the patterned paper.
And this time, I changed the construction just a little.
Step 1: Prepare the White Panel
I started with a piece of white cardstock measuring:
5½ × 4 inches
This creates the main panel for the card.
Before assembling everything, I added a few gold splatters.
Nothing too heavy. Just enough to give the white background a little festive sparkle.
Step 2: Add the Score Lines
Using my scoring board, I added three score lines above and below the area where my patterned paper would sit.
Again, the lines are spaced ⅛ inch apart.
I love how these simple lines add texture to an otherwise plain piece of cardstock.
And the best part?
They don't add any bulk.
Step 3: Add the Patterned Paper
Here's where I did something a little different from the snowman card.
Instead of adhering the evergreen paper directly to the white panel, I popped the strip up using foam tape.
What a difference!
That little bit of dimension gives the card an entirely different appearance.
The patterned paper becomes more of a focal point, and the raised strip creates a lovely shadow between the score lines.
Such a simple change, but it adds so much interest.
Step 4: Add the Sentiment
For this card, I chose a traditional:
Merry Christmas
I heat embossed the sentiment in gold to coordinate with the splattered background.
A few deep red gems finished things off.
I then backed the completed white panel with green cardstock and adhered everything to my card base.
And just like that, another Christmas card was finished!
A Little Cardstock-Saving Tip
Now, here's something worth remembering, especially if you're making a whole stack of Christmas cards.
There are several ways to create that lovely colored border around your card.
And they don't all require using an entire extra piece of cardstock.
Option One: A Full Colored Mat
You can back your completed white panel with a piece of colored cardstock before adhering it to a white card base.
This is the method I used for the evergreen card.
It creates a lovely finished appearance, but it does add another layer.
Option Two: Save Some Cardstock!
If you're concerned about the weight of your card for mailing, or you'd simply like to conserve your colored cardstock, try this little trick.
Instead of using a full colored mat, cut two strips of colored cardstock measuring:
¼ × 5½ inches
Adhere one along the top edge of your card base and the other along the bottom.
Then position your white panel between them.
You'll get that lovely colored border without using an entire sheet of cardstock behind the panel.
Less cardstock, less weight, and the same pretty effect.
I'm all for that!
Option Three: Keep It Even Simpler
The lightest option is to make your card base directly from colored cardstock.
Cut your cardstock to:
5½ × 8½ inches
Score at:
4¼ inches
Fold, and you've got a standard A2 card base.
Simply adhere your decorated white panel directly to the front.
No additional mat required.
This is especially handy when you're making cards that will be mailed.
Because as much as we love adding layers and embellishments, the postal service doesn't necessarily share our enthusiasm.
Don't Forget the Inside!
I always like to add a little something to the inside of my handmade cards.
It doesn't have to be elaborate.
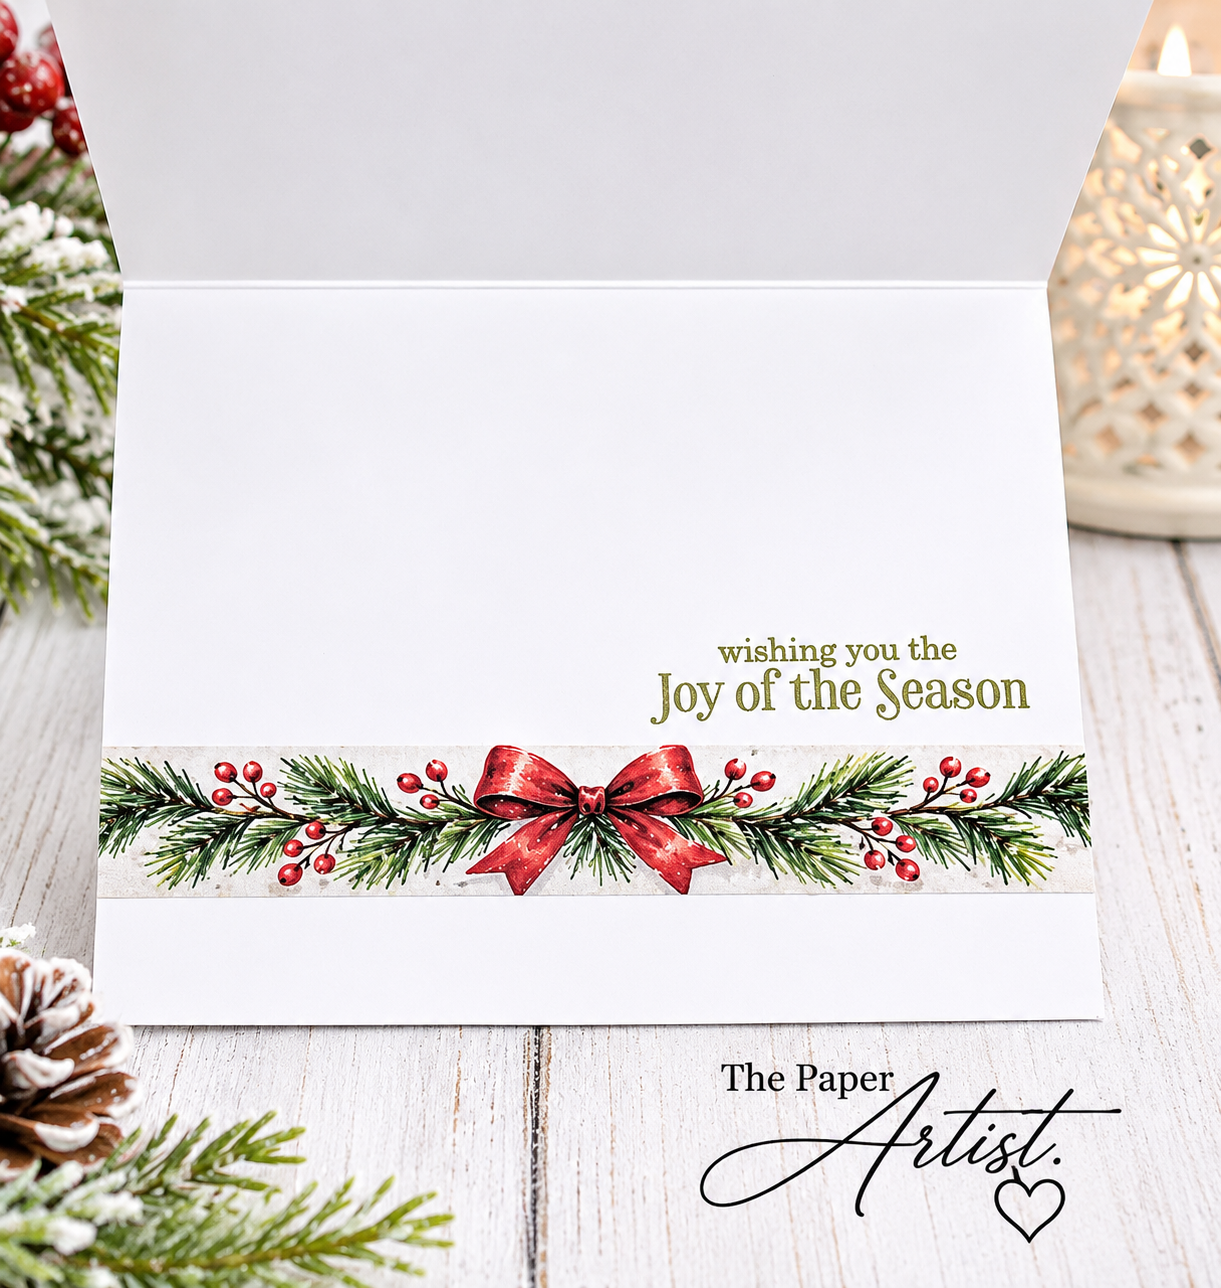
For the evergreen card, I used another coordinating strip from my Christmas paper collection.
This one features evergreen branches, red berries, and a beautiful red bow.
I adhered the strip near the bottom of the card and stamped the sentiment:
Wishing You the Joy of the Season
Simple, pretty, and it ties the inside of the card to the front.
You could do something similar with the snowman card, perhaps using another coordinating paper strip.
Or leave the inside blank for your own handwritten Christmas message.
There's something special about opening a handmade card and finding a personal note inside.
One Design, So Many Possibilities!
And this is exactly why I love 5 Minute Monday.
We started with one simple card design.
A strip of patterned paper, a few score lines, a sentiment, and some embellishments.
But look how easily we changed things!
For the snowman card, I used Adobe Express to prepare the design and sentiment before printing.
For the evergreen card, I used a traditional cardstock panel and added dimension with foam tape.
Both cards have the same basic layout, but they have their own personalities.
You could change the patterned paper, try a different sentiment, add some embossing, or switch up the colors.
You could even skip the foam tape altogether if you're making cards to mail.
One simple design. So many possibilities.
And that's the whole idea behind this series.
A Little Tip for Making Several Cards
If you're planning to make a stack of Christmas cards, try working assembly-line style.
Prepare all your card bases first.
Cut your white panels.
Trim your patterned paper strips.
Then add your scoring, sentiments, and embellishments.
Once everything is prepared, the actual assembly goes surprisingly quickly.
And before you know it, you'll have a lovely little stack of handmade Christmas cards ready to send.
Of course, whether you can resist adding just one more gem is entirely another matter.
I make no promises.
5 Minute Monday Is Back!
I'm so happy to be bringing this little series back to The Paper Artist.
Sometimes it's fun to spend an entire afternoon creating one elaborate card.
And sometimes it's just as satisfying to make something beautiful in a few minutes.
That's what 5 Minute Monday has always been about.
Quick ideas, simple techniques, and little tips that you can take back to your own craft table.
And because I've been having so much fun creating my own patterned papers, you might just find a few more printable surprises sprinkled throughout these Monday projects.
Don't forget to download your free 6×6 Christmas paper strips!
I'd love to see what you create with them.
Until next Monday, keep those creative ideas coming, enjoy a little Christmas crafting, and remember...
Sometimes the simplest cards are the ones that make us smile the most.
Coffee in hand & something always on the craft table,
Julie — The Paper Artist
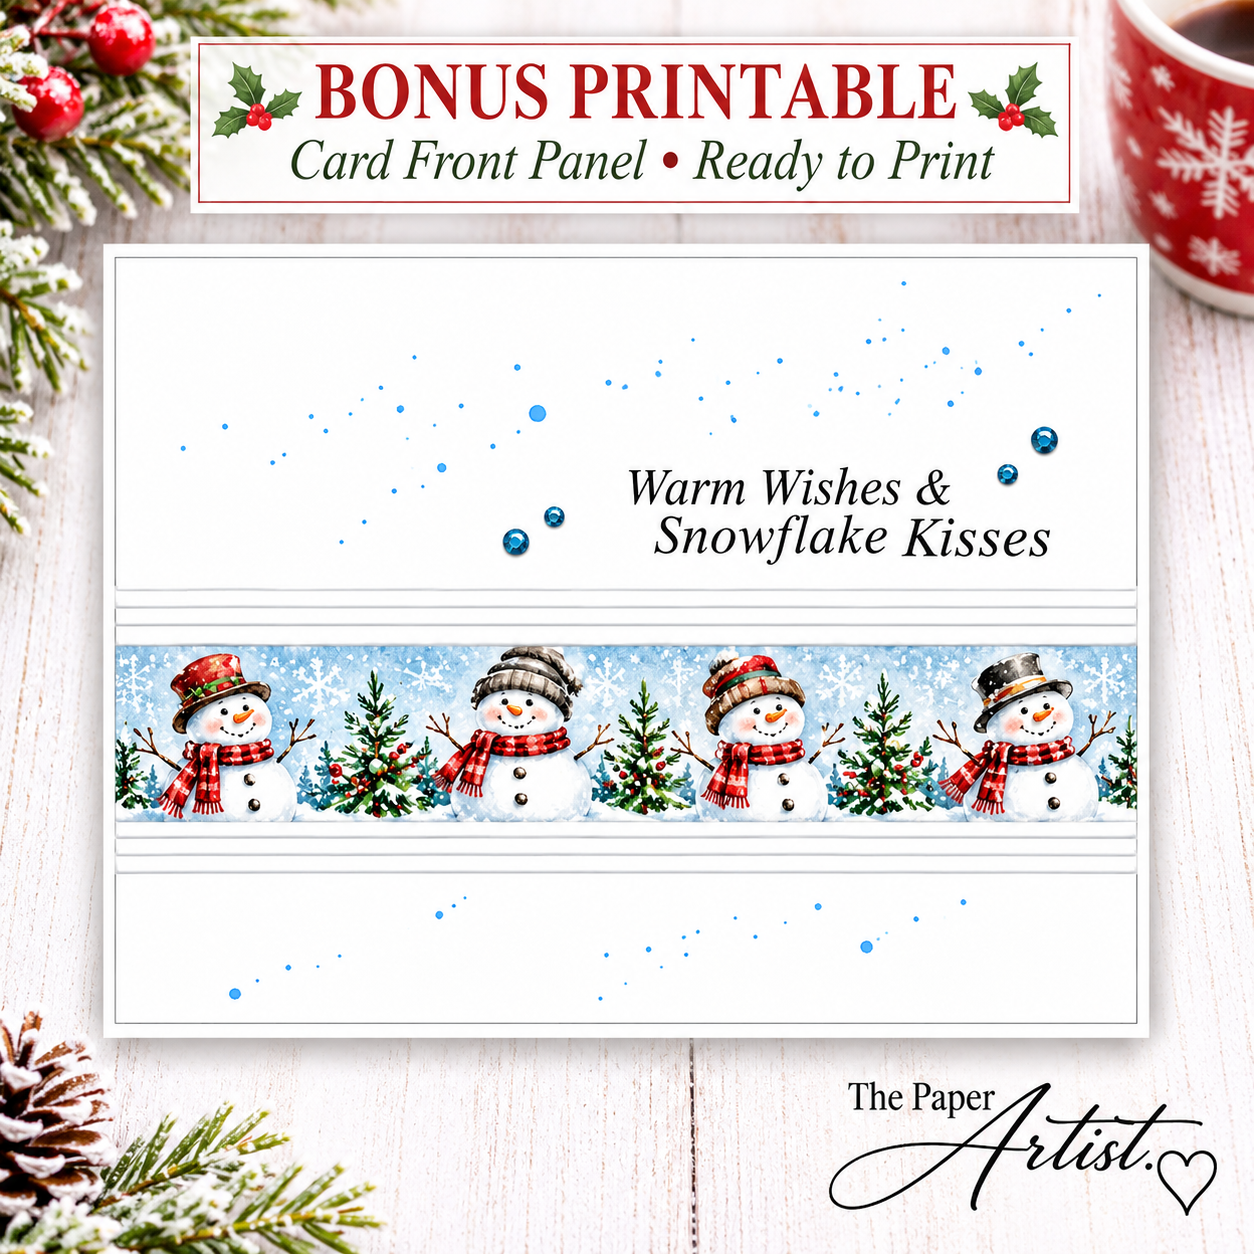
Bonus Printable -
Warm Wishes & Snowflakes Kisses Printable Panel - Print & Create Your Card ( Sentiment Included)
